
Have you ever noticed the warning labels on the bottom of some candles? Maybe you’ve even visited the manufacturer’s website, only to read something like “avoid breathing in fumes” or “only use in a well-ventilated area”. There are many toxins that fill most store-bought candles, and they can harm our family’s health over time. Thankfully, we don’t have to compromise our health in order to enjoy candles in our homes! After hours of research, I settled on my own recipe for homemade beeswax candles. Learn how to make beeswax candles, and also how to naturally scent them different ways, below!
Why Beeswax?
The most popular store-bought candle wax is paraffin wax, which is derived from petroleum oil. When burned, it releases toxic fumes and other cancer-causing substances into the air. This makes paraffin wax not a safe option for homemade candles.
Before doing my own research, I thought the natural alternative to paraffin wax was soy wax. Little did I know that this option isn’t fully all-natural either. Soy wax is not naturally occurring. It’s originally derived from soybean oil, but it is then chemically processed and hydrogenated, turning it into a different substance all together. So, while the marketing on the candle may say “made with 100% soy wax”, that does not mean it is “made of 100% soy”. They’re two different substances.
In contrast, beeswax is organic, non-toxic, and naturally occurring. It burns cleanly, and even works to pull toxins out of and purify the air. It melts evenly, and has a light pleasant honey scent even without adding fragrances. Beeswax really is the best candle wax out there! This is why it was so important to learn how to make beeswax candles.
Why Coconut Oil?
Adding coconut oil to the beeswax helps to distribute the essential oils through the wax, if you choose to add essential oils for added fragrance. It also extends the burn time of your candles, making them last longer than if you had just used beeswax alone! Lastly, it helps to prevent tunneling (where the wax on the edges of the candle never melts).
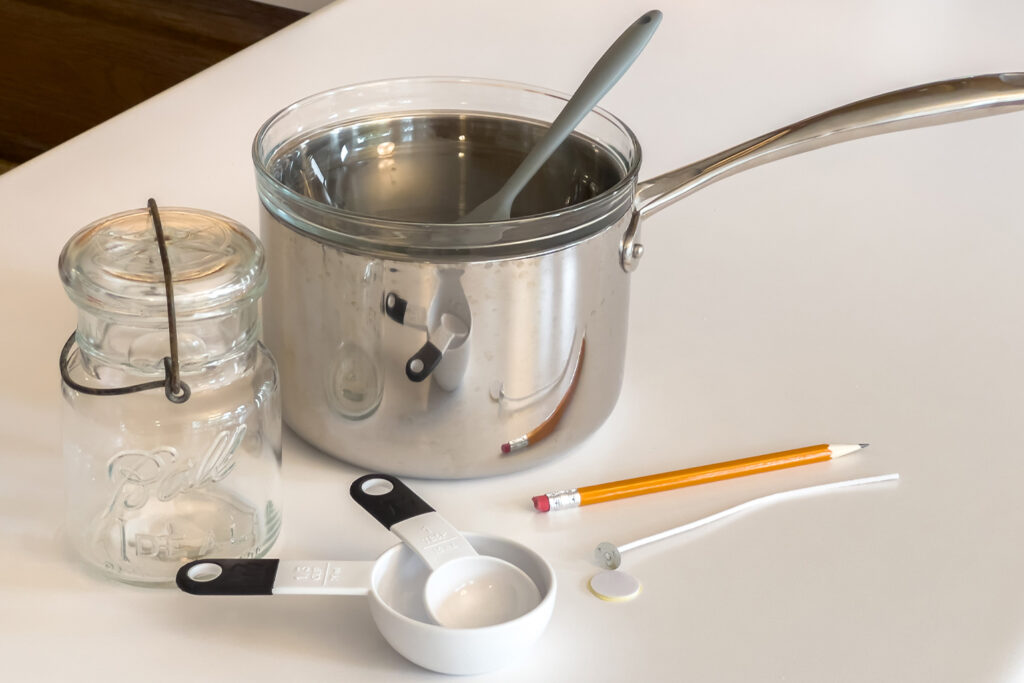
Supplies Needed
- Candle jar: I recommend using mason jars, such as this ball mason jar. I used a vintage jar for mine. Just make sure that the glass is heat and shock proof (designed for canning).
- Candle wick stickers: Adding candle wick stickers to the bottom of the wicks to hold them in place is optional, but I find that these are very inexpensive for how much fuss they save!
- Candle wicks: I use these 100% cotton wicks that contain no harmful substances.
- A pot and a bowl to create a double boiler: I use a pot from my stainless steel cookware set, and a fitting bowl from my glass bowl set.
- A spatula: I like using a silicone spatula for this for easy cleanup, but you can use whatever you have.
- Measuring cups and spoons: I like using these measuring cups and these measuring spoons.
- Something to hold the wick in place while the candle dries: This could be a pencil, or a clothespin, or anything you have! You could also purchase candle wick holders specifically designed for this if you’d like.
Ingredients
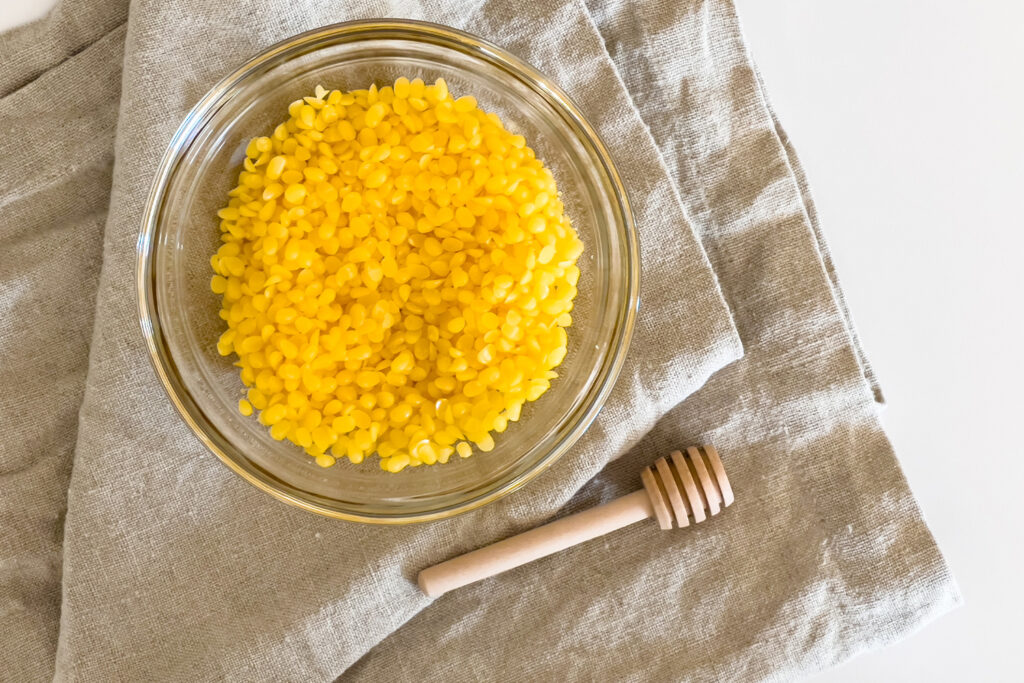
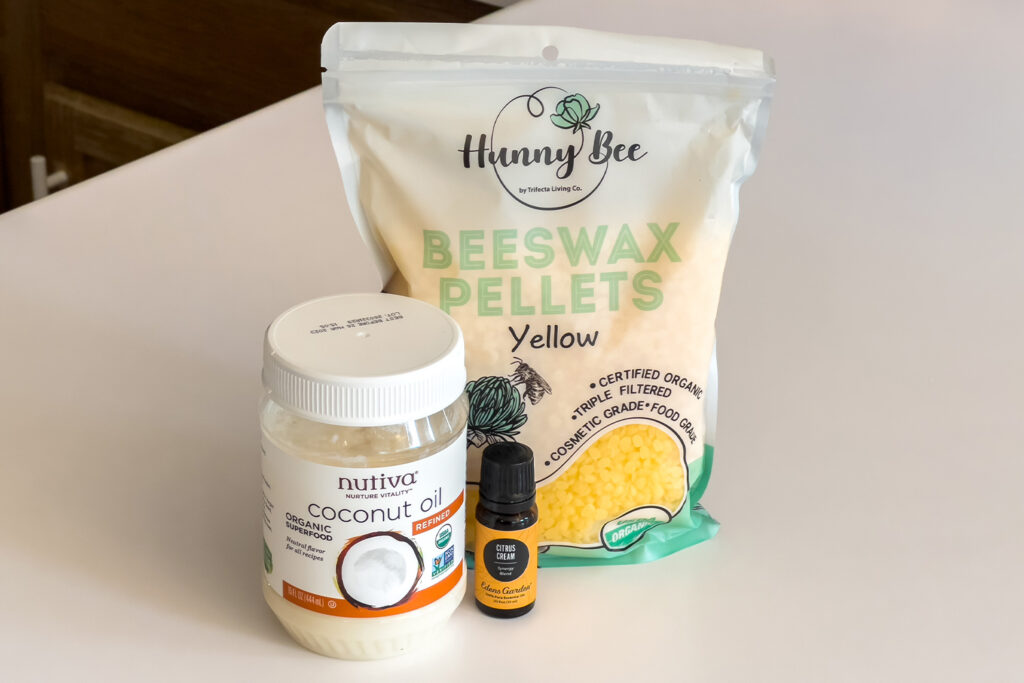
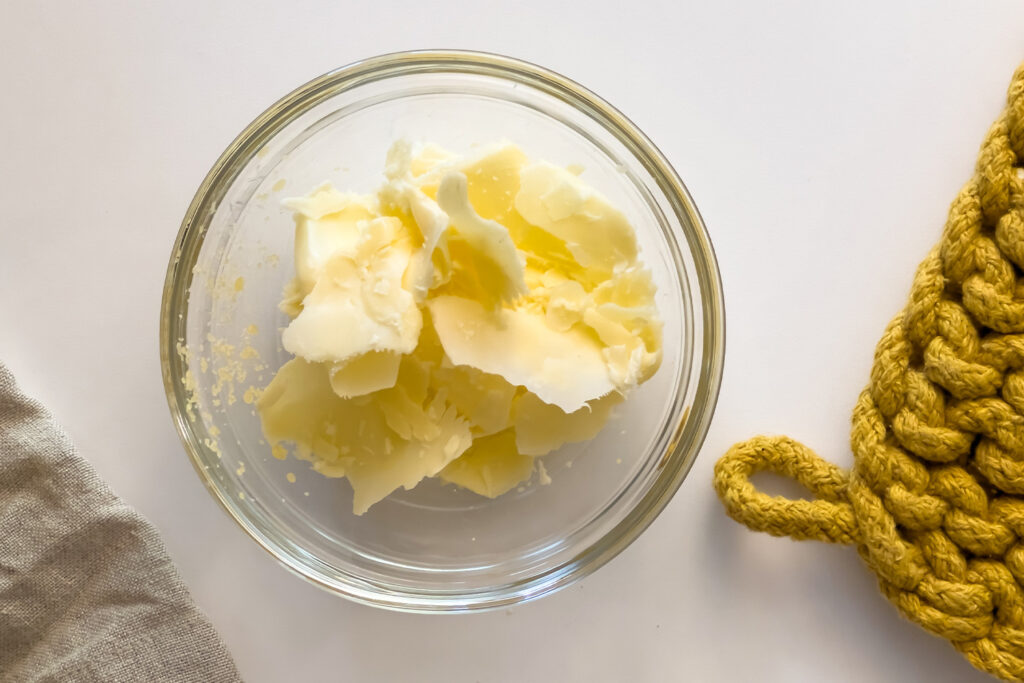
- Beeswax: I use these organic beeswax pellets for easy melting.
- Coconut oil: I use this organic coconut oil.
- (Optional) Essential oils: I add essential oils if I want any additional scent to the candles. If you prefer a subtle candle, the beeswax provides a sweet and mild honey scent, even without the addition of oils.
Directions for How to Make Beeswax Candles
First, prepare your candle jar.
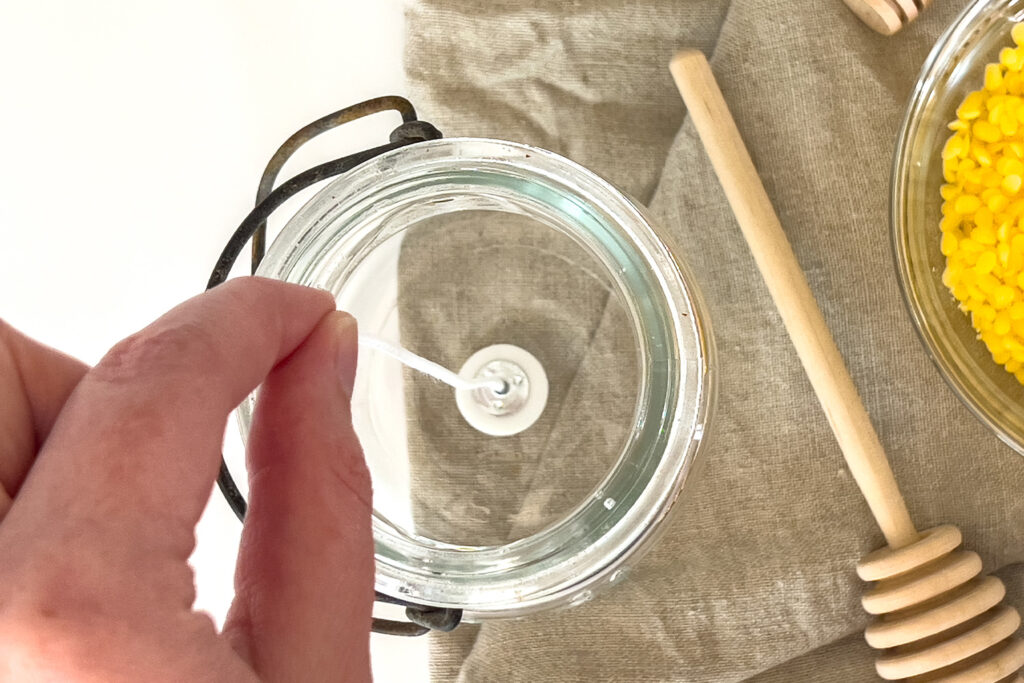
Use a wick sticker to place the cotton wick in the center of your candle jar.
Prepare the wax.
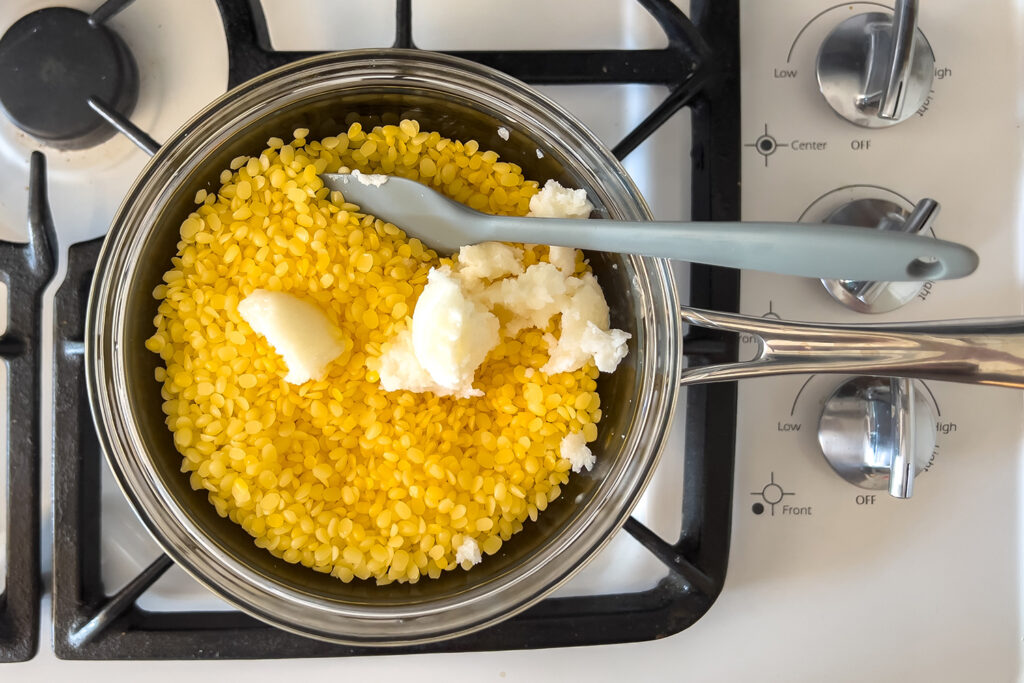
Use a pot and bowl to create a double boiler. You’ll do this by adding some water to the bottom of the pot, putting the bowl on top of the pot, and then putting it over medium heat on the stove.
Place the beeswax and coconut oil into the double boiler, and use a spatula to stir occasionally until melted, about 8-12 minutes.
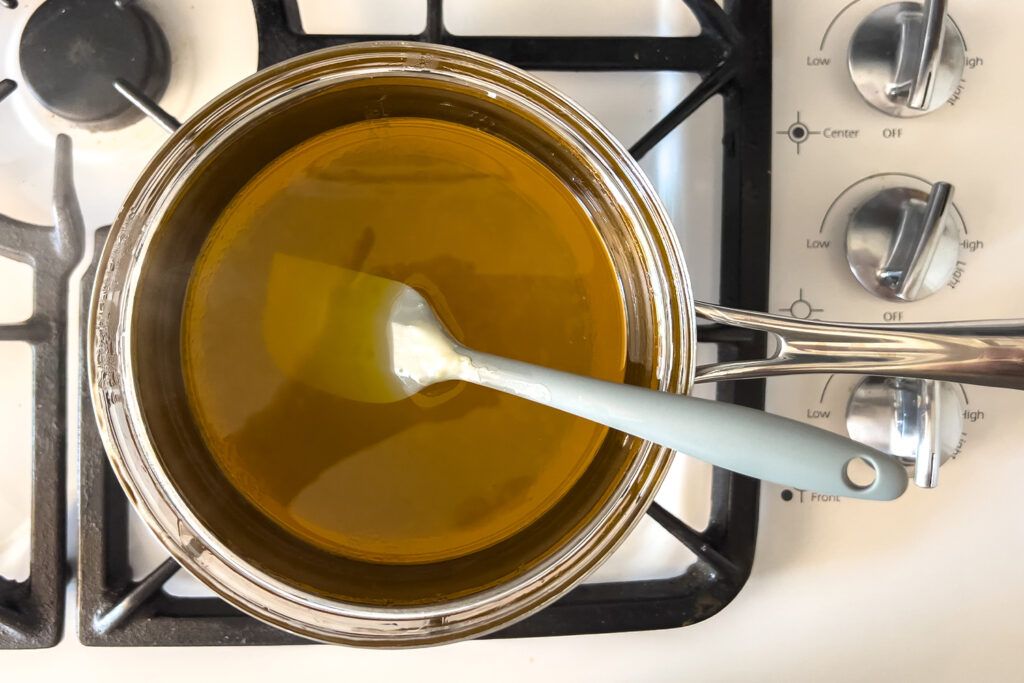
Remove from heat. Continue to stir, and allow it to cool slightly, a few minutes, before adding optional essential oils. Some essential oils would evaporate if poured into hot wax, meaning they wouldn’t add fragrance to your candle at all.
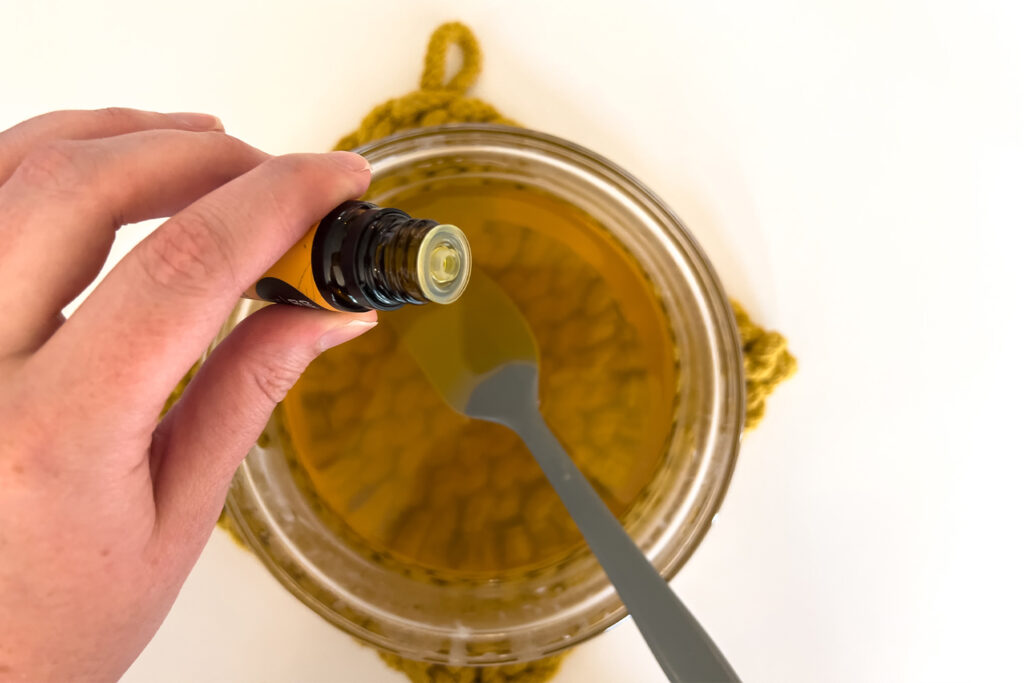
Once you’ve added your oils, thoroughly stir to combine. If you choose not to use essential oils, the candle will have a very light honey scent from the beeswax.
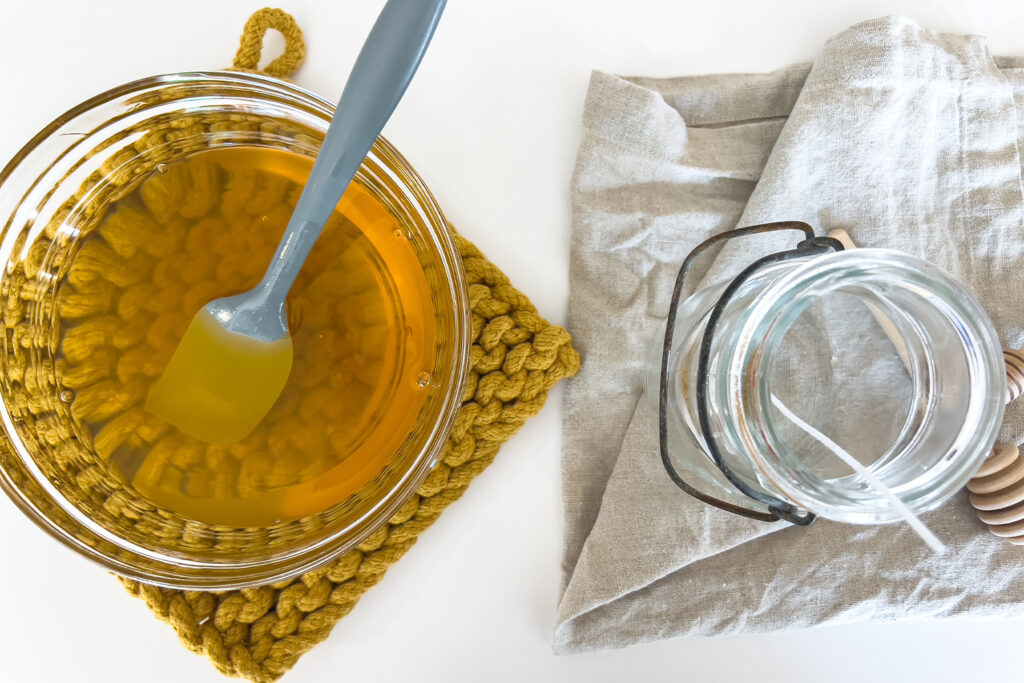
Pour the candle.
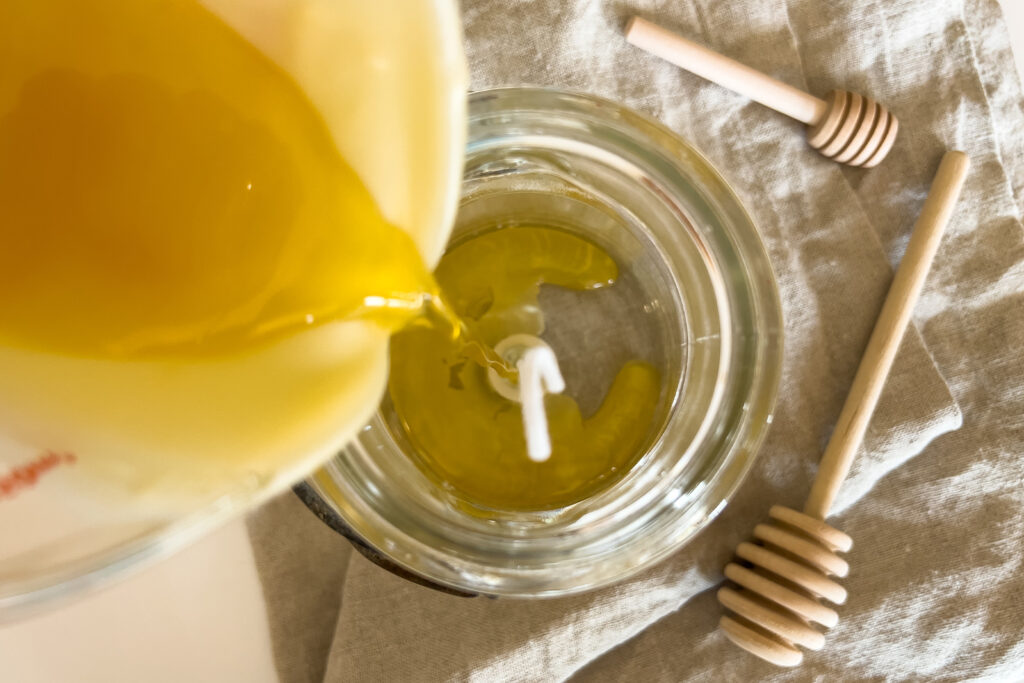
Immediately pour the wax into your prepared candle jar. You’ll want to do this as soon as possible, as the wax begins to solidify rapidly.
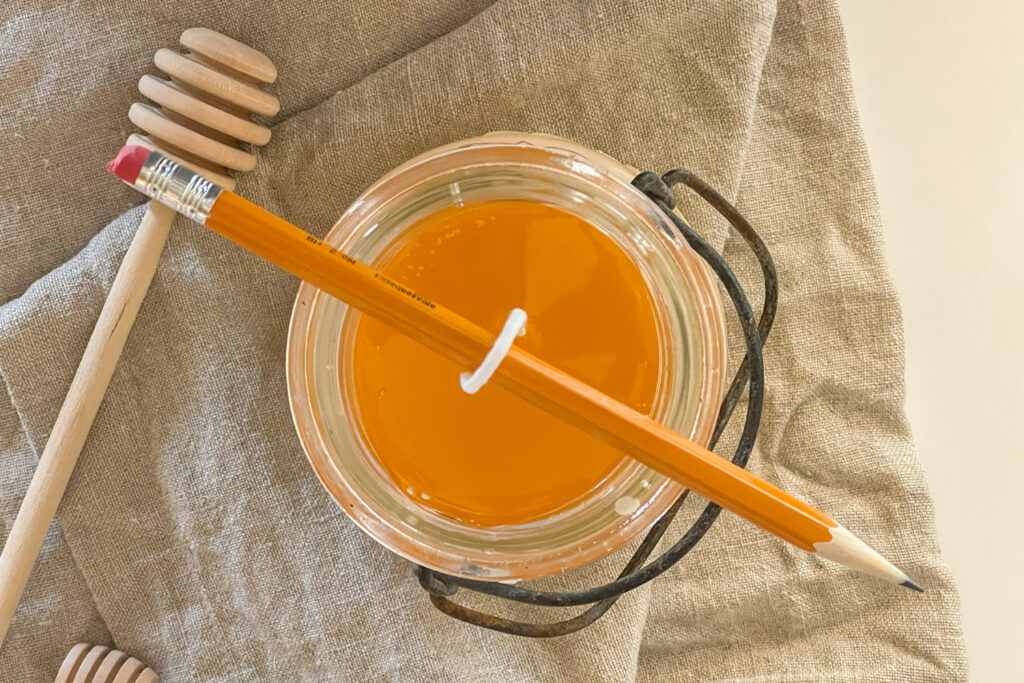
Secure your candle wick in the center of the jar (using a clothespin, a pencil, or a candle wick holder). This is necessary because wherever the wick is when the candle dries, that is where it stays.
Allow to rest, untouched, at room temperature for 8 hours or overnight.
Note: If candles cool too quickly, the wax may crack or split. This is only a cosmetic issue though, and will not impact the performance of your candle. For the best chances at preventing this, allow the candle to solidify in a warm area of the house, so that it doesn’t cool too quickly.
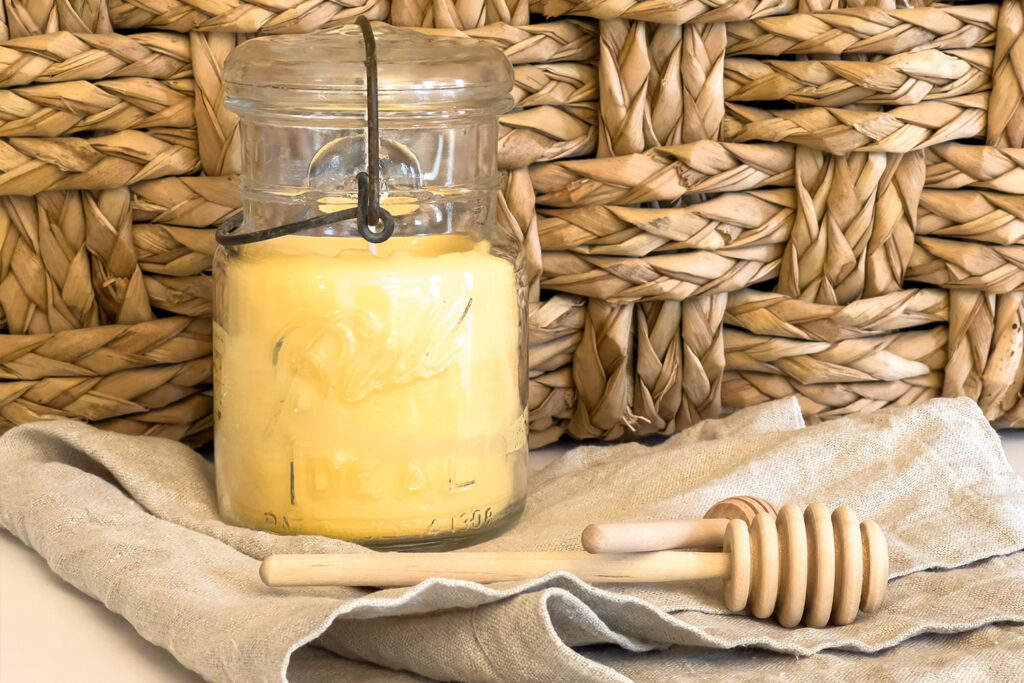
Once the wax is dry, trim the wick down to about 1/4” above the wax surface. The candle is now ready for use!
To get the best fragrance results, you can allow the candle to cure for about 2 days before you use it. This gives the essential oils the chance to thoroughly penetrate all of the wax, creating a more consistent fragrance when it’s burned.
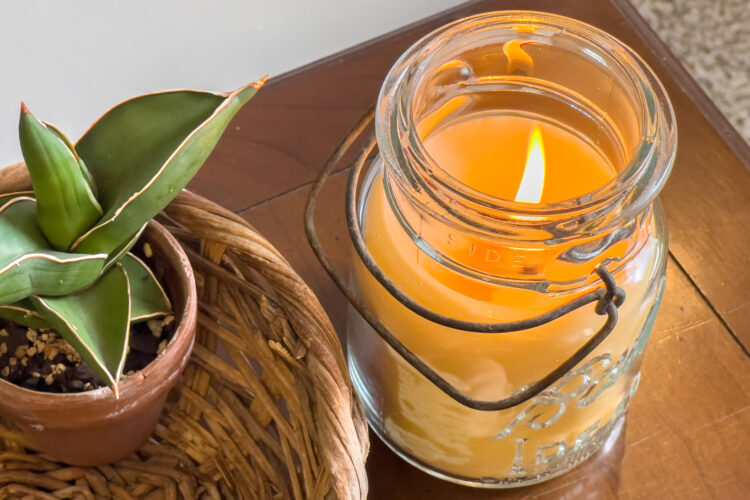
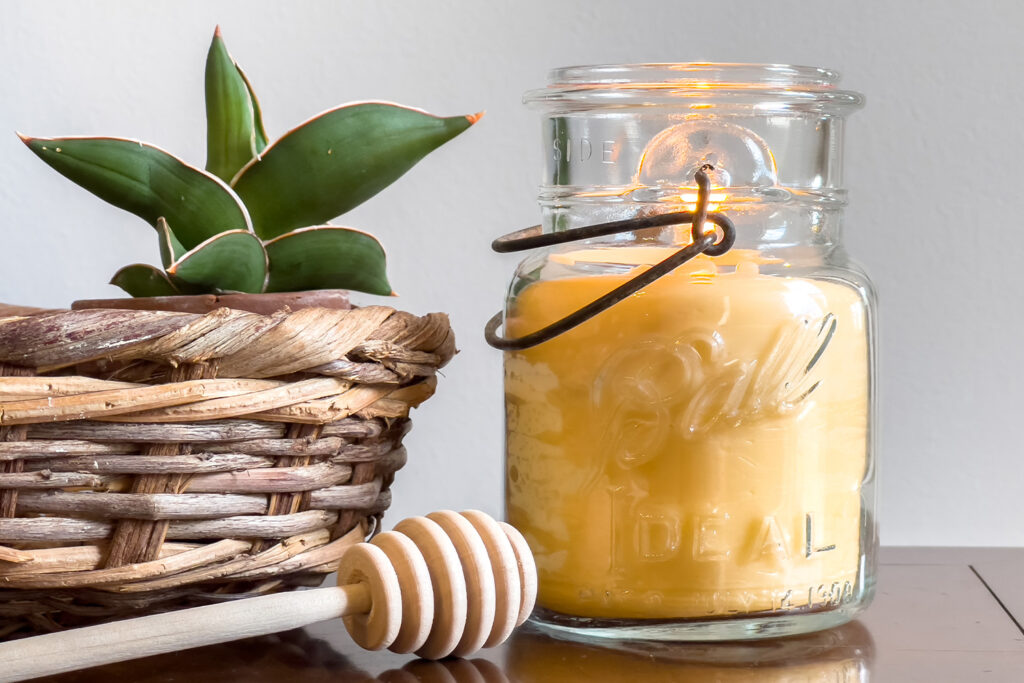
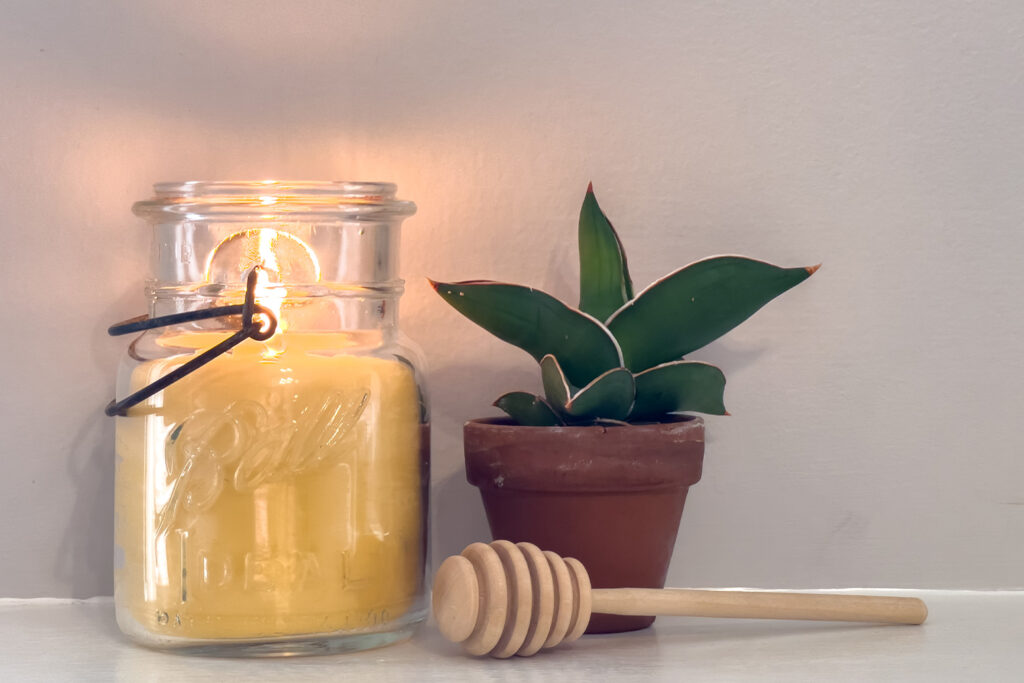
Enjoy your beautiful candle!
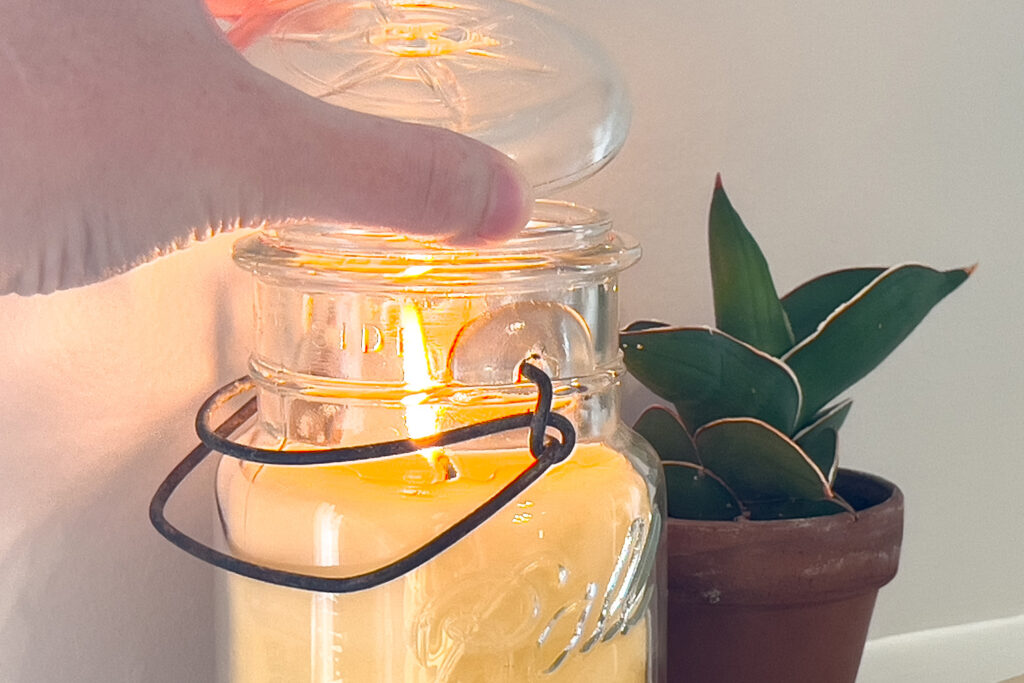
The Right Way to Blow a Candle Out
When you are done burning the candle for the day, do not blow the candle out! This creates smoke, which dissipates all of the pleasant fragrance that you have built up from the candle.
Instead, put a heatproof lid on top of the candle to put it out. This contains the smoke, preserving the pleasant fragrance! I use the vintage glass lid that came with my jar.
Uses for Leftover Candle Wax
When learning how to make beeswax candles, you may have leftover candle wax. You have a few options for how to use it!
- Make wax melts: If you have any silicone molds for candy making or candle making, you can pour excess wax into them for use in a candle warmer! This bee shaped mold would make adorable beeswax candle melts!
- Make tea light candles: You can use the same silicone mold to make tea light candles. Simply place a candle wick inside each mold before pouring the wax in. Note that to burn these candles, you will need to place them in a heat safe container (such as a mason jar).
- Save it for the next candle: That’s right! You can save the leftover wax to use in a future beeswax candle. You can also salvage any leftover wax on the edges of the jar after burning your candle. Simply heat the jar on a candle warmer or inside a slowly simmering pot of water until all of the wax melts down. Then, use it to make your next candle.
How to Reuse a Candle Jar
Once you’ve burned your candle, you may want to reuse your jar. Here’s a step-by-step of how to do this!
- Put the jar on a candle warmer until all leftover wax is melted.
- Carefully pour any leftover wax into molds to be used later (as wax melts or in future candles). Caution: The jar and wax will be hot! I use grill gloves for this process.
- Remove the wick and sticker from the bottom of the jar, and wipe it out with a dry paper towel. It’s now ready to reuse!
Essential Oil Blends to Scent the Candles
Wildflower Fields – Spring Scent
- Lavender essential oil
- Cedarwood essential oil
- Lemongrass essential oil
- Orange essential oil
Sunny Day – Summer Scent
- Lime essential oil
- Eucalyptus essential oil
- Basil essential oil
- Grapefruit essential oil
Spice Latte – Fall Scent
- Coffee essential oil
- Cinnamon essential oil
- Allspice essential oil
- Vanilla essential oil
Cozy Cabin – Winter Scent
- Douglas Fir essential oil
- Nutmeg essential oil
- Vanilla essential oil
- Peppermint essential oil
How Much Wax Do I Make
Here are the amounts of each ingredient that you need to make these size candles. You can scale this recipe up or down to make whatever size or however many candles you want to make!
To make 8oz. of wax:
- 1 2/3 cup beeswax pellets
- 2 1/2 tbsp. coconut oil
- About 45 drops essential oils
To make 12oz. of wax:
- 2 1/2 cups beeswax pellets
- 3 1/2 tbsp. coconut oil
- About 65 drops essential oils
To make 16oz. of wax:
- 3 1/3 cups beeswax pellets
- 5 tbsp. coconut oil
- About 90 drops essential oils
To make 24oz. of wax:
- 5 cups beeswax pellets
- 7 tbsp. coconut oil
- About 130 drops essential oils

How to Make Beeswax Candles, All-Natural and Non-Toxic!
How to make an organic, all natural, non toxic, naturally scented candle! Learning how to make beeswax candles is valuable for your home!
Keeps your screen on while viewing recipe
Ingredients
- Ingredients Needed
Optional: Essential oils
- How Much is Needed
To Make 8oz. of Wax:
1 2/3 cup beeswax pellets
2 1/2 tbsp. coconut oil
Optional: about 45 drops essential oilsTo Make 12oz. of Wax:
2 1/2 cups beeswax pellets
3 1/2 tbsp. coconut oil
Optional: about 65 drops essential oilsTo Make 16oz. of Wax:
3 1/3 cups beeswax pellets
5 tbsp. coconut oil
Optional: about 90 drops essential oilsTo Make 24oz. of Wax:
5 cups beeswax pellets
7 tbsp. coconut oil
Optional: about 130 drops essential oils
Directions
- First, prepare your candle jar. Use a candle wick sticker to place the wick in the center of your jar.
- Use a pot and bowl to create a double boiler. You’ll do this by adding some water to the bottom of the pot, putting the bowl on top of the pot, and then putting it over medium heat on the stove.
- Place the beeswax and coconut oil into the double boiler, and use a spatula to stir occasionally until melted, about 8-12 minutes.
- Remove from heat. Continue to stir, and allow it to cool slightly, a few minutes, before adding optional essential oils. Thoroughly stir to combine. If you choose not to use essential oils, the candle will have a very light honey scent from the beeswax.
- Immediately pour the wax into your prepared candle jar. You’ll want to do this as soon as possible, as the wax begins to solidify rapidly.
- Secure your candle wick in the center of the jar (using a clothespin, a pencil, or a candle wick holder). This is necessary because wherever the wick is when the candle dries, that is where it stays.
- Allow to rest, untouched, at room temperature for 8 hours or overnight.
- Once the wax is dry, trim the wick down to about 1/4” above the wax surface. The candle is now ready for use!
Recipe Notes
- Note: If candles cool too quickly, the wax may crack or split. This is only a cosmetic issue though, and will not impact the performance of your candle. For the best chances at preventing this, allow the candle to solidify in a warm area of the house, so that it doesn’t cool too quickly.
- To get the best fragrance results, you can allow the candle to cure for about 2 days before you use it. This gives the essential oils the chance to thoroughly penetrate all of the wax, creating a more consistent fragrance when it’s burned.
Like this recipe?
Follow @everypurposehome on Pinterest for more!
