
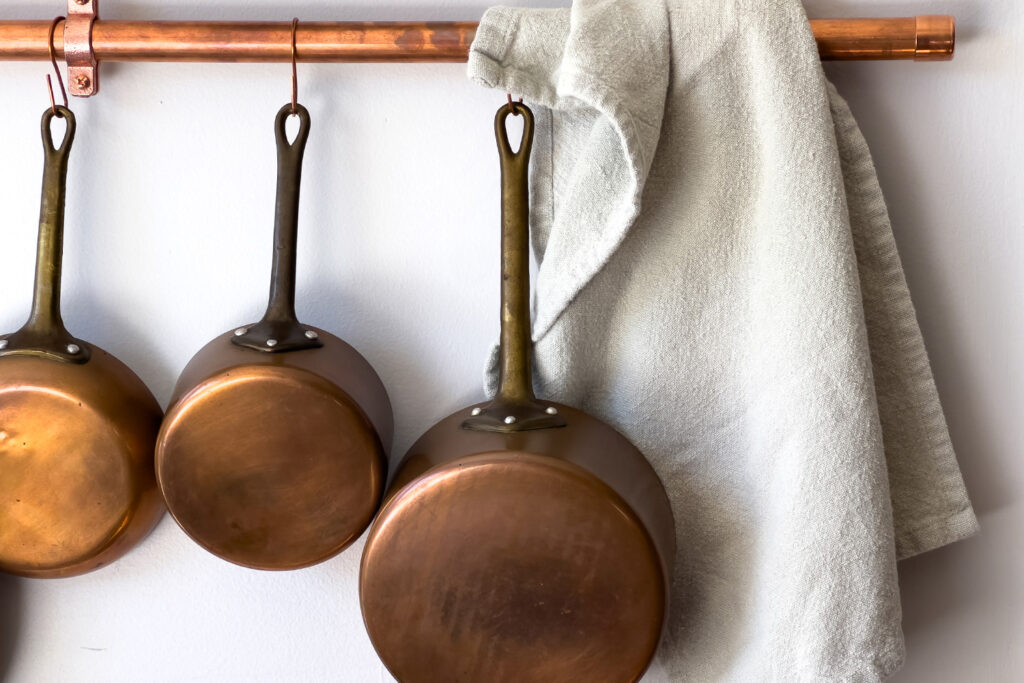
Finding the perfect copper pot set was hard, but do you know what I never anticipated being hard to find? A beautiful pot rail to hang them on. I was shocked to find that all of the options were either the wrong material, the wrong size, or way too expensive. That’s when I decided to figure out a way to make my own copper pot rack for a fraction of the price! Keep reading to see exactly how you can make one for yourself too.
Decorating with Copper
I’ve always been attracted to the charm of copper, especially considering how beautifully it ages. It took years for me to come across the right vintage copper pot set for our home, but I finally found it and snatched it up immediately! I’ve been obsessed with finding more vintage copper pieces ever since.
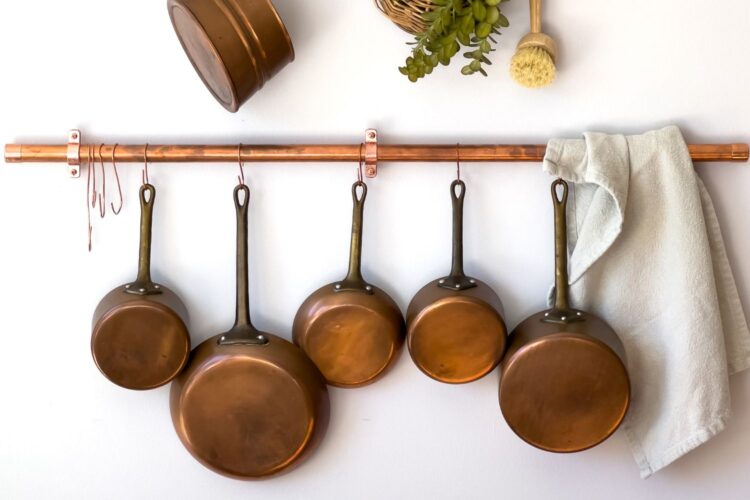
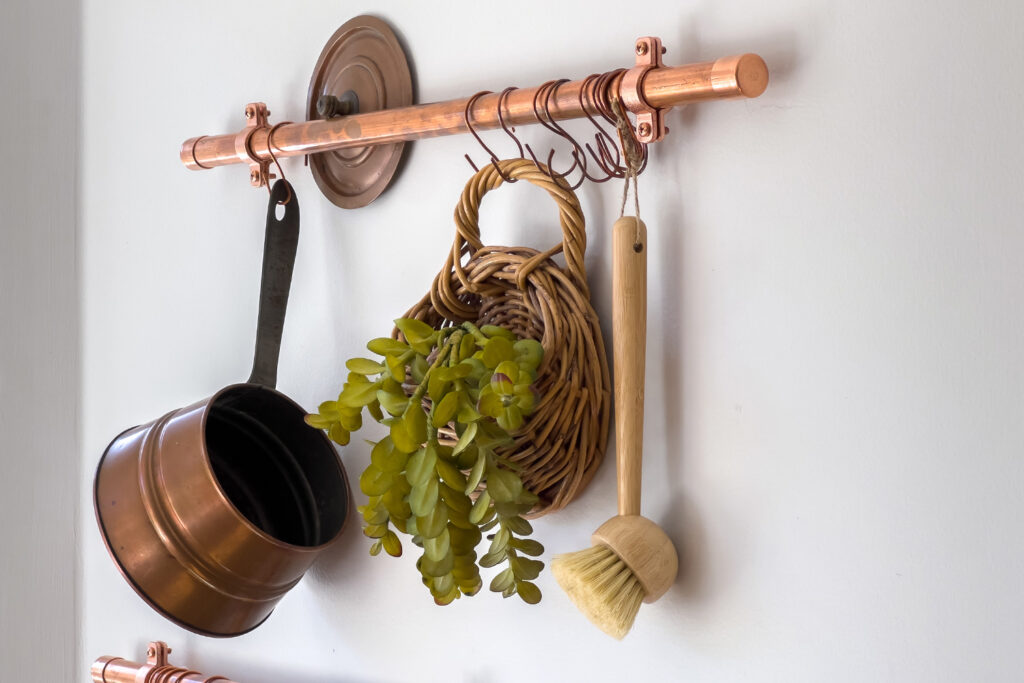
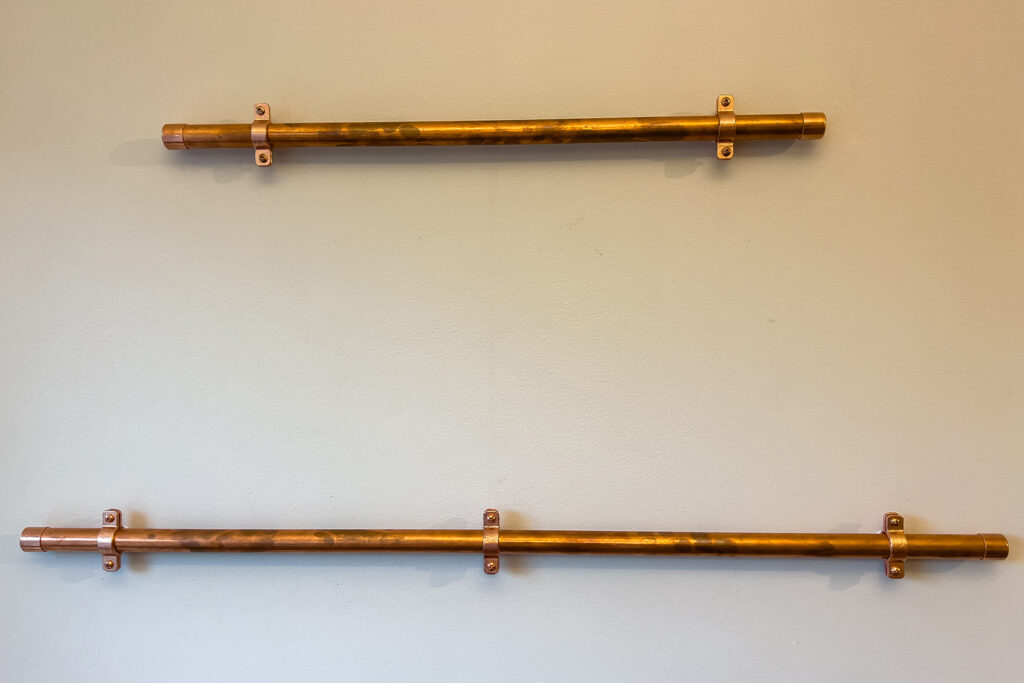
I’ve now collected another copper pot, lids, candlestick holders, a watering can, and more. Still though, this copper pot rack wall takes the cake for being my favorite decor element in our home. I feel that it sets the tone for the entire kitchen now.
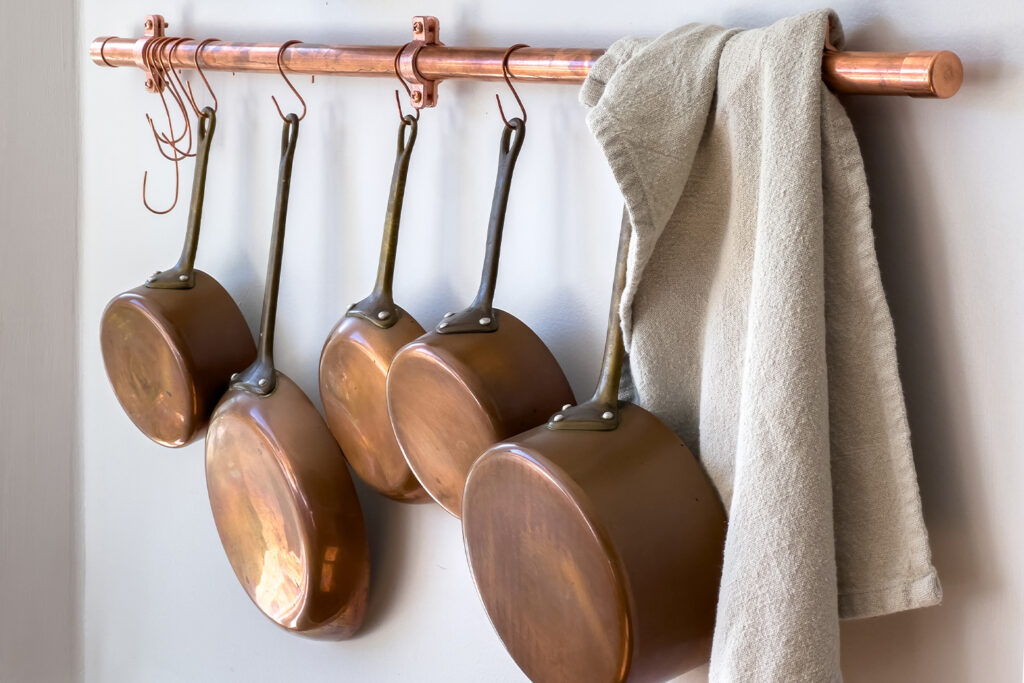
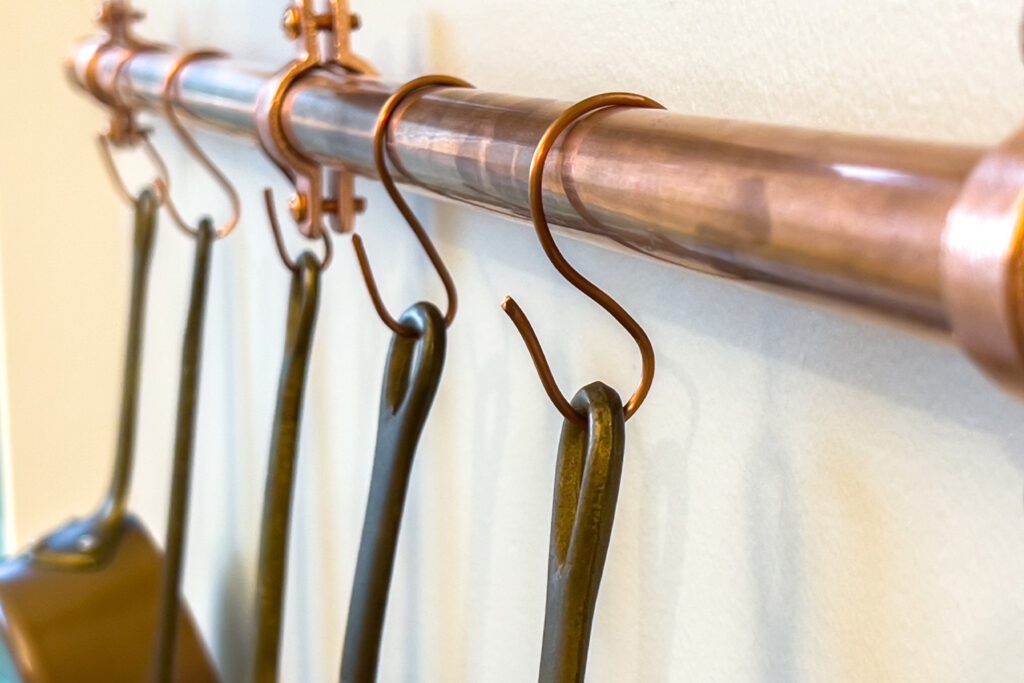
Not only am I over the moon for the cookware pieces themselves, but the copper pot rack that I made is stunning in and of itself. I love that it’s all real copper, even down to the hooks! I’m so glad that I made my own, it’s so much more beautiful than anything I found online.
Making a DIY Copper Pot Rack
Tools Needed or Recommended
- A way to cut the copper pipe: A copper pipe cutter or a mini hack saw is only needed if you’re going to cut the pipe to make multiple rails like I did. If you leave it at length, you won’t even need this tool.
- A drill and drill bits: You’ll need an electric drill for creating holes for anchors and installing screws into the drywall.
- A level: You’ll benefit from using a level to insure that the pipes are being hung straight.
- A measuring tape: You’ll need a measuring tape for making sure that you hang the brackets in the right areas.
- A pencil: You’ll want to have a pencil on hand for marking holes or areas on your wall.

Supplies Needed
Some of the supplies are linked from Lowe’s, while others are from Home Depot. This is because I was trying to make these copper pot racks as affordable as possible, so I shopped for the cheapest options between both stores. However, you can find most of these items at either store, if you do not have access to both.
- Copper pipe: You will want to find the length and thickness of copper pipe that works for you. I used a 5-foot and 3/4 inch thick copper pipe. I cut mine into a 3-foot piece and a 2-foot piece, which is how I ended up with two copper pot racks on my wall.
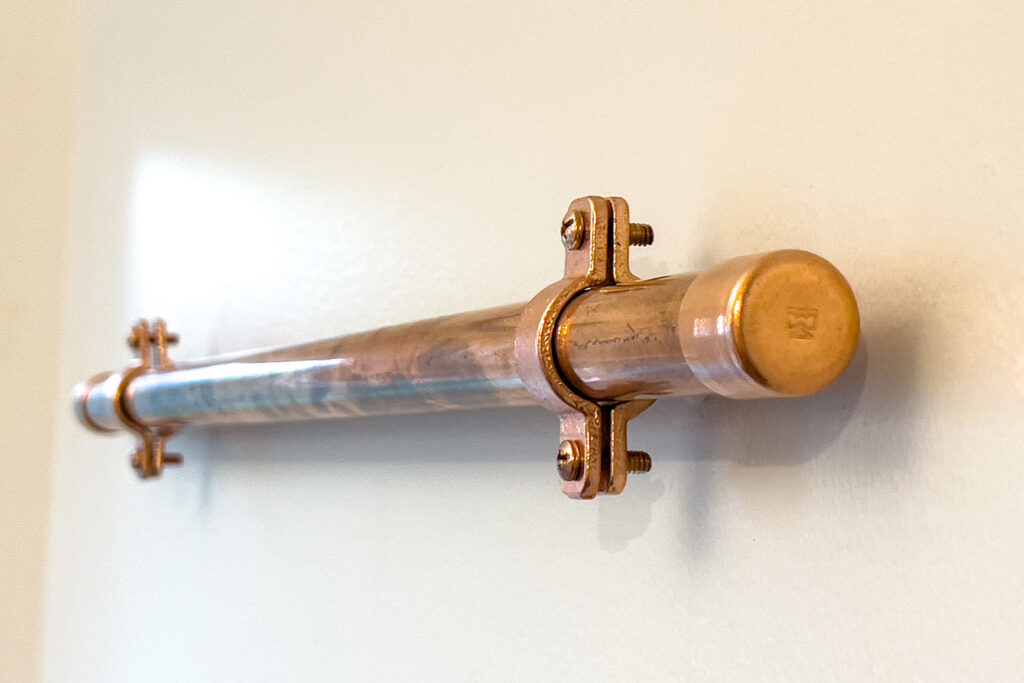
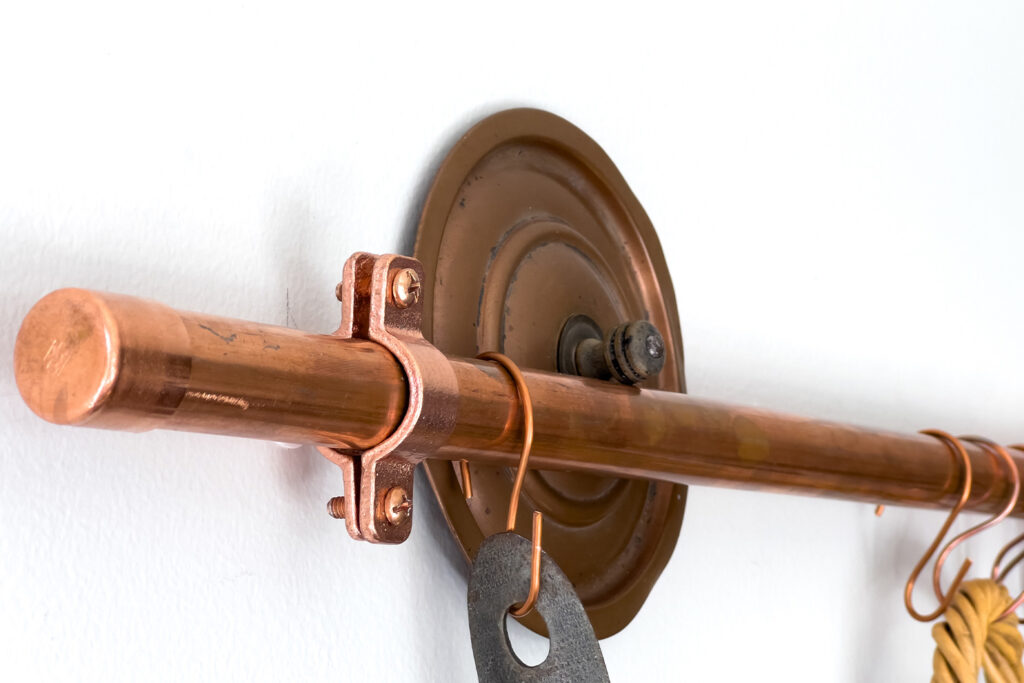
- Copper hanging brackets: There are a few different designs of copper hanging brackets, but the one linked is my favorite by far. You’ll need 1 bracket per about 1-2 feet of pipe, with a minimum of two per pipe.
- Copper pipe end caps: Copper pipe end caps finish off and cover the ends of each rail. You’ll need exactly two caps per rail. I used four caps for my project because I made a total of two rails.
- Drywall anchors: We used toggle anchors for this project because I wanted to be able to hang absolutely anything on these copper pot racks without being limited by weight. You’ll need one anchor per bracket.
- Flat head machine screws: Even though the toggle anchor set above comes with screws, they stick out too far. I found these machine screws that settle inside the bracket instead of sticking out. They would work with the drywall toggle anchors. If you use the screws that come with the anchors, the pipe doesn’t sit into the bracket nicely because the screw sticks out. It’s more of a cosmetic issue than a structural one. If you’re using these screws, you’ll need one screw per brackets.
Directions
(Optional) Cut your copper pipe to length. If desired, darken all of the copper pieces and fittings so that it blends in more with vintage copper. See tips at the end for a non-toxic way to de-shine and slightly darken copper.
Attach the end caps to the ends of your pipe(s).
Use your measuring tape and pencil to mark where the holes need to go for your brackets, making sure that they’re level and even.
Use your drill to make holes in the drywall in the areas marked for the toggle anchors to fit into.
Insert the toggle anchors into the holes.
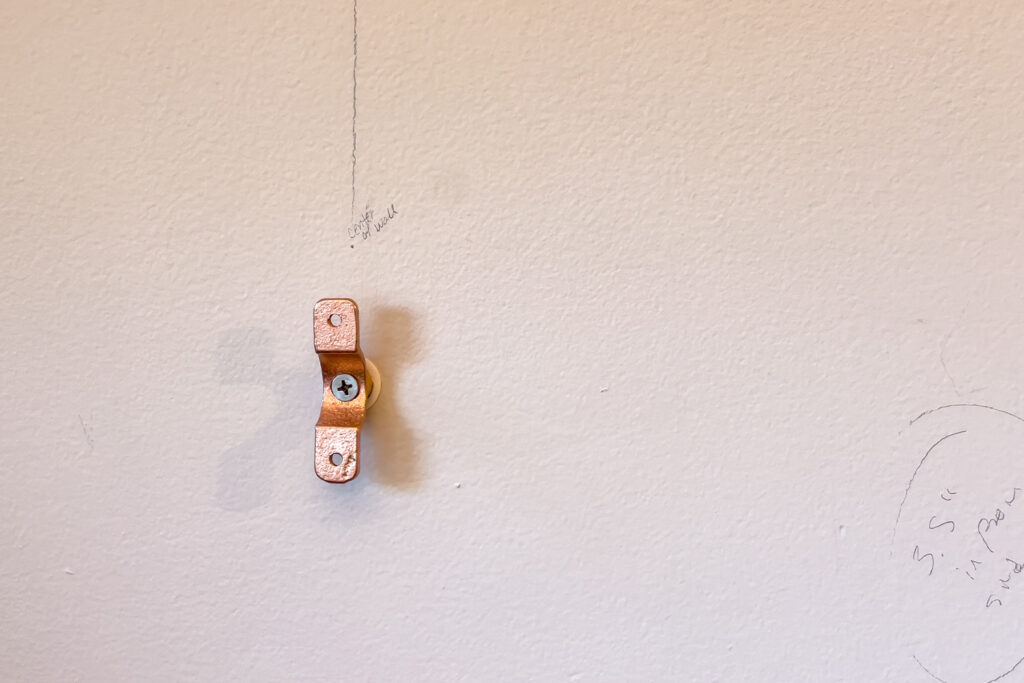
Attach the copper hanging brackets to the wall by drilling the machine screws through the bracket and into the toggle anchors.
Finally, attach the pipes to the brackets with the screws included with the brackets.
Decorate to your heart’s content!
Making DIY Copper Hooks
Tools Needed or Recommended
- Wire cutters: You’ll need a standard pair of wire cutters for trimming each hook to length.
- Something round to use as a template: You’ll need to use something to wrap the wire around to shape the hook. I used the actual copper pipe to do this, but if it’s already hung on the wall you could use anything circular that is the same diameter as your pipe. If you’re really in a pinch and don’t have anything, use a couple of fingers to wrap the wire around.
- (Optional) A hammer: I used an ordinary hammer for this job.
Supplies Needed
- Copper wire: I used a 12-gauge solid copper wire to make my hooks. The wire is sold by the foot and is extremely affordable. I used a total of about 3 feet of wire to make all of my hooks.
Directions
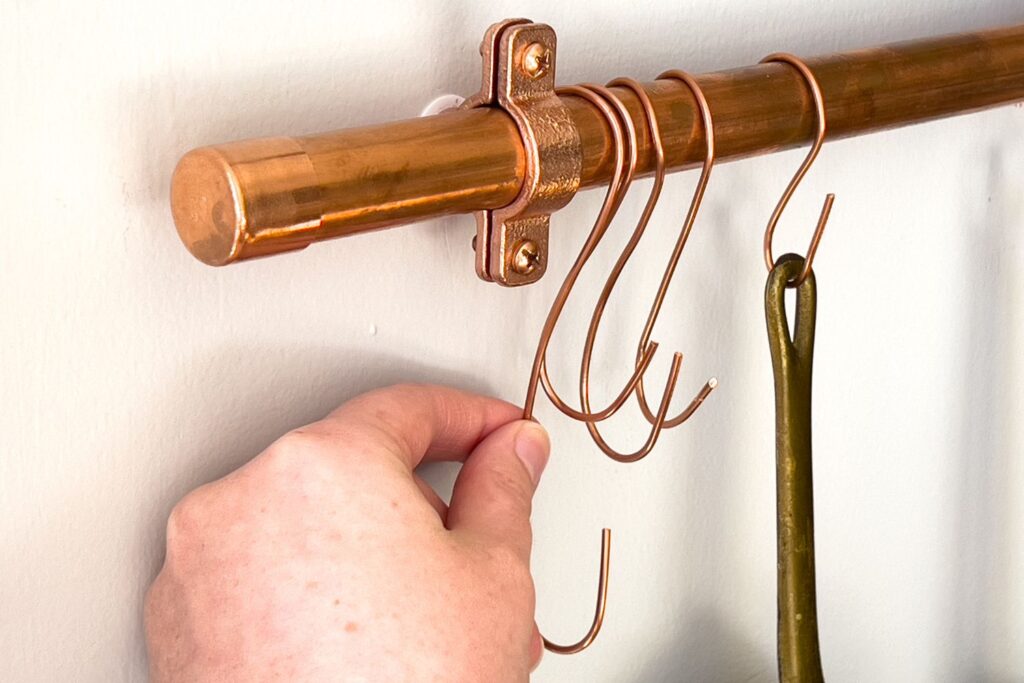
- Using your fingers, place the end of your wire against the pipe (or template), and bend the wire around the pipe to create a curve.
- Remove the wire from the pipe, and then repeat step one, but curving the bottom of the wire the opposite direction. After this step, you should have an “S” shaped end to the wire. Get creative with the amount of length you leave between the two curves! The more space you leave, the lower the hook will hang.
- Cut the remaining wire off so that you’re left with just your “S” hook.
- Optional: Place the hook on a solid surface, and hammer both ends of the hook to flatten them. This gives it a more finished look, making it appear more like an intentional hook and less like just a copper wire. You can also hammer designs onto the sides of the hook if you want to get fancy. Copper dents easily, making it good for designs if desired.
Total Cost of Supplies for My Project
The total cost for me to get both complete pot rails and all of the hooks was $43.07, as broken down below.
- The copper pipe: $15.58
- Copper hanging brackets: $9.40 total (5 brackets at $1.88 each)
- Copper pipe end caps: $7.24 (4 caps at $1.81 each)
- Drywall anchors: $6.47 (out of the pack of ten, only 5 were used)
- Flat head machine screws: $3.45 (though these are sold in packs of two, only 5 screws were needed)
- Copper wire: $0.93 (3 feet of wire, sold for $0.31 per foot)
Though these prices may fluctuate over time, I think that making your own copper pot racks will always be more affordable than buying a pre-made one, if you want it to be real copper. This project was completely worth the time and cost investment!
How to Darken Copper
I like to slightly darken and de-shine new copper pieces so that they look more vintage. This even applies to the pipe, fittings, and end caps of this copper pot rack project.
To do this, simply mix equal parts of warm water and baking soda together, and apply to the surface of the piece. Reapply as it dries, and repeat until it reaches your desired look. Once it’s darkened to your liking, wipe clean.
For the smaller items such as the copper end caps and fittings, I soaked them in the water and baking soda solution for about two hours.
This method does not darken the copper completely, but it does remove some of the shine so that the new copper pieces blend in with the old. This was the only non-toxic method I found for darkening copper.

DIY Copper Pot Rack + Hooks
Finding the perfect copper pot set was hard, but do you know what I never anticipated being hard to find? A beautiful pot rail to hang them on. I was shocked to find that all of the options were either the wrong material, the wrong size, or way too expensive. That’s when I decided to figure out a way to make my own copper pot rack for a fraction of the price!
Keeps your screen on while viewing recipe
Ingredients
Copper pipe: You will want to find the length and thickness of copper pipe that works for you. I used a 5-foot and 3/4 inch thick copper pipe. I cut mine into a 3-foot piece and a 2-foot piece, which is how I ended up with two copper pot racks on my wall.
Copper hanging brackets: There are a few different designs of copper hanging brackets, but the one linked is my favorite by far. You’ll need 1 bracket per about 1-2 feet of pipe, with a minimum of two per pipe.
Copper pipe end caps: Copper pipe end caps finish off and cover the ends of each rail. You’ll need exactly two caps per rail. I used four caps for my project because I made a total of two rails.
Drywall anchors: We used toggle anchors for this project because I wanted to be able to hang absolutely anything on these copper pot racks without being limited by weight. You’ll need one anchor per bracket.
Flat head machine screws: Even though the toggle anchor set above comes with screws, they stick out too far. I found these machine screws that settle inside the bracket instead of sticking out. They would work with the drywall toggle anchors. If you use the screws that come with the anchors, the pipe doesn’t sit into the bracket nicely because the screw sticks out. It’s more of a cosmetic issue than a structural one. If you’re using these screws, you’ll need one screw per brackets.
Copper wire for hooks: I used a 12-gauge solid copper wire to make my hooks. The wire is sold by the foot and is extremely affordable. I used a total of about 3 feet of wire to make all of my hooks.
Directions
- (Optional) Cut your copper pipe to length. If desired, darken all of the copper pieces and fittings so that it blends in more with vintage copper. See tips at the end for a non-toxic way to de-shine and slightly darken copper.
- Attach the end caps to the ends of your pipe(s).
- Use your measuring tape and pencil to mark where the holes need to go for your brackets, making sure that they’re level and even.
- Use your drill to make holes in the drywall in the areas marked for the toggle anchors to fit into. Insert the toggle anchors into the holes.
- Attach the copper hanging brackets to the wall by drilling the machine screws through the bracket and into the toggle anchors.
- Finally, attach the pipes to the brackets with the screws included with the brackets.
- To make hooks: Bend the copper wire around the copper pipe, and then repeat in the opposite direction to create an “S” shape at the end of the wire. Use wire cutters to cut the rest of the wire off the hook. Optionally use a hammer to flatten the ends of the hooks.
- Decorate to your heart’s content!
Like this recipe?
Follow @everypurposehome on Pinterest for more!
More Like This…
- 7 Subtle Fall Decor Ideas (Using Copper!)
- Tips for a Tidy Feeling Home
- How to Make Useful Things Look Beautiful

What a terrific idea. Years ago my husband made me a hanging copper pot rack out if copper pipe it was beautiful it was 5 ‘ long made like a ladder. I never thought to make a hanging one for the wall. I’ve searched for a reasonable copper pot rack to hang on my wall but they were all to expensive. Thank you for sharing how to make one like yours!
That sounds amazing, I’d love to see the copper ladder! Sounds like a dream <3
My husband and I have just started watching the British baking competition and they’re in this beautiful old house in London and I spotted this copper pipe with pots hanging from it in the kitchen and took a picture of it because I fell in love with it. Then I looked up on Pinterest last night and you have the EXACT same look. Thanks so much for this, I thought this was gonna be super expensive and now I could start on it this week! I only wish you had taken a picture of how both racks look on your wall. You have separate pictures of each rack and I’m not sure if I should do two levels or just one rack. 🙂 But again, thank you!