
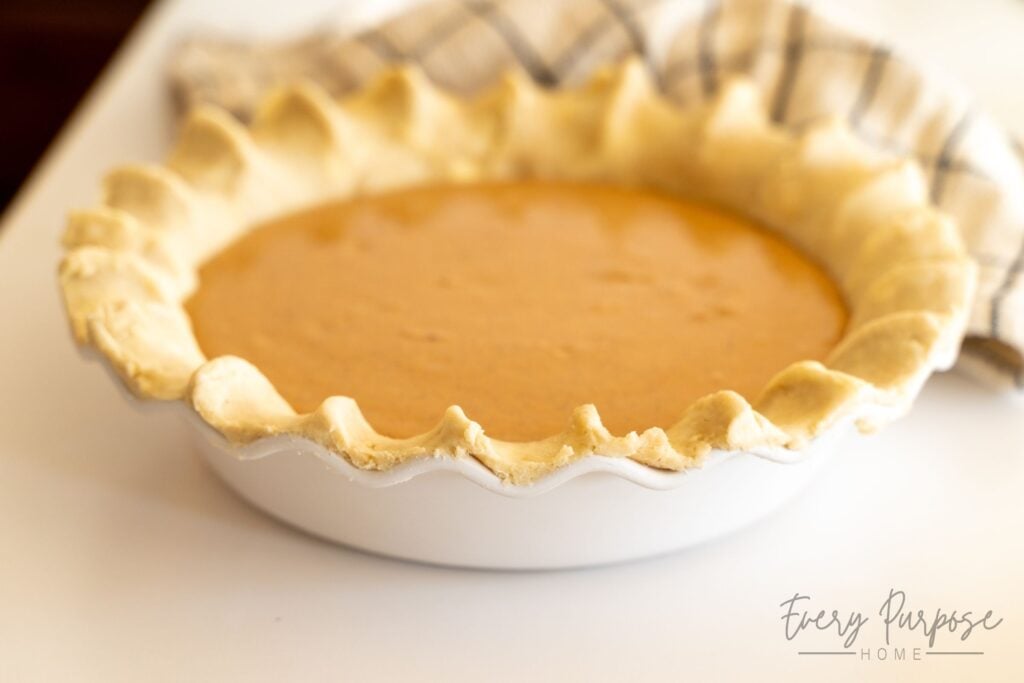
If you have been looking for the perfect dough for your sweet or savory pies, this delicious recipe comes together with just 5 ingredients. This All-Butter Sourdough Discard Pie Crust offers everything you could want in a homemade crust, with incredible flakiness and a rich, buttery flavor, without the use of shortening or lard. It’s the perfect way to use up your excess starter! The butter and discard combine to create a beautiful golden texture that pairs perfectly with sweet fruit pies and savory pot pies alike. Make it quick or long-fermented!
Essentials for the Perfect Sourdough Discard Pie Crust
- Butter Cutter (Pastry Blender): Cutting cold butter into the flour is often the most tedious part of making a crust from scratch! This is why having a butter cutter is so beneficial, because it makes light work of an otherwise daunting task and ensures that the butter stays cold.
- Heavy Rolling Pin: A heavy rolling pin is ideal for rolling out cold pastry dough, especially sturdy doughs like this all-butter pie crust! The weight of a marble rolling pin does the work for you, so that you don’t have to overwork the dough.
- Deep Dish Pie Plate: This specific recipe creates a generous amount of dough, enough to line a deep-dish pie plate, with plenty left over for a top crust (perfect for lattice fruit pies or savory pot pies)!
Ingredients
- 1½ cups all-purpose flour, scooped directly from bag (not spooned and leveled) (236g): It’s very difficult to accurately measure flour by volume because it depends entirely on how packed each scoop is! For this recipe, I designed this volume measurement to be scooped directly out of the bag (not spooned and leveled). For best accuracy, you can measure the flour by weight.
- 1 tsp salt (6g): I prefer to use sea salt, as iodized salt may add an unwanted metallic flavor.
- 1 cup salted butter, cold (226g): For the flakiest all-butter pie crust texture, you need the butter to be very cold, straight from the fridge. If you want to use unsalted butter, add ½ tsp. additional salt to the recipe.
- ¾ cup sourdough starter, active or discard, stirred down (225g): You can use either active starter or discard! Be sure to stir the starter down before measuring. Cold starter straight from the fridge is totally fine (and actually preferred to keep the dough as cold as possible!). For best accuracy, measure by weight.
- 1 tbsp honey (21g): Honey adds the perfect touch of sweetness and depth (even for savory pies!) without the grainy texture that granulated sugar can leave in a crust.
How to Make All-Butter Sourdough Discard Pie Crust
Whisk the Dry Ingredients: In a large bowl, add the flour and salt. Whisk to combine.
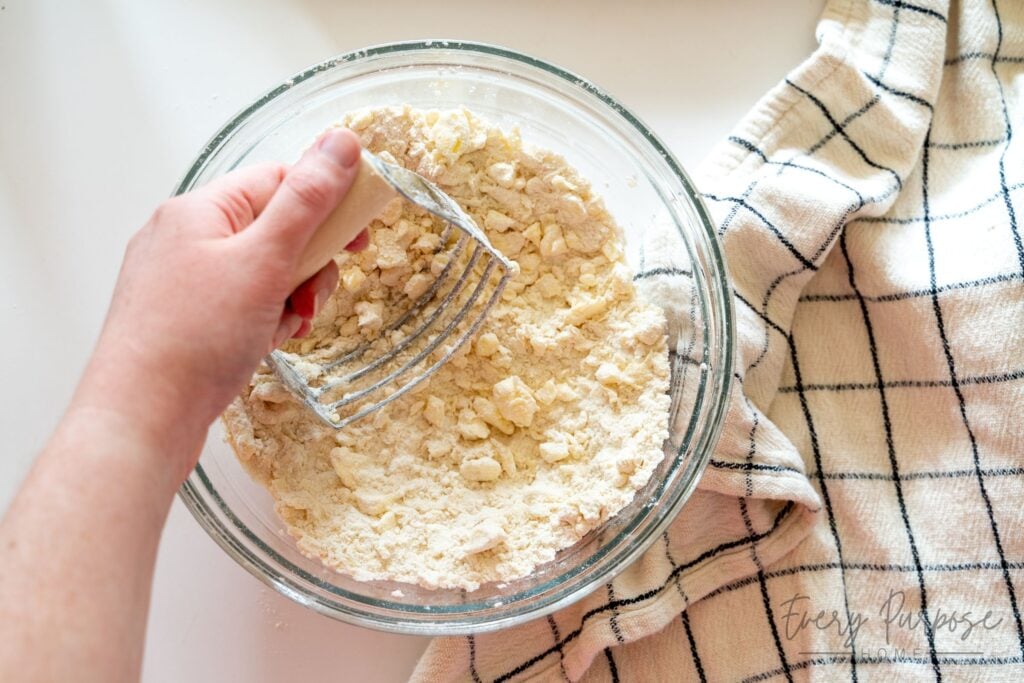
Cut in Cold Butter: Start by cutting your cold butter into small cubes. Add them to the flour mixture. Use a butter cutter (or pulse in a food processor to make quick work of it) to cut the butter into the flour until the butter is in pea-sized pieces. The mixture should resemble coarse crumbs. Pro Tip: Don’t overdo it here! The visible chunks of butter are what create the flaky layers in the oven.
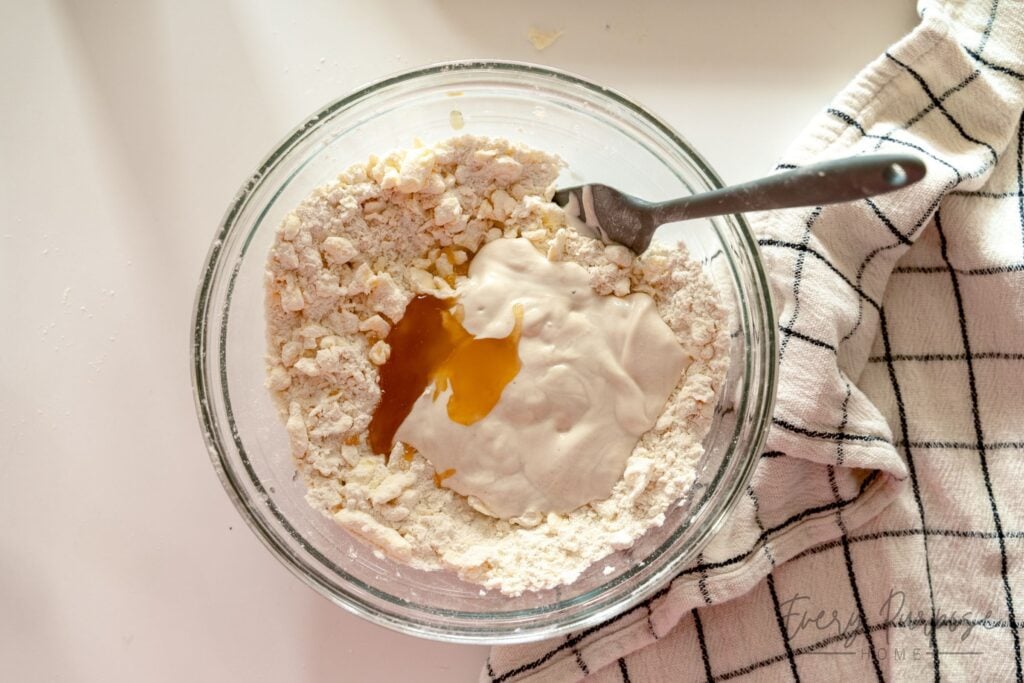
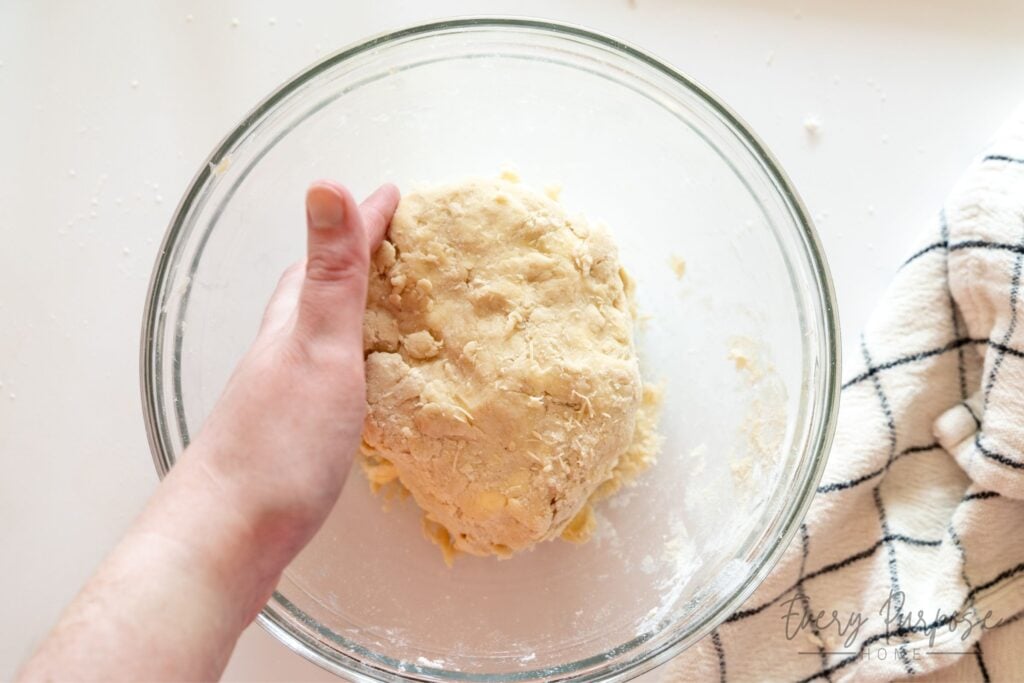
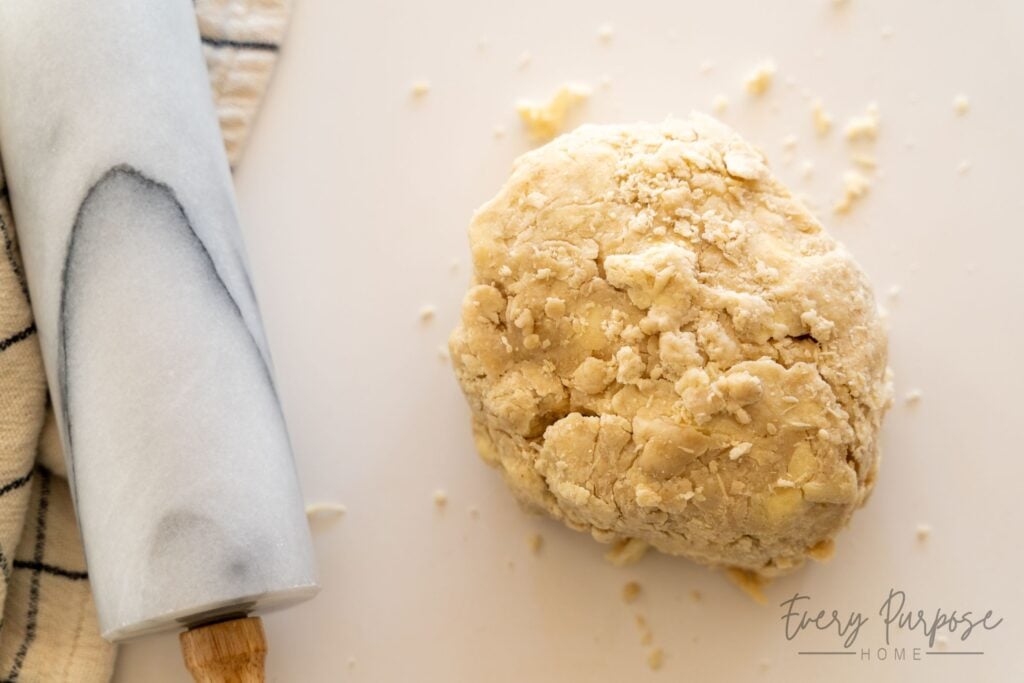
Add the Sourdough Starter and Honey: Pour in the sourdough starter and the honey. Use a spatula and then your hands to gently work the dough together. You do not need to heavily knead it, simply fold and press the mixture until it comes together into a rough, shaggy ball of dough.
(Option A) Quick Method: Wrap the dough tightly in plastic wrap, and refrigerate for at least 10-20 minutes to let the butter firm up before rolling it out. Sourdough pie crust can be refrigerated up to 3 days before use.
(Option B) Long-Fermentation: Cover the bowl with plastic wrap or a damp tea towel, and let sit at room temperature for 8-12 hours (or overnight) to allow sufficient time for the starter to ferment the grains. After fermentation, chill in the fridge for at least 2 hours before rolling it out.
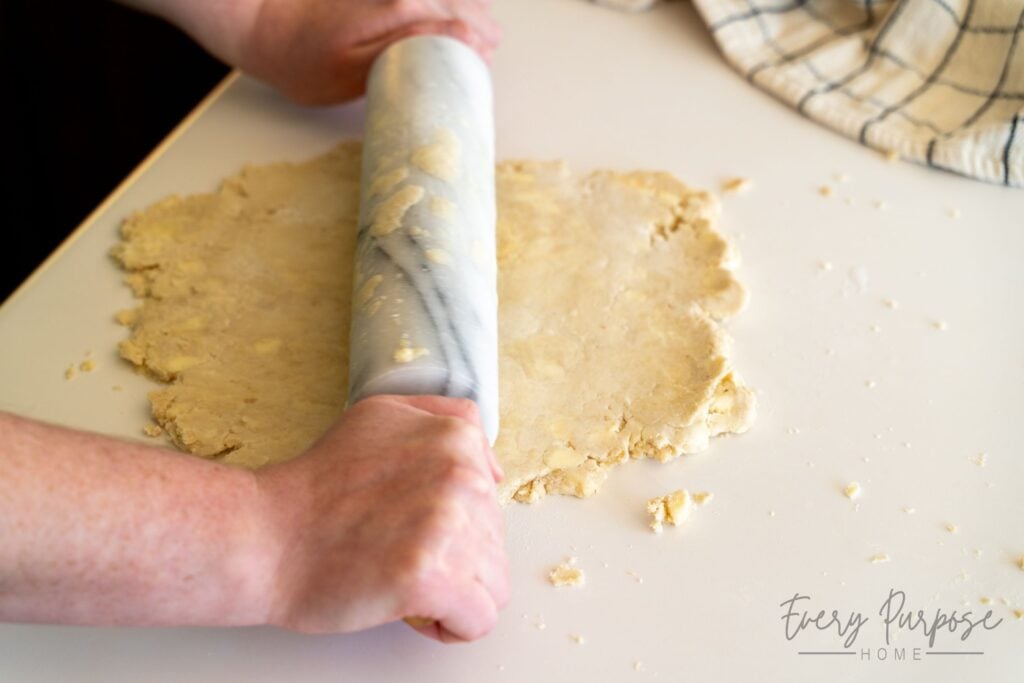
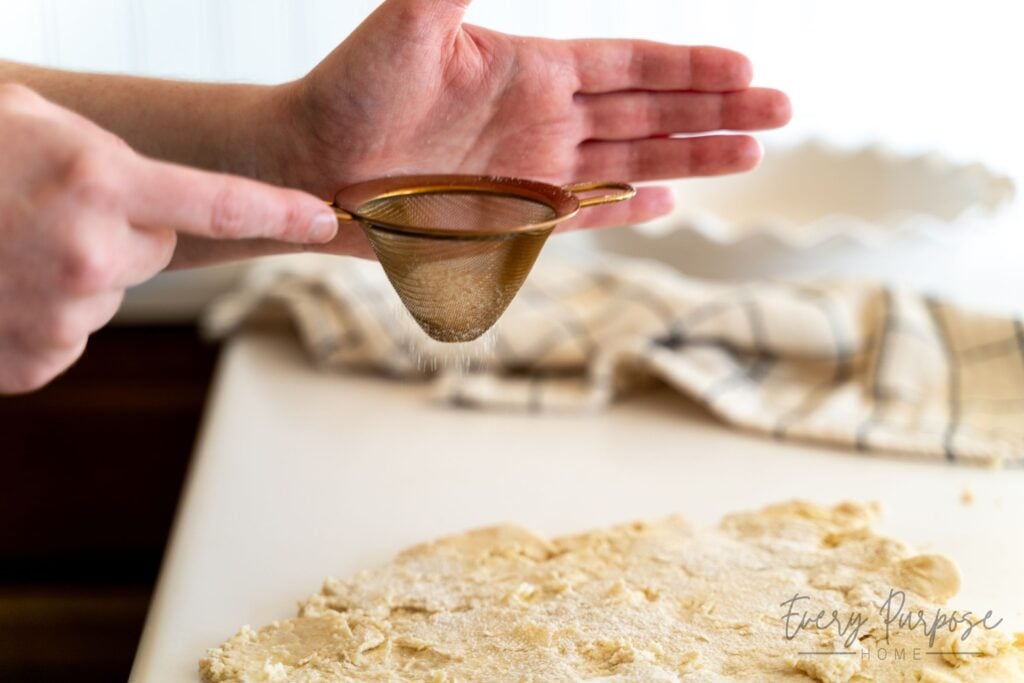
Divide and Roll Out The Dough: When you’re ready to bake, remove the dough from the fridge. Because this is an all-butter pie crust, it may be quite hard! If the dough is very cold (chilled longer than an hour), let it sit on the counter for 5-10 minutes to slightly soften. Divide the dough by removing 1/3 (for the top crust or lattice) and setting it aside. Use a heavy rolling pin to roll out the remaining 2/3 portion on a floured surface. It should create a 12-14 inch circle.
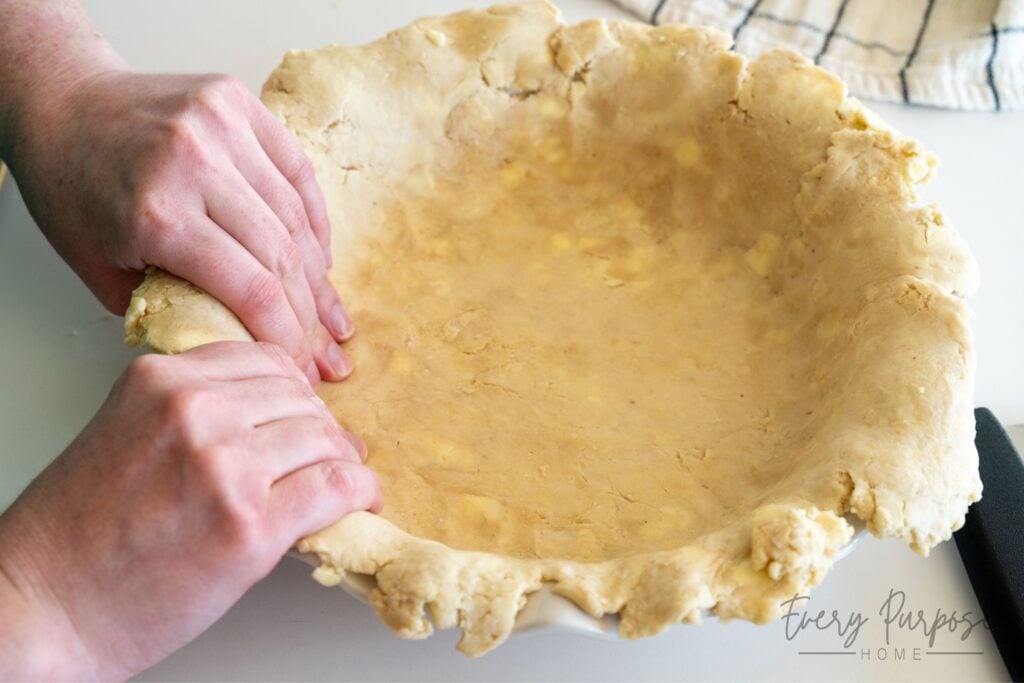
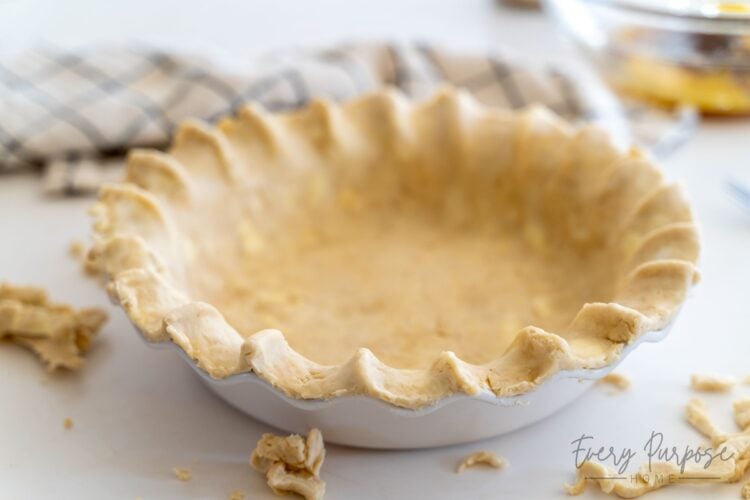
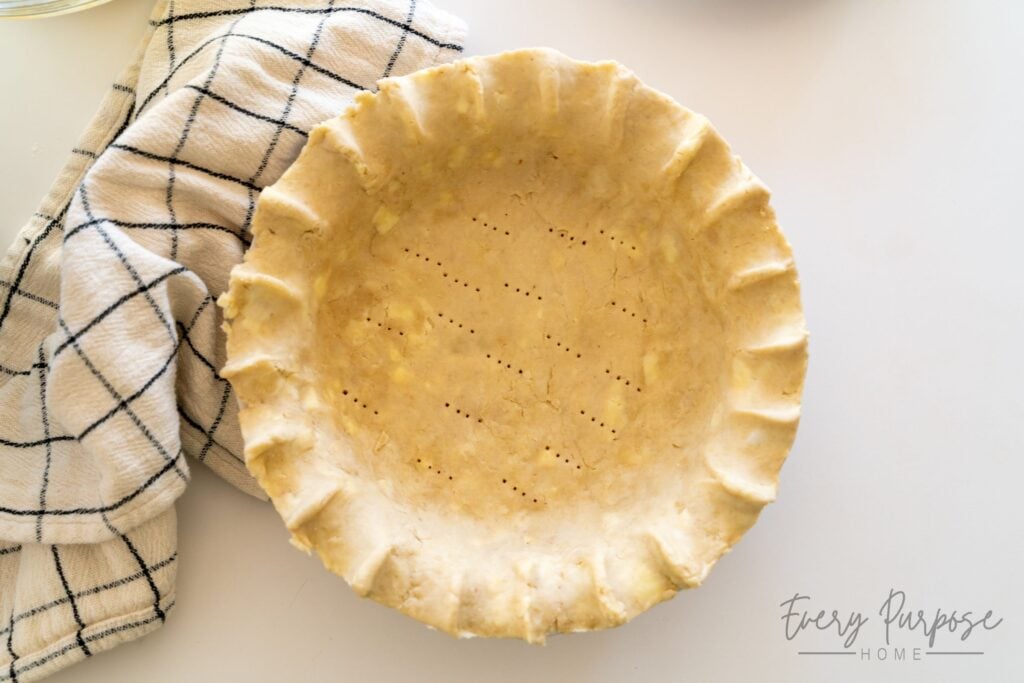
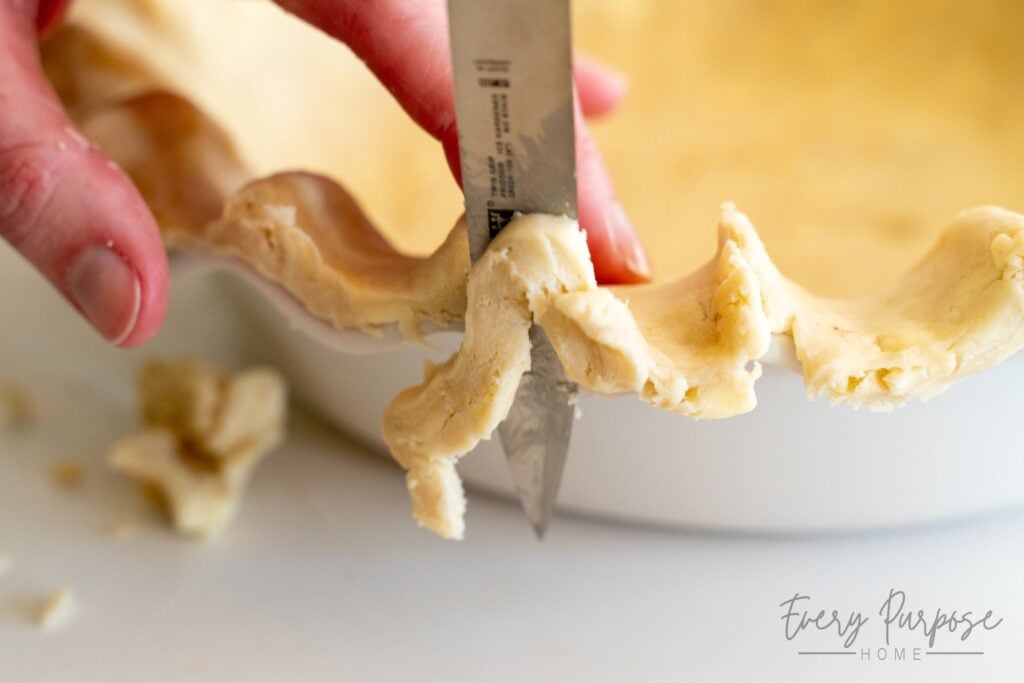
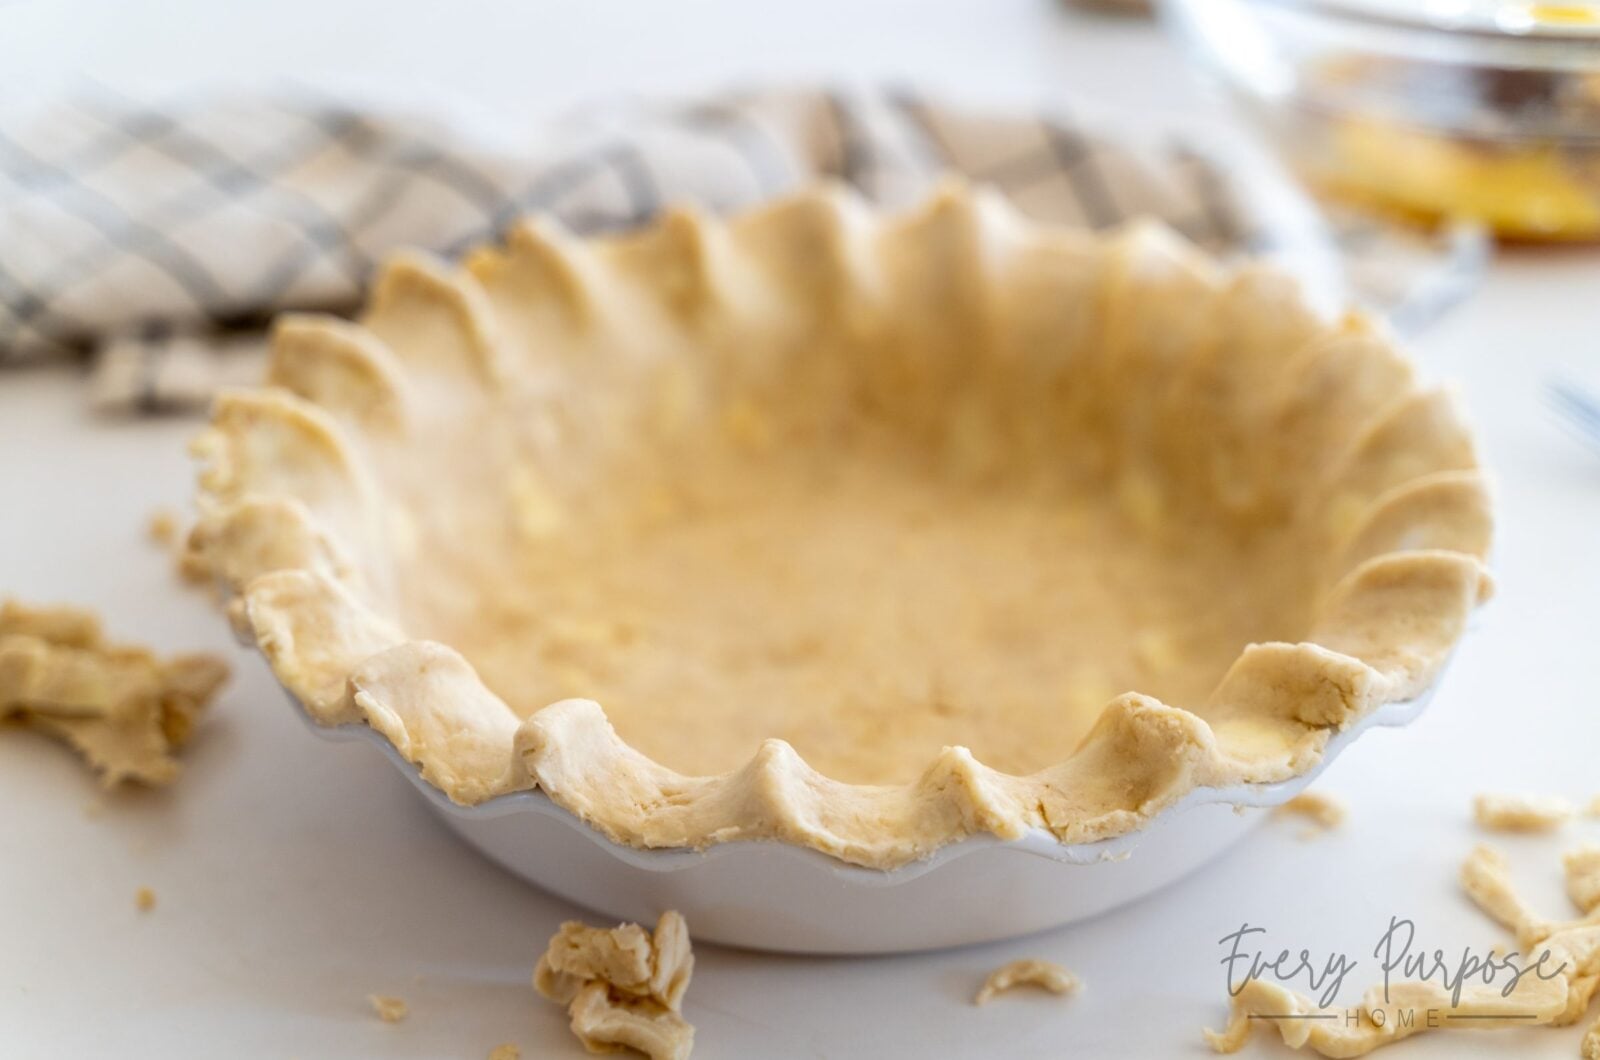
Assemble the Pie: Gently drape the dough over your deep-dish pie plate. Press it gently into the bottom and sides, and trim excess edges with a knife. Use a fork to poke holes in the bottom before adding your filling. For the top crust, roll the remaining 1/3 dough into a large circle. Drape it over the filling, or create a lattice design. Use your fingers or a fork to crimp the edges of the crust together. Cut venting slits into the top before baking.
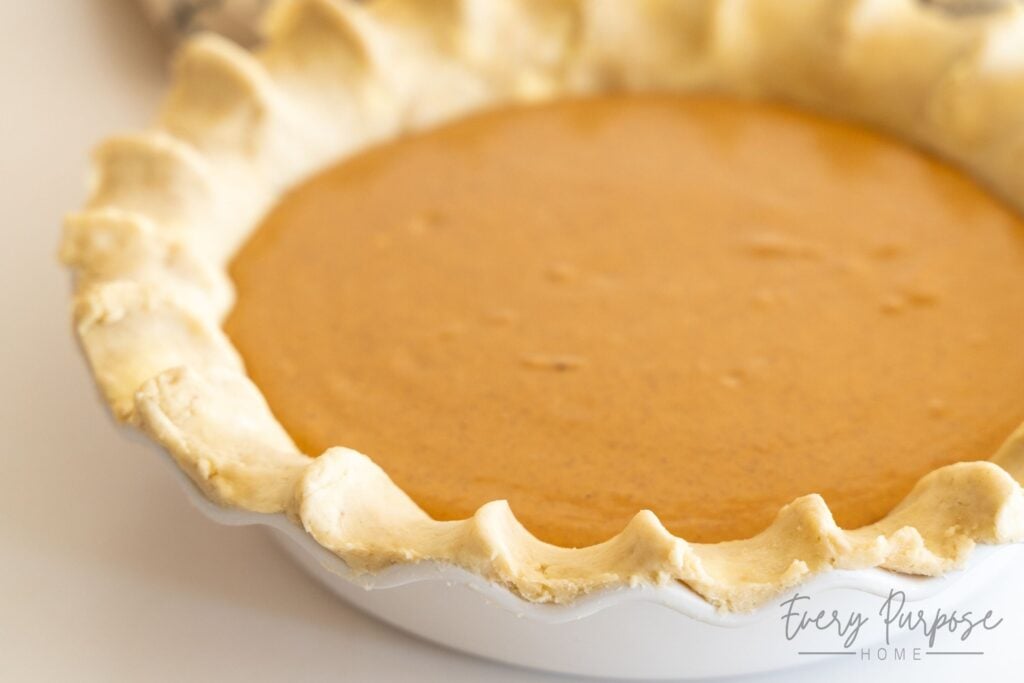
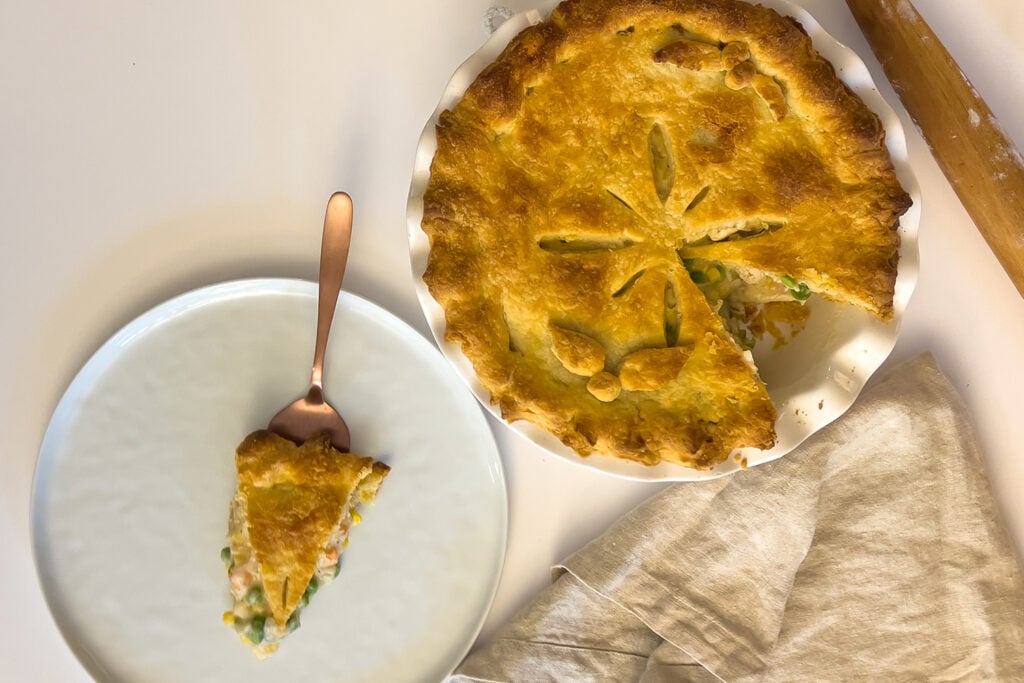
Bake the Pie: Bake according to the temperature and time listed on your specific pie filling recipe. Pairs deliciously with my Sourdough Chicken Pot Pie or Sourdough Pumpkin Pie!
Ways to Use Sourdough Discard Pie Crust
This crust is incredibly versatile! There are endless ways to use it, but here are some of my favorites:
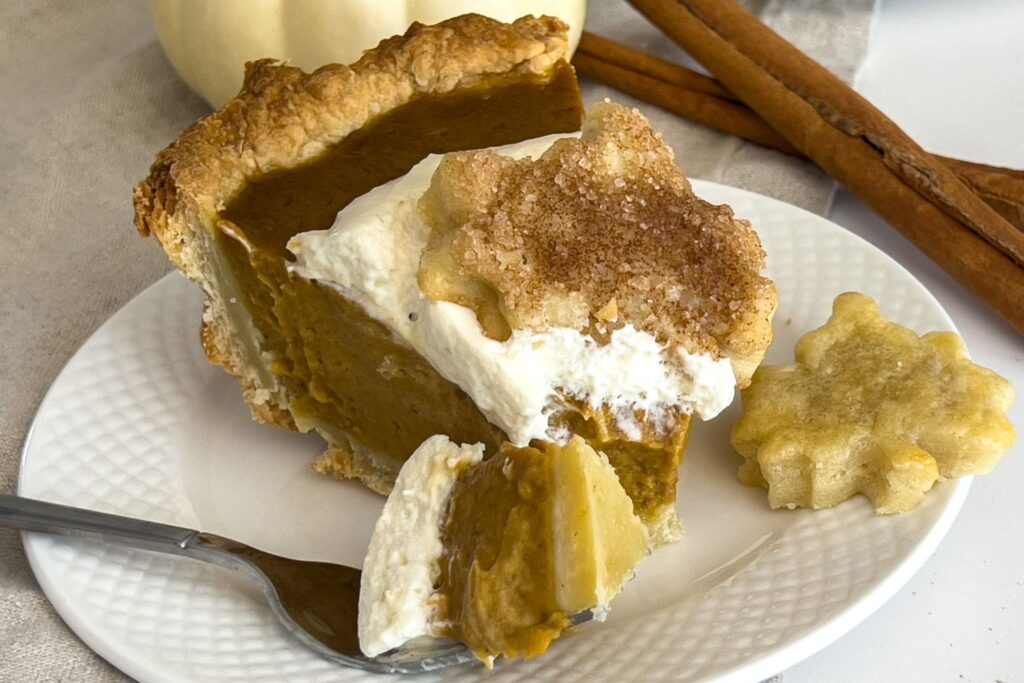
- Sweet Pies: Perfect for classic fruit pies (apple, cherry), custard pies, chocolate pies, or my Sourdough Pumpkin Pie.
- Savory Pies: The ideal crust and topping for a classic chicken or beef pot pie, such as my Sourdough Chicken Pot Pie.
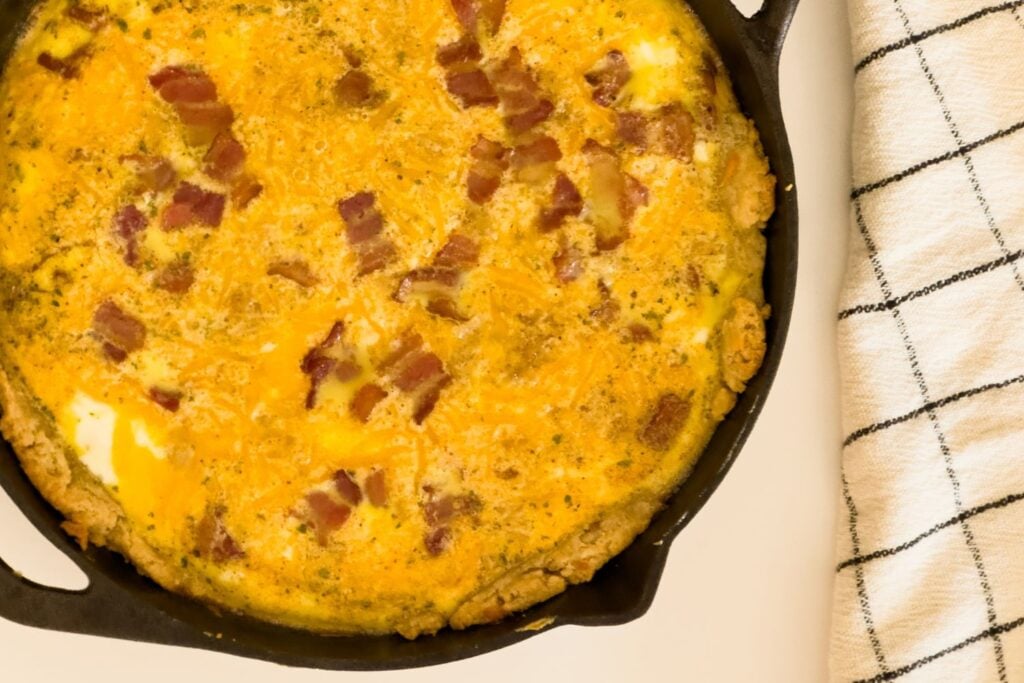
- Quiche: Use it as a flaky base for your favorite egg breakfast, such as my Sourdough Quiche.
- Pie Crust Dippers: Roll the dough out thin, sprinkle with cinnamon sugar or salt, bake until crisp, and use as dippers for fruit dip, yogurt, or my Easy Cannoli Dip.
- Homemade “Toaster Pastries”: Roll out rectangles, fill with jam or brown sugar and cinnamon, bake, and top with a homemade glaze.
- Skillet Crust: Add it to the top (or bottom) of a cast iron skillet meal to liven it up.
- Mini Tart Shells: Press dough into a mini muffin pan, bake, and fill with melted chocolate, peanut butter, or nut fillings.
- Miniature Pies: Press circles of dough into a muffin pan, and fill with desired fillings before baking according to the pie directions.
- Empanadas: Use this dough instead of biscuit dough for a flaky twist on the classic.
- Hand Pies: Great for using up scraps (see the tip below!).
Have a bit of dough left over?
When I have a little bit of pie crust left over, I like to make a mini hand pie! Simply roll the excess into a circle, add a spoonful of filling (chocolate hazelnut spread, peanut butter, or jam) to the center, fold it over, and use a fork to crimp the edges together. Bake it along with your main pie until golden brown (or at 425°F for 15-20 minutes if baking it separately).

Frequently Asked Questions
Does this sourdough crust taste sour?
Not usually, but it depends on how you prepare it! If you do a long-fermentation on the dough, it may develop more of that classic sourdough taste. This is easily balanced out by pie fillings in most cases, but if you want the least sour crust possible then you should choose the quick method for the pie crust preparation!
Why did my pie crust turn out tough instead of flaky?
A tough crust usually happens for two reasons, either overworking the dough or using warm butter. If you over-knead the dough, you develop too much gluten and the dough turns out tough. Likewise, if the butter is too warm before the crust goes into the oven, you lose the desirable flaky layers. Keep your ingredients cold and handle the dough as little as possible!
Can I use this recipe for a blind-baked crust?
Yes! Some recipes call for a blind-baked crust (crust that is partially pre-baked before filling is added) to prevent a soggy bottom. To blind-bake this sourdough discard pie crust, poke holes in the bottom of the crust with a fork, and line with parchment paper before filling with pie weights (or dried beans). Bake at 375°F for 15 minutes, remove the weights, follow your specific pie’s instructions for either adding filling at this step or fully baking for no-bake pie fillings.
Can I freeze sourdough pie dough?
Absolutely! This is a great recipe to prep ahead. To freeze, wrap the freshly-made dough in plastic wrap, and place it in a freezer-safe bag. It will keep in the freezer for up to 3 months! When you’re ready to bake, let the dough thaw in the fridge overnight before rolling out.
Pro Tip: Double the recipe to intentionally freeze an extra dough for later use! This provides you with a mess-free option for when you need pie crust in a pinch!

Love this recipe? Pin it to your sourdough board and follow The Sourdough Cookie Lady on Pinterest for more!
More From The Sourdough Cookie Lady (Sweet & Savory!)

All-Butter Sourdough Discard Pie Crust Recipe:
All-Butter Sourdough Discard Pie Crust (No Shortening!)
8
servings25
minutes365
kcal8 hours
This All-Butter Sourdough Discard Pie Crust is the ultimate base for both sweet and savory baking! This makes enough pie dough to line and cover the top of a deep-dish pie crust! Made with plenty of sourdough discard (or active starter), it bakes up incredibly flaky, tender, buttery, and golden brown. Choose the quick method for immediate baking, or the long-ferment option for enhanced health benefits and sourdough flavor!
Keeps your screen on while viewing recipe
Recommended Equipment
- For Flaky LayersButter Cutter
- For Cold DoughHeavy Rolling Pin
- For Deep FillingsDeep-Dish Pie Plate
Ingredients
1½ cups all-purpose flour scooped directly from bag (not spooned and leveled) (236g)
1 tsp salt (6g)
1 cups salted butter, cold (226g)
¾ cup sourdough starter active or discard, stirred down (225g)
1 tbsp honey (21g)
Directions
- Mix Dry Ingredients & Butter: Whisk flour and salt in a large bowl. Add cold, cubed butter and use a butter cutter to cut the butter into the flour (or pulse in a food processor to make quick work of it) until the mixture resembles coarse crumbs with pea-sized pieces. Note: Visible chunks of butter create flaky layers, so don’t overwork it!
- Add Wet Ingredients: Pour in the sourdough starter and honey. Use a spatula and then your hands to gently work the dough into a rough, shaggy ball. Do not overwork the dough.
- Rest or Ferment: Choose your timeline.
Quick Method: Wrap dough tightly and chill for 10-20 minutes (or up to 3 days) to firm the butter.
Long-Fermentation: Cover and let sit at room temperature for 8–12 hours (or overnight). Chill for at least 2 hours before rolling. - Divide and Roll: If dough is too hard to roll, let it soften on the counter for 5–10 minutes. Divide dough (2/3 for bottom of pie, 1/3 for top). On a floured surface, roll the larger portion into a 12-14 inch circle.
- Assemble: Drape dough into a deep-dish pie plate. Trim edges and poke holes in the bottom with a fork. Add your filling as directed by your pie recipe. Roll the remaining dough for a top crust or lattice. Crimp edges to seal and cut steam vents on top.
- Bake the Pie: Bake according to the temperature and time listed on your filling recipe. (Try my Sourdough Chicken Pot Pie or Sourdough Pumpkin Pie!) See notes below for blind-baking.
- Notes on How Much to Make: Full recipe makes enough crust for sides and top of a deep-dish pie plate (like a pot pie). If you want to just line the bottom of a deep-dish plate, you will need ⅔ of the recipe (look above for ways to use excess crust!). To line just the bottom of a regular pie crust (not deep dish), you can ½ the recipe.
Recipe Notes
- • To Blind Bake: Drape dough into the pie plate, poke holes in the bottom with a fork, and line with parchment paper. Fill with pie weights (or dried beans) and bake at 375°F (190°C) for 20 minutes. Remove the weights and parchment. Follow your specific pie’s instructions for either adding filling now or continuing to bake for no-bake fillings.
• To Freeze: Wrap prepared dough tightly in plastic wrap, place in a freezer-safe bag, and freeze for up to 3 months. Thaw in fridge overnight before rolling.
• Butter: Butter must be very cold to achieve a flaky pie crust. If using unsalted butter, increase salt in dough by ½ tsp.
• Flour: For best accuracy, weigh the flour. If measuring by volume, these measurements are designed for you to scoop directly from the bag (do not use the spoon-and-level method).
• Sourdough Starter: Active or discard both work well. For the flakiest crust, use cold discard directly from the fridge to keep butter from melting.
Approximate Nutrition Facts
- Total number of serves: 8
- Calories: 365kcal
- Fat: 23g
- Saturated Fat: 15g
- Sodium: 498mg
- Carbohydrates: 35g
- Fiber: 2g
- Sugar: 2g
- Protein: 5g
Like this recipe?
Follow @everypurposehome on Pinterest for more!

)
I love this pie dough recipe so much. I used it with your pot pie recipe and I think it’s my favorite meal I’ve ever made. The sourdough discard adds the perfect amount of tang and it’s so buttery and flaky. 10/10 I’ve pinned this and will make it over and over.