

Cutout sugar cookies are such a nostalgic treat, but chilling the dough, waiting, rolling, and cutting can quickly turn them into an all-day project. I set out to create an easier sourdough version, and these cookies turned out even better than I had imagined! They are soft and tender, perfectly sweet, and taste like a classic vanilla sugar cookie with rich vanilla bean flavor. The dough is easy to work with, holds every detail in the oven, and can be rolled, cut, and baked right away. Finish these no-chill sourdough cut out sugar cookies with soft-set vanilla bean icing for a beautiful treat that feels special enough for the holidays but works for any season or occasion!

Essentials for the Perfect Sourdough Cutout Cookies
- Digital Kitchen Scale: Thick, soft cookies depend on the right balance of flour, starter, and moisture. A digital kitchen scale removes the guesswork so your cookie dough comes together properly. I have used this exact scale in my kitchen for years, and it has never failed me!
- Stand Mixer: Properly mixing the butter and sugars creates the foundation for the perfect no-spread cookie dough. A quality stand mixer fitted with the paddle attachment makes quick work of this thick dough, but a handheld electric mixer works too.
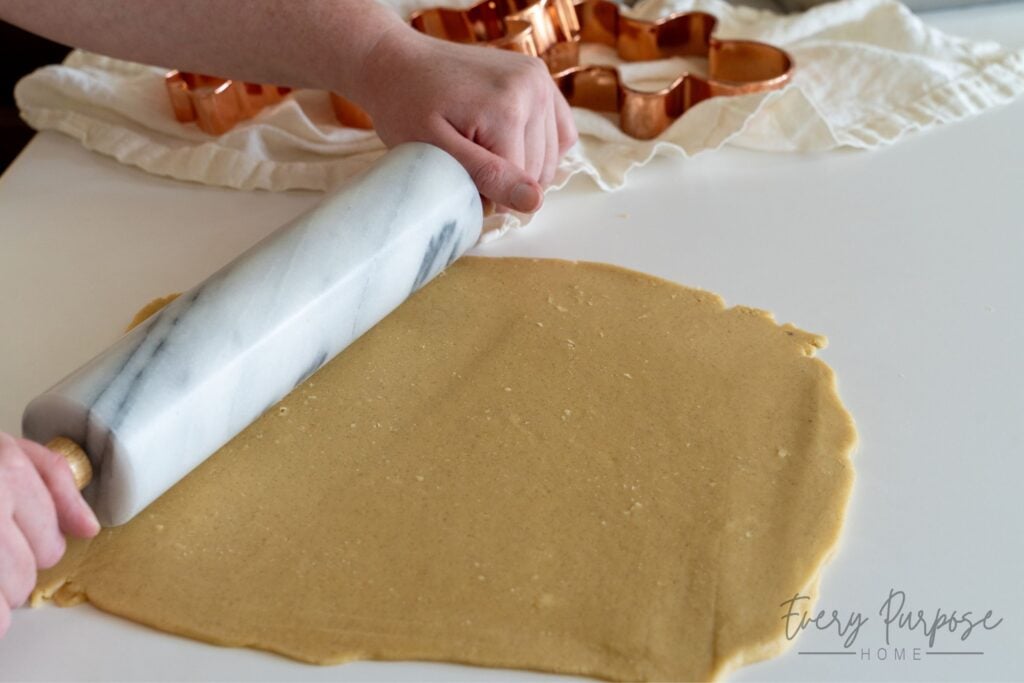
- Heavy Rolling Pin: Having a heavy marble rolling pin helps to get a nice, even cookie thickness for the perfect sourdough cutout cookies. This helps the cookies bake evenly and gives them a consistent appearance!
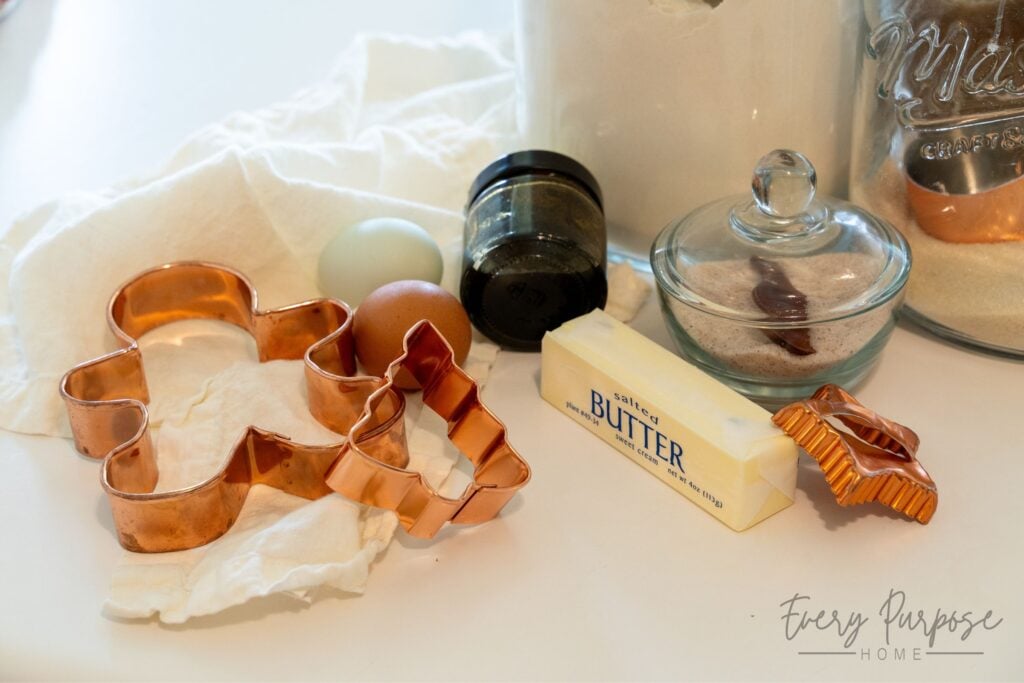
- Fun Cookie Cutters: You may use any cookie cutters that you wish, creating shapes for all seasons and occasions. Many of my cookie cutters are vintage, thrifted, or handed down by my grandma. My favorite cookie cutters in my collection are vintage or thrifted solid copper! If I were rebuilding my collection from scratch, I would get these copper cookie cutters: this copper star, a copper snowman set, this copper Christmas tree, and I might even try this copper candlestick cookie cutter this year!
Ingredients
Sourdough Cut Out Sugar Cookie Ingredients
- ¼ cup light brown sugar, packed (55g): Pack it tightly to help create that soft, tender texture!
- ½ cup granulated sugar (100g): Helps create that classic sugar cookie flavor.
- ½ cup salted butter, softened (113g): Use “dent soft” butter, meaning it should indent with resistance when pressed, remaining cool to the touch and not shiny or oily. This usually takes 30–60 minutes at room temperature. To use unsalted butter, add ¼ tsp additional salt.
- ¼ cup sourdough starter, active or discard, stirred down (75g): Active or discard starter works! Stir it down well before measuring by volume. For best accuracy, measure by weight.
- 2 large egg yolks (40g): Yolks only (skipping the egg whites) give the cookies a beautifully tender texture.
- 1 tbsp vanilla bean paste (20g): Vanilla bean paste provides that elevated signature sugar cookie flavor that is impossible to beat. When recipe testing, I found that vanilla extract alone didn’t give me the right amount of vanilla flavor, and sometimes left the cookies tasting more like flour than like a vanilla sugar cookie. Substitution: If you don’t have vanilla bean paste, substitute with an equal amount of quality vanilla extract. Note that doing this will mean the cookies will no longer have the vanilla bean specks.
- ½ tsp salt (3g): Sea salt is preferred over iodized salt for a cleaner flavor profile.
- 2 cups all-purpose flour, scooped (not spooned or sifted) (316g): I designed this volume measurement to be scooped directly out of the bag (not sifted or spooned and leveled). Pro Tip: For the best accuracy and overall cookie texture, measure flour by weight.
- ¼ tsp baking soda (1g): Ensure you are using baking soda, not baking powder. They’re not interchangeable here.
Vanilla Bean Icing Ingredients
- 1½ cups powdered sugar (188g): You can use a traditional powdered sugar (usually with cornstarch included) or a single-ingredient powdered sugar.
- 2 tsp vanilla bean paste (13g): Vanilla bean paste provides a beautiful vanilla-bean flavor, as well as the signature vanilla bean flecks!
- 1½ tbsp salted butter, melted (21g): For a perfectly smooth and glossy finish, ensure your butter is melted but not hot. The butter is what gives this icing its “truffle-like” richness. Note: If you only have unsalted butter on hand, just add the tiniest extra pinch of salt to the bowl.
- 1½—2 tbsp milk (22g—30g): Any milk works here! Whole milk provides the creamiest finish, but you can use lower-fat milk or even heavy cream if you want a richer, thicker icing.
- Pinch salt: I prefer fine sea salt. It dissolves quickly into the icing and cuts through the sweetness of the sugar. Avoid iodized table salt if possible, since it can have a metallic flavor that can be detected in a simple recipe like this.
- (Optional) ½ tsp vanilla extract (2g): Depending on the brand of vanilla bean paste that you used, you may find the vanilla flavor in the icing slightly flat. If this is the case, add a bit of quality vanilla extract to warm it up just a touch more!
- (Optional) dye-free food coloring: You can dye the icing whatever color you would like. Note that due to the vanilla bean paste, you will have brown flecks in the icing. For an icing without vanilla bean flecks, use vanilla extract in place of the vanilla bean paste.

How to Make No-Chill Sourdough Cut Out Sugar Cookies
Step 1: Preheat Oven & Prep
Preheat oven to 350°F (175°C). Line two baking sheets with parchment paper.
Step 2: Beat the Butter & Sugars
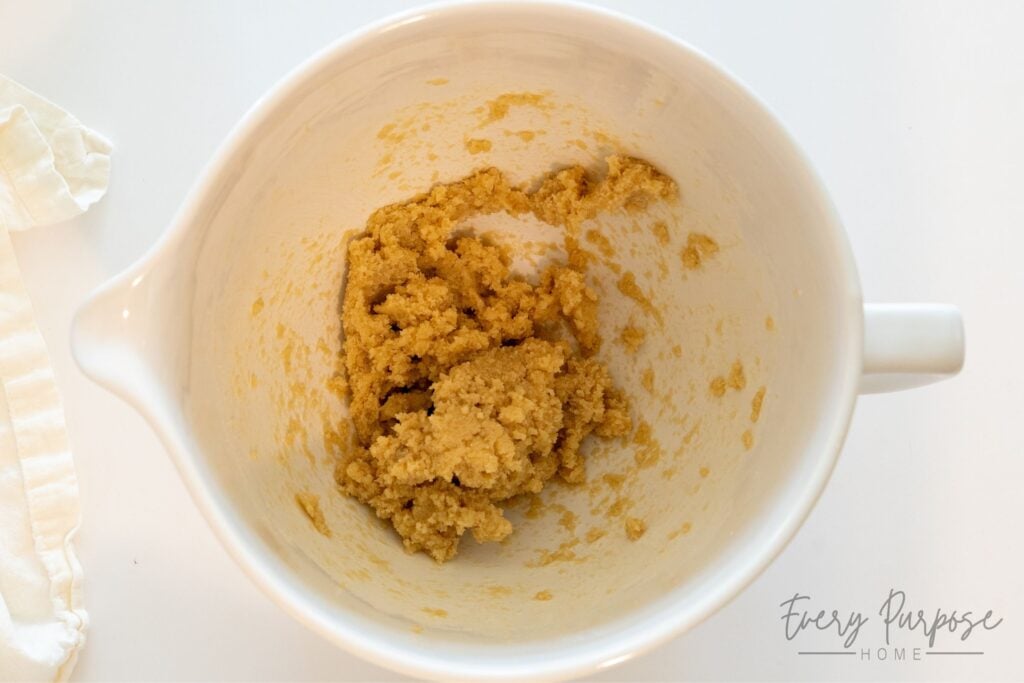
Beat the brown sugar, granulated sugar, and softened butter until uniform. Beat just until creamy. Do not beat until light and fluffy. This works best with a stand mixer (paddle attachment) or a handheld electric mixer.
Step 3: Add the Wet Ingredients
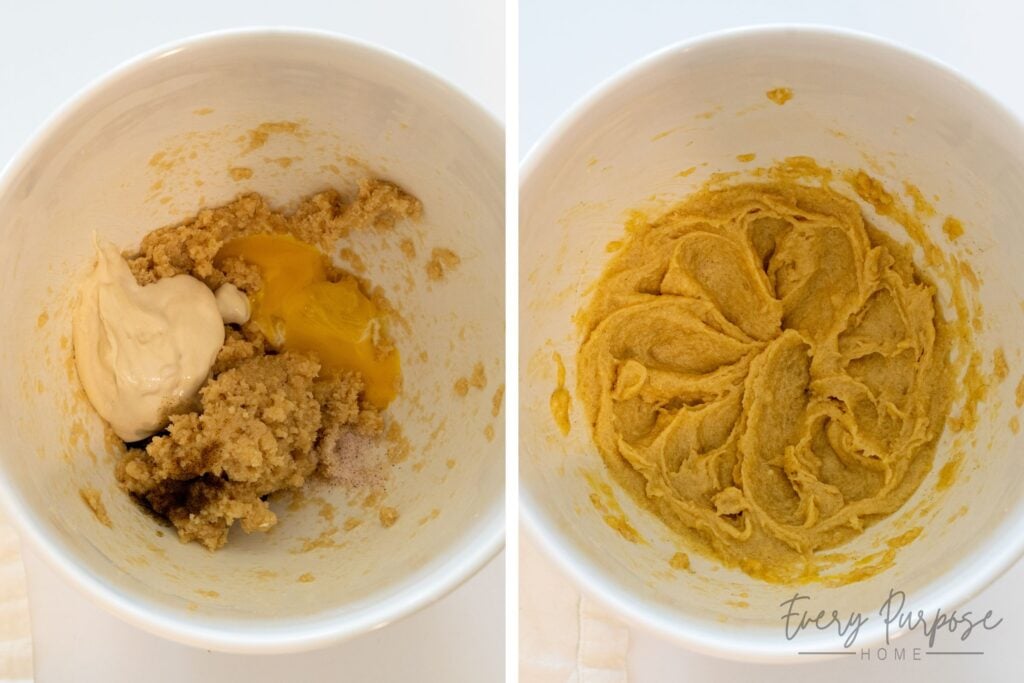
Add the sourdough starter, egg yolks, vanilla bean paste, and salt. Beat until smooth and combined. Pro Tip: Scrape down the sides of the bowl to ensure the starter is fully incorporated with no streaks remaining.
Step 4: Incorporate the Dry Ingredients
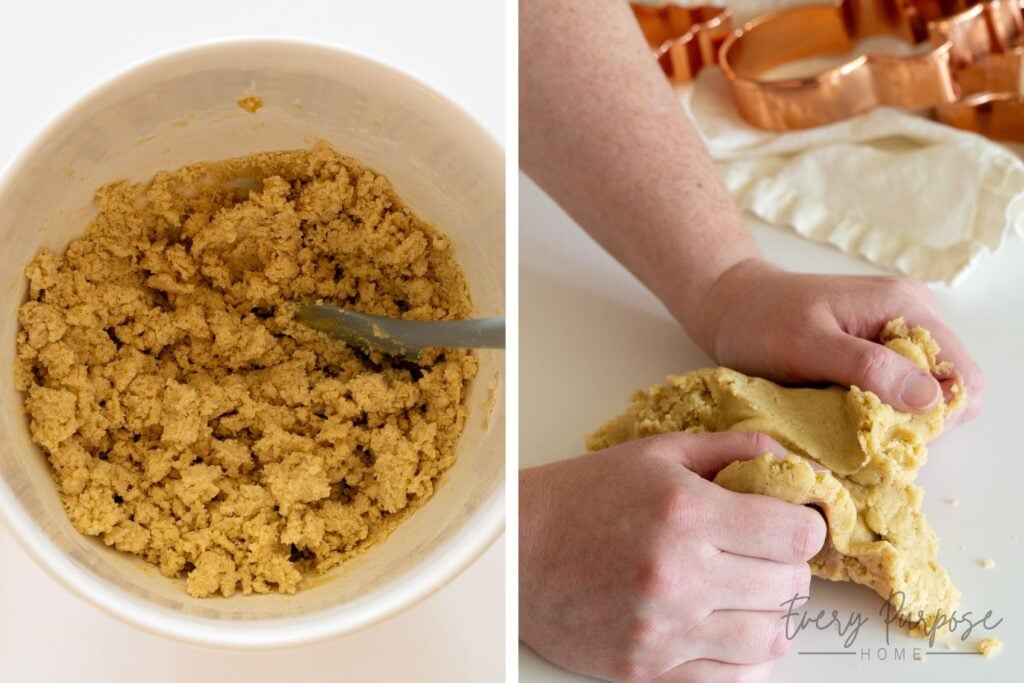
Add the flour and sprinkle the baking soda evenly over the top. Turn the mixer to low speed and mix until the dough begins to combine and form large clumps. Then, turn the mixture out onto a clean, flat surface and knead it briefly with your hands, just until the dough comes together. It should be a play-dough-like consistency.
Step 5: Roll
Roll your dough to about ¼ inch thick, which is roughly a 12- to 14-inch square. If needed, you may lightly flour your dough to prevent it from sticking, though this usually isn’t necessary for me.
Step 6: Cut & Transfer
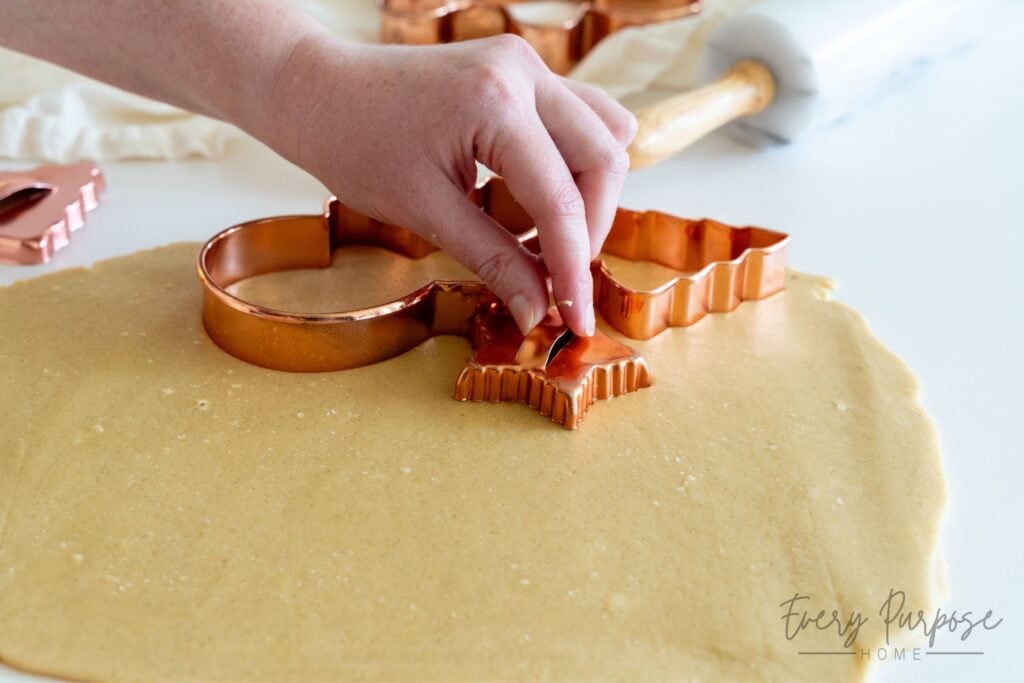
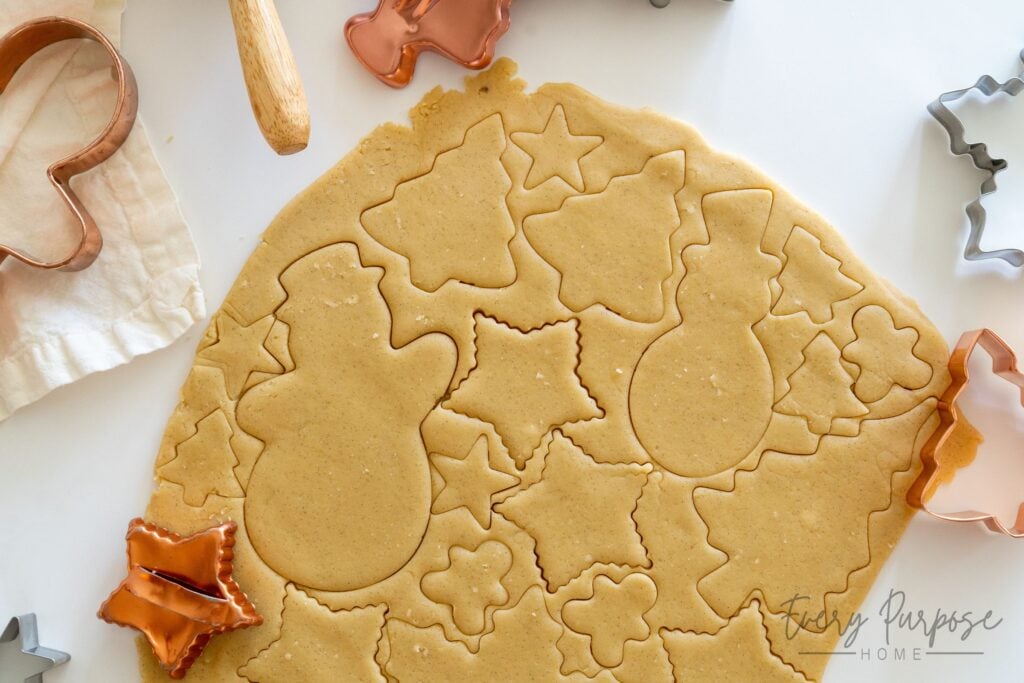
Use cookie cutters to cut the dough into your desired shapes, or use a circle biscuit cutter or mason jar lid for round cookies. Try to nest the shapes tightly to reduce the number of re-rolls needed. Gently press the scraps together, reroll, and continue cutting, taking care not to overwork the dough. Transfer all shapes to the prepared baking sheets, leaving about 1 inch between them. Recipe will make approximately 18-24 3-inch cookies. Note that different-sized cookie cutters will produce different quantities of cookies. The recipe can be doubled if needed. Pro Tip: The dough will bake up perfectly without any chill time (all the cookies photographed in this post were made with unchilled dough). However, for the absolute sharpest edges, feel free to chill the baking sheets of shapes for 20 minutes before baking. Chilled cookies may need an additional 1–2 minutes of baking.

Step 7: Bake
For 3-inch cookies, bake for 9–11 minutes, rotating the pan halfway through. Remove when the edges are ever so slightly golden but the centers are still soft. For smaller cookies, bake for 7–9 minutes, and for larger cookies bake for 11–13 minutes. I tested this recipe baking the pans one at a time. Always place the cut dough on a cool baking sheet, never one that is still warm from the previous batch.
Step 8: Cool on Baking Sheet
Allow the cookies to set on the hot baking sheet for 7 minutes before transferring to a wire rack. The cookies will be delicate while hot and will finish setting as they cool. Allow cookies to cool completely before icing.
How to Make the Vanilla Bean Cookie Icing
Step 1: Combine Ingredients
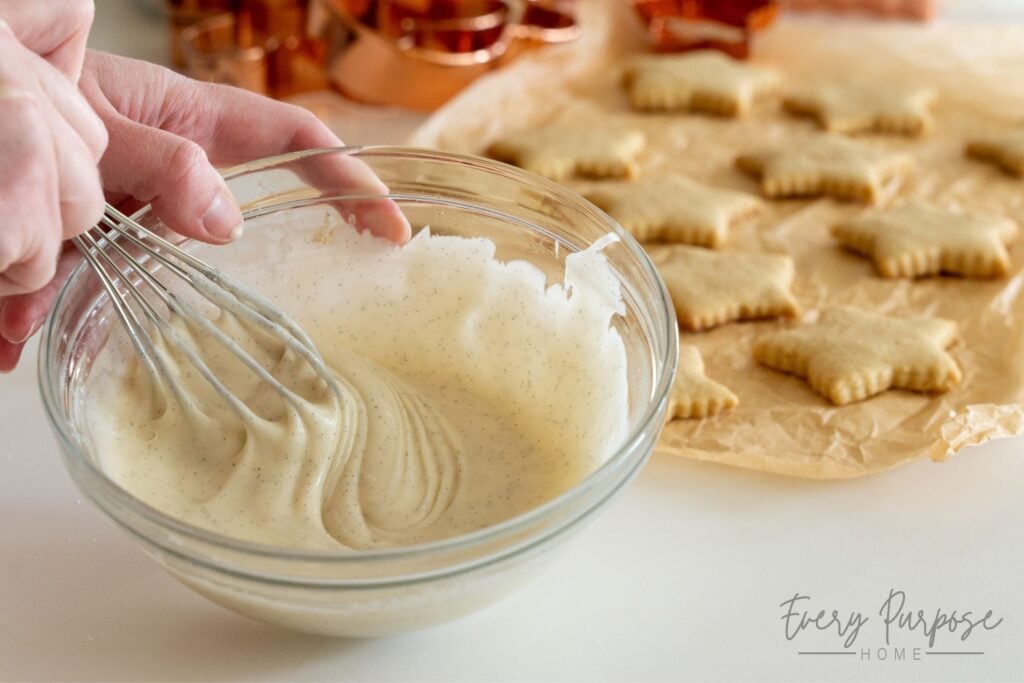
Once the cookies have cooled completely, make the icing. Add the powdered sugar, vanilla bean paste, melted butter, milk, salt, and optional vanilla extract to a medium bowl. Whisk until completely smooth and combined. Then, add food coloring (optional) if using.
Step 2: Check the Consistency
If the icing feels too thick, then add more milk (a teaspoon at a time) until the desired consistency is reached. Or, if it feels too thin, add more powdered sugar (one tablespoon at a time) until it feels thick enough for your liking!
Step 3: Decorate Cookies
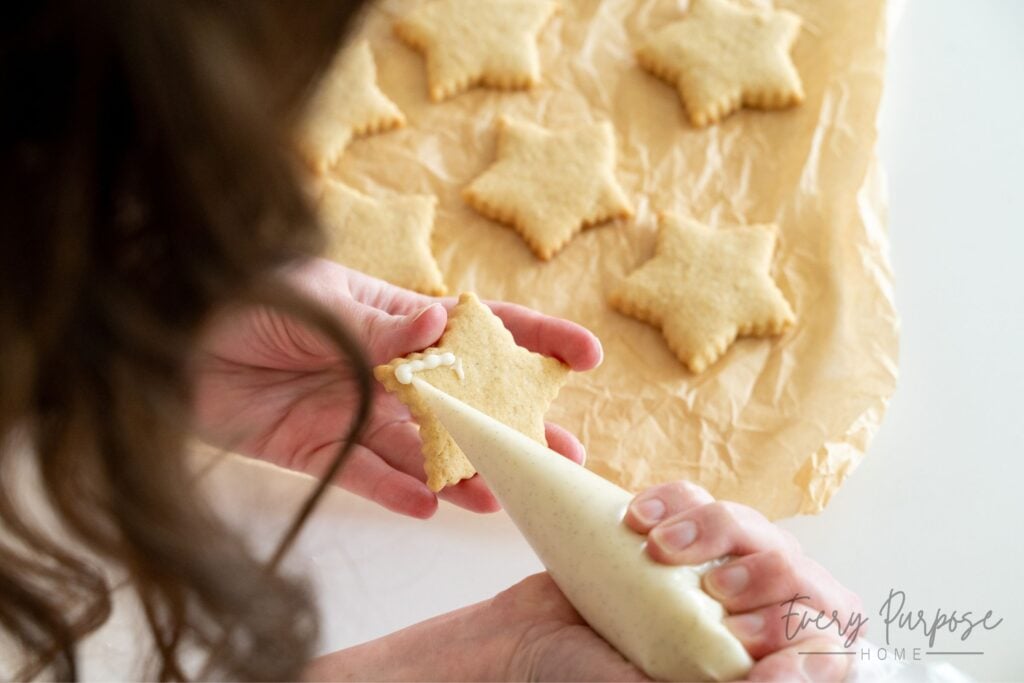
Transfer the vanilla bean cookie icing to a piping bag if desired. Cut the end off and decorate the completely cooled cookies to your liking! This is a soft-set icing that tastes great and has a great texture, but it does take several hours before it sets enough to stack cookies. One batch of icing should cover the top of all cookies, but the size of cookies varies depending on the cutters used and the thickness of the dough. Recipe can be doubled if needed.
Storage Tips
- Storing Uniced Cookies: Store completely cooled cookies in an airtight container for up to 5 days at room temperature. Cookies remain tender for days!
- Storing Iced Cookies: If the cookies are iced, allow the icing to set completely (several hours) before stacking and storing in an airtight container at room temperature for up to 5 days. Cookies remain soft for days!

Why This Recipe Works
I designed these no-chill sourdough cut out sugar cookies with the perfect balance of butter, sugar, starter, and flour so the dough is soft and easy to roll without spreading in the oven. Egg yolks create a rich, tender texture without the cakiness that egg whites can add, while a touch of brown sugar keeps the centers soft. The dough comes together with a play-dough-like consistency that can be rolled and cut immediately, with no cornstarch, cream of tartar, or chill time required!
Vanilla bean paste gives both the cookies and icing a deep vanilla flavor with those beautiful signature flecks. You can use active sourdough starter or discard, and the cookies still bake with slightly golden edges, soft centers, and beautifully defined shapes. Finish them with the rich vanilla bean icing for a sophisticated but approachable cutout cookie that can be decorated for any occasion.

The Sourdough Cookie Lady Tips
- Cut consistently sized shapes. Ensuring that your cookies are all roughly the same size will help with a consistent baking time, where the small ones aren’t getting overdone while the large ones are still baking. If you’re baking in two batches, then try to combine similar-sized shapes together on the same baking sheet so they bake evenly!
- Give the icing plenty of time to set. If you’re making my vanilla bean cookie icing, be sure to allow it to set completely before stacking and storing cookies. It takes several hours to set completely.
- Let the butter become “dent soft.” To keep this a no-chill recipe, the butter should indent easily when pressed but still feel cool and offer some resistance. It should not look melted, shiny, or oily.
- Do not overbake the cookies. Remove them when the edges are set but the centers are still soft and slightly underbaked. They will continue to firm up on the hot baking sheet, giving you those soft and tender centers rather than a crunchy and overbaked texture.
- Use only the egg yolks. Whole eggs add too much moisture and can push the cookies toward a cakey texture. Egg yolks help keep the centers tender and moist.
- Measure the flour and sourdough starter by weight if possible. The balance between flour and the moisture from the sourdough starter makes a big difference in the final texture. Weighing them helps prevent cookies that spread or turn out overly thick and dry.

Frequently Asked Questions
Will these cookies taste sour?
The sourdough discard acts as a flavor enhancer, adding a subtle depth that balances the sweetness of the other ingredients. To ensure the cookies do not taste sour, use starter or discard that has been fed within the last two weeks. Older discard and the long-fermented option (1–3 days in the fridge) may create a more noticeable sourdough tang!
Can I use active starter instead of discard?
Absolutely! Both active starter and sourdough discard work well here. Because the dough is mixed and baked immediately, the starter does not need to be active for leavening. Active starter will generally provide a slightly milder flavor.
Do I have to chill the dough before baking?
This cut out cookie recipe is designed to be quick and easy! This is a no-chill recipe, so you can bake the cookies immediately for a no-wait sourdough treat. However, if you prefer the sharpest edges, feel free to chill the cut dough for 20 minutes before baking, and possibly add 1–2 minutes to the bake time if needed. If you prefer a long-fermentation option with more developed sourdough flavor, refrigerate the dough for up to 3 days. Then, let it sit at room temperature for about 30 minutes before rolling and cutting.

Can I freeze sourdough cookie dough?
Absolutely! For best results, follow one of these options below:
Option 1: Freezing Dough Before Cutting
- Freezing Uncut Dough: To freeze uncut dough, start by making the sourdough cut out sugar cookie dough according to the recipe directions. Shape into a thick disc or rectangular slab and wrap tightly with plastic wrap. Place in an airtight container and freeze until ready to use.
- To Bake: Thaw overnight in the refrigerator. Then let sit at room temperature only until pliable enough to roll, likely 15–30 minutes. Then continue with the steps to roll, cut, and bake as usual.
Option 2: Freezing Cut Cookie Dough Shapes
- Freezing Shapes: To freeze cut dough, start by preparing the dough according to the directions. Roll it out (¼ inch thick) and cut the desired shapes, placing them on parchment-lined baking sheets. The shapes can be close together, but make sure they are not touching. Place in the freezer for about 1 hour, or until they’re firm to the touch. Transfer the frozen shapes to a freezer bag or container, where they can be stored up to 3 months!
- To Bake: There is no need to fully thaw cut shapes. Place them on a cool, parchment-lined baking sheet while the oven preheats, then bake at 350°F. Begin checking them at the regular baking time, but expect frozen cookies to need a few additional minutes of baking time.
Pro Tip: Double the recipe and intentionally freeze an extra batch! This gives you ready-to-bake sourdough sugar cookie dough whenever that sweet tooth hits.

How to Make Long-Fermented Sourdough Cut Out Sugar Cookies
To long-ferment the dough for deeper flavor and a slower fermentation option that some bakers prefer for digestibility, follow these simple directions. Note that a long fermentation may affect the texture and spread of the final cookies.
- Prepare: Follow the recipe directions to make the dough, shaping into a thick disc or rectangular slab.
- Cold Ferment: Wrap the slab tightly with plastic wrap. Refrigerate for 1–3 days. Note: The longer the dough ferments, the more noticeable the sourdough tang may become.
- Bring to Room Temp: Remove the dough from the refrigerator about 30 minutes before baking so that it can soften.
- Roll, Cut, & Bake: Once the dough is soft enough to work with, you can continue with the usual baking directions of rolling the dough out, cutting it, and baking.

Love this recipe? Pin it to your sourdough board and follow The Sourdough Cookie Lady on Pinterest for more!
More From The Sourdough Cookie Lady
No-Chill Sourdough Cut Out Sugar Cookie Recipe:

No-Chill Sourdough Cut Out Sugar Cookies with Vanilla Bean
These no-chill sourdough cut out sugar cookies are soft, buttery, and filled with rich vanilla bean flavor. The easy-to-roll dough holds its shape beautifully in the oven without cornstarch, cream of tartar, or chilling! Finish them with soft-set vanilla bean icing for a sophisticated yet approachable cookie you can make for any season or occasion.
18-24
3-inch cookies20
minutes10
minutes180
kcalKeeps your screen on while viewing recipe
Recommended Equipment
- For Best Accuracy:Digital Kitchen Scale
- For Easy Mixing:Stand Mixer
- For Uniform Thickness:Heavy Rolling Pin
Ingredients
- Sourdough Cut Out Sugar Cookies
¼ cup light brown sugar packed (55g)
½ cup granulated sugar (100g)
½ cup salted butter softened, see softness notes (113g)
¼ cup sourdough starter active or discard, stirred down (75g)
2 large egg yolks (40g)
1 tbsp vanilla bean paste (20g) or sub 1 tbsp vanilla extract, only if needed
½ tsp salt (3g)
2 cups all-purpose flour scooped directly from the bag and leveled off (not spooned and leveled) (316g)
¼ tsp baking soda (1g)
- Vanilla Bean Cookie Icing (Optional)
1½ cups powdered sugar (188g)
2 tsp vanilla bean paste (13g)
1½ tbsp salted butter, melted (21g)
1½—2 tbsp milk (22g—30g)
(Optional) ½ tsp vanilla extract (2g) if needed for flavor, depending on your brand of vanilla bean paste
(Optional) food coloring (or dye-free food coloring)
(Optional) sprinkles of choice
Directions
- For the Cutout Cookies
- Preheat & Prep: Preheat oven to 350°F (175°C). Line two baking sheets with parchment paper.
- Beat Butter & Sugars: In a large bowl or stand mixer fitted with a paddle attachment, beat brown sugar, granulated sugar, and softened butter until combined and uniform. Do not beat until light and fluffy, just until no butter chunks remain.
- Add Wet: Beat in sourdough starter, egg yolks, vanilla bean paste, and salt until smooth and combined, scraping the sides of the bowl as needed.
- Incorporate Dry: Add all-purpose flour, then sprinkle the baking soda evenly over the top. Mix on low speed until the dough begins to combine and form large clumps. Then, turn the mixture out onto a clean, flat surface and knead it briefly with your hands, just until the dough comes together. It should be a play-dough-like consistency.
- Roll: Roll your dough to about ¼ inch thick, which is roughly a 12- to 14-inch square. If needed, you may lightly flour your dough to prevent it from sticking, though this usually isn’t necessary for me.
- Cut & Transfer: Cut the dough into desired shapes, nesting them closely to minimize scraps. Gently press scraps together and reroll without overworking. Transfer to prepared baking sheets, spacing 1 inch apart. Recipe will make approximately 18–24 3-inch cookies. Pro Tip: No chilling is required (I never chill the dough), but you may optionally chill the cut shapes for 20 minutes for the sharpest edges. Chilled cookies may need an additional 1–2 minutes of baking.
- Bake: Bake one sheet at a time, rotating halfway through. Bake 3-inch cookies for 9-11 minutes. For smaller cookies, bake 7–9 minutes, or for larger cookies bake 11–13 minutes. Remove when the edges are barely golden and the centers are still soft.
- Cool on Baking Sheet: Allow the cookies to set on the hot baking sheet for 7 minutes before transferring to a wire rack. Cookies will be delicate while hot and will finish setting as they cool. Allow cookies to cool completely before icing.
- For the Vanilla Bean Icing (Optional)
- Combine: Add powdered sugar, bean paste, melted butter, milk, salt, and optional vanilla extract to a medium bowl. Whisk thoroughly until smooth and combined. Then add food coloring (optional) if desired.
- Check Consistency: If the icing feels too thick, add more milk (1 tsp at a time) until it reaches the desired consistency. If it feels too thin, add more powdered sugar (1 tbsp at a time).
- Decorate Cookies: Transfer the icing to a piping bag, if desired, and decorate completely cooled cookies. Immediately add sprinkles if using. Allow several hours for the soft-set icing to firm before stacking. This amount covers the tops of approximately one batch of cookies, but you can double the icing batch if needed.
Recipe Notes
- • Cookie Cutters: Use any cookie cutters you like. My copper ones are vintage, thrifted, or passed down from my grandma! If I were rebuilding my collection, I would start with this star, a snowman set, this Christmas tree, and I might even try this candlestick shape this year!
• To Store: Allow icing to set completely before stacking and storing. Cookies will stay soft at room temp in an airtight container for up to 5 days!
• To Freeze Uncut Dough: Wrap the dough disc tightly and freeze in an airtight container for up to 3 months. Thaw overnight in the refrigerator, then at room temperature for 15–30 minutes or until pliable. Roll, cut, and bake as directed.
• To Freeze Cut Dough Shapes: Freeze cut shapes on a lined baking sheet for 1 hour. Transfer to an airtight container with parchment between layers and freeze for up to 3 months. Arrange on a cool, lined sheet while the oven preheats, then bake as directed, adding a few minutes if needed.
• Butter: Temperature is key. Use “dent soft” butter (indents easily when pressed but still offers resistance, not room temp). Allow cold butter to sit out for 30–60 mins. If using unsalted butter, add an extra ¼ tsp salt to the dough.
• Flour: Weigh the flour for best accuracy. If measuring by volume, scoop directly from the bag rather than spooning and leveling.
• Sourdough Starter: Active or discard works. For best results, allow cold discard to sit at room temp while your butter softens.
• Long Fermentation: Wrap the dough disc tightly and refrigerate for 1–3 days. Let it sit at room temperature for about 30 minutes or until pliable, then roll, cut, and bake. Longer fermentation may produce more sourdough tang.
Approximate Nutrition Facts
- Total number of serves: 21
- Calories: 180kcal
- Fat: 6g
- Saturated Fat: 4g
- Cholesterol: 34mg
- Sodium: 120mg
- Carbohydrates: 30g
- Fiber: 1g
- Sugar: 17g
- Protein: 2g
Like this recipe?
Follow @everypurposehome on Pinterest for more!