

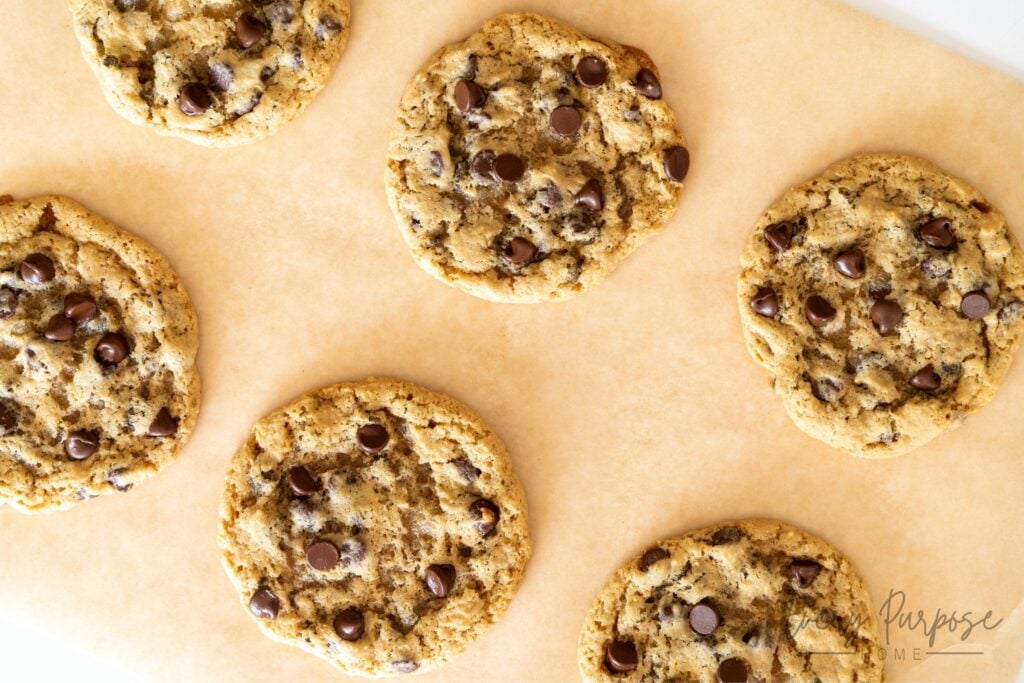
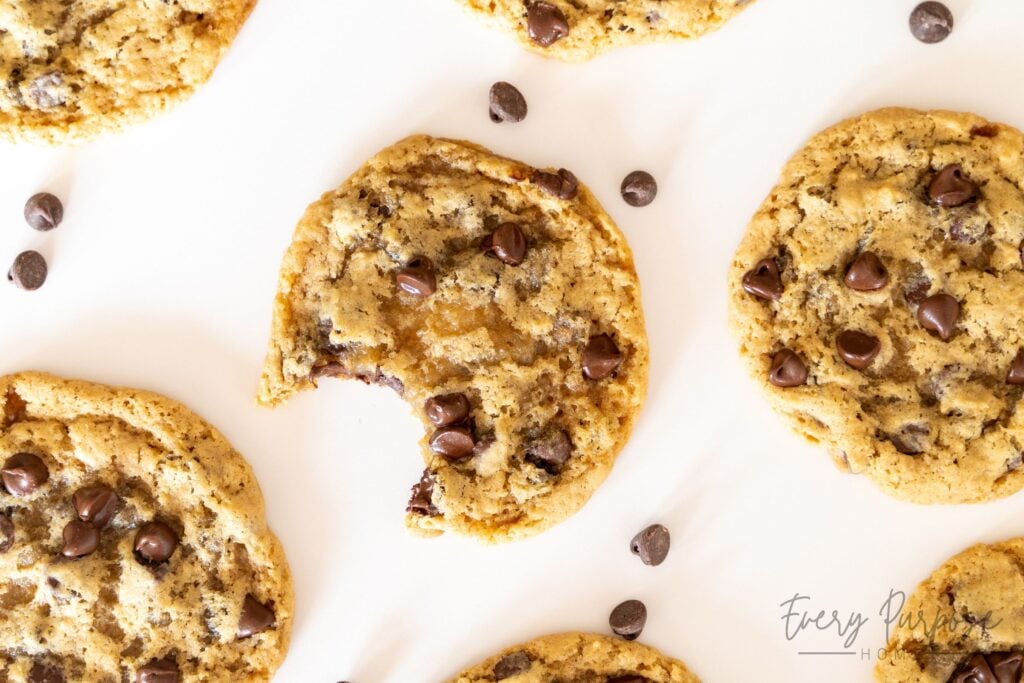
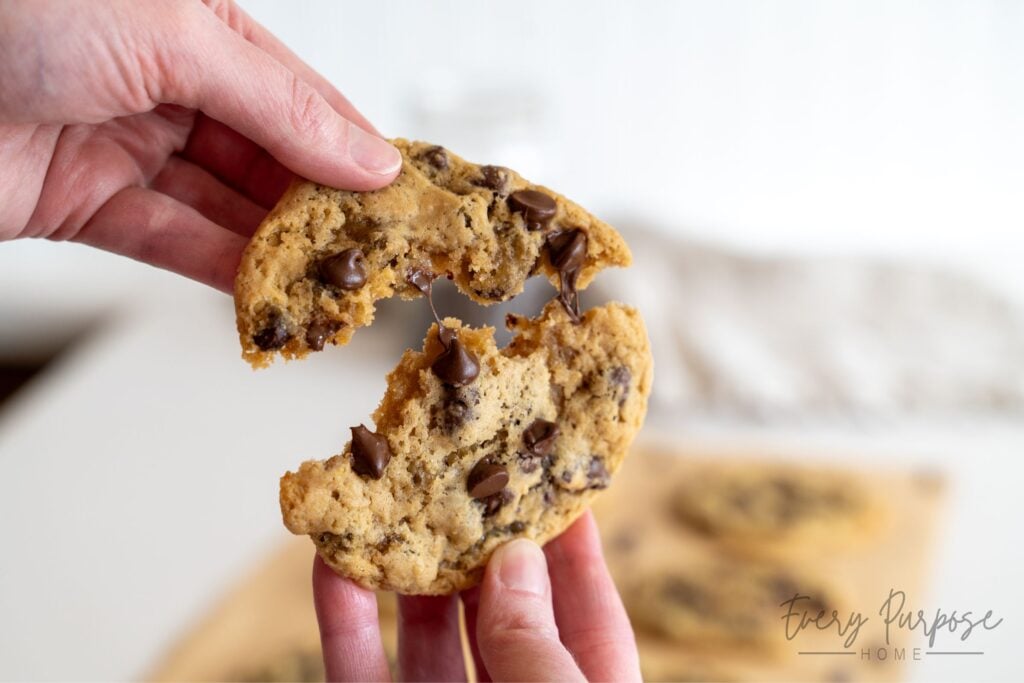
If you’ve been searching for sourdough chocolate chip cookies that are incredibly chewy, fudgy, and bakery-quality, you’ve finally found your home. Rather than thin, crisp, or cakey results, I set out to create the ultimate gooey sourdough cookie that checks every desirable box. As “The Sourdough Cookie Lady” (a former micro-bakery owner turned blogger), I’ve spent countless days in my kitchen perfecting the science of the dense, fudgy bake. This recipe is designed to be foolproof, focusing on achieving that perfect texture without the need for chilling the dough. Whether you use active sourdough starter or discard, or choose an optional long fermentation for improved gut health and a deeper tang, these jumbo cookies are loaded with melty chocolate chips and a signature gooey center that will make your home kitchen feel like a professional bakery.
Essentials for the Perfect Sourdough Cookie
- Digital Kitchen Scale: In my kitchen, a digital scale is a non-negotiable! Measuring by weight is the only foolproof way to ensure accuracy, especially for flour and sourdough starter, which can vary wildly by volume and make or break that signature chewy and gooey texture. I have used this exact digital scale for years and it has never failed me!
- Stand Mixer: A quality stand mixer fitted with a paddle attachment is a game changer for sourdough cookies. It helps combine the thick dough with ease without over-mixing, which is key for a tender, bakery-style crumb!
- Large Cookie Scoop: Most of my sourdough cookie recipes are designed for making jumbo cookies. Using a large cookie scoop (about 3 tablespoons) ensures that you get the bakery-style size with even baking every time!
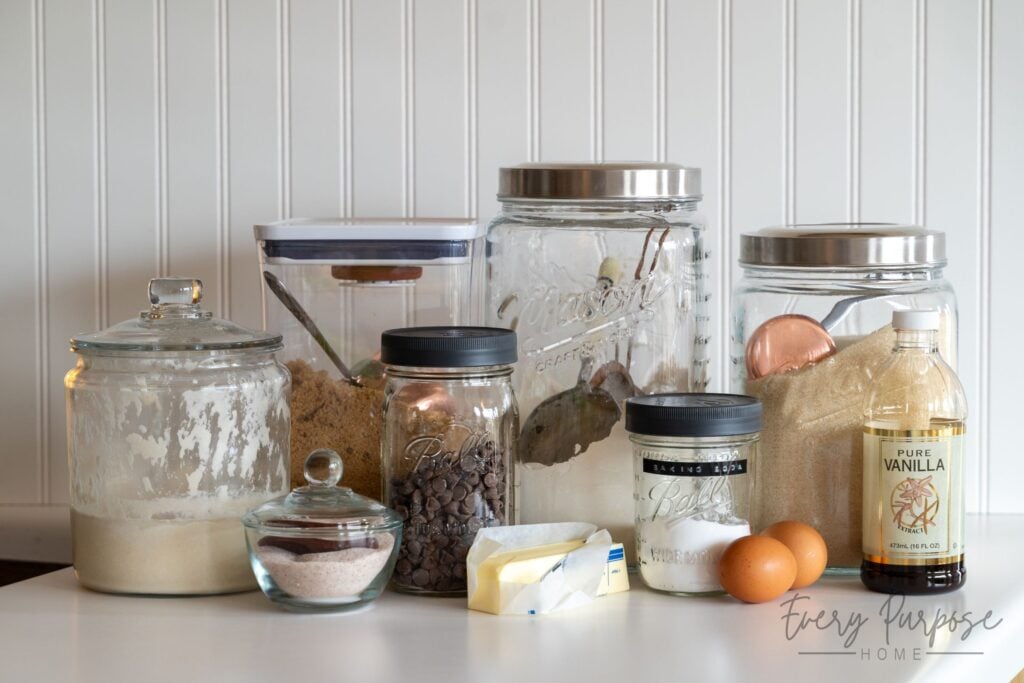
Ingredients
- 1¼ cups light brown sugar, packed (275g): Make sure you pack it tight! The right amount of sugar gives the cookies the perfect amount of spread while keeping them chewy and fudgy in the center.
- 1 tbsp granulated sugar (13g): Including a bit of white sugar helps to balance the moisture from the brown sugar, ensuring the cookies spread just the right amount with an ever-so-slight crisp on the edges.
- ½ cup salted butter, softened (113g): Using “dent soft” butter is my secret to a no-chill dough. The perfect dent soft texture means the butter indents easily when pressed, but still feels cool to the touch and offers some resistance. If your butter is shiny or oily, it’s too warm! Let cold butter sit out for 30–60 minutes depending on the temperature of your home. If using unsalted butter, add an extra ¼ tsp of salt to the recipe.
- ½ cup sourdough starter, active or discard, stirred down (150g): You can use active starter or discard! It can be cold from the fridge or room temperature. The natural acidity in the starter is what reacts with the baking soda to create the perfect cookie texture. Be sure to stir the starter down before measuring by volume. For the best accuracy, measure by weight.
- 2 large egg yolks (40g): Using only yolks is the secret to a rich, dense, and chewy center. While room temperature is ideal for emulsifying, cold yolks work just fine here!
- 2 tsp vanilla extract (10g): Pure vanilla extract is best for a deep, complex flavor profile. It acts as the aromatic backbone that balances the subtle tang of the sourdough.
- ½ tsp salt (3g): I prefer fine sea salt for a clean flavor profile. If using iodized table salt, you may notice a slight metallic aftertaste, and coarse salt may not distribute as evenly in the thick dough.
- 1½ cups all-purpose flour, scooped directly from bag (235g): To get my thick and fudgy cookie, you must scoop directly from the bag so the flour is slightly packed. Avoid the “spoon-and-level” method, as it provides significantly less flour and will cause your cookies to spread too thin. Pro Tip: For the most consistent, bakery-quality results, I highly recommend measuring by weight (235g).
- 1 tsp baking soda (6g): Ensure you are using baking soda, NOT baking powder. They are not interchangeable, and baking powder would negatively affect the final spread and texture of the cookie. Pro Tip: Make sure your baking soda is fresh (ideally opened within the last 6 months) so it reacts perfectly with the sourdough to create the proper lift.
- 1⅓ cup chocolate chips (226g / 8 oz): For this recipe, I love these semi-sweet chocolate chips, but this dough is also fantastic with dark chocolate chunks if you want large pools of dark chocolate! For a fun twist, try a combination of both.
How to Make Gooey Sourdough Chocolate Chip Cookies
Preheat Oven & Prep: Preheat oven to 350°F (175°C). Line a baking sheet with parchment paper.
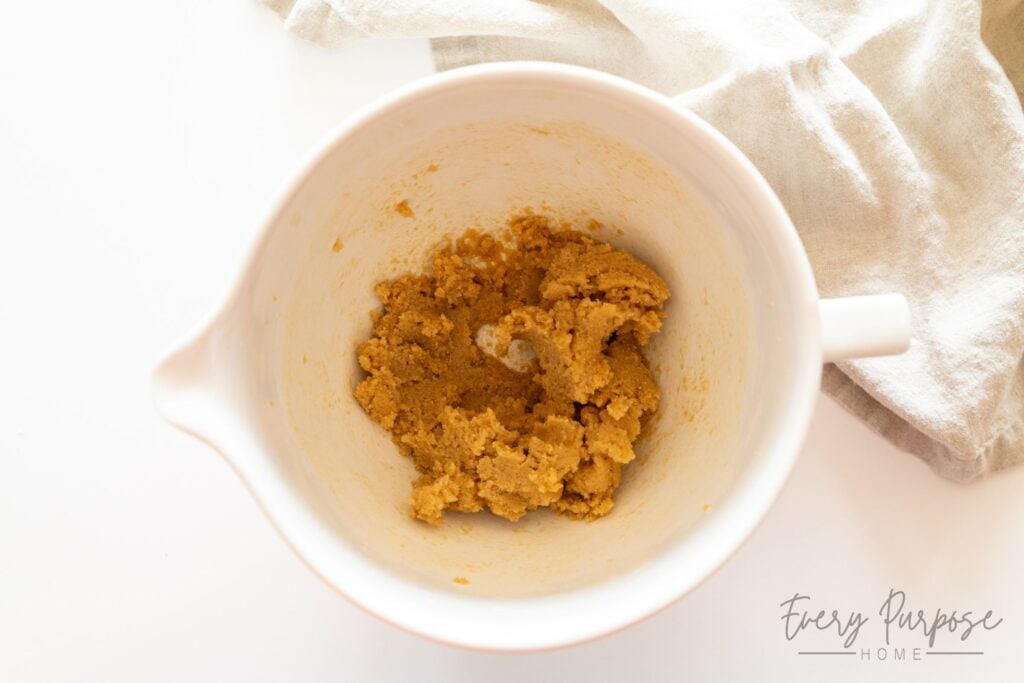
Cream the Butter & Sugar: Start by beating the brown sugar, granulated sugar, and dent-soft butter together. This works best with an electric mixer (either handheld or a stand mixer with paddle attachment). You are looking for more than just a mix here, you want the texture to change. It should look creamy, fluffy, and slightly aerated, beat for 3 full minutes on medium-high speed. If you see chunks of butter, keep mixing!
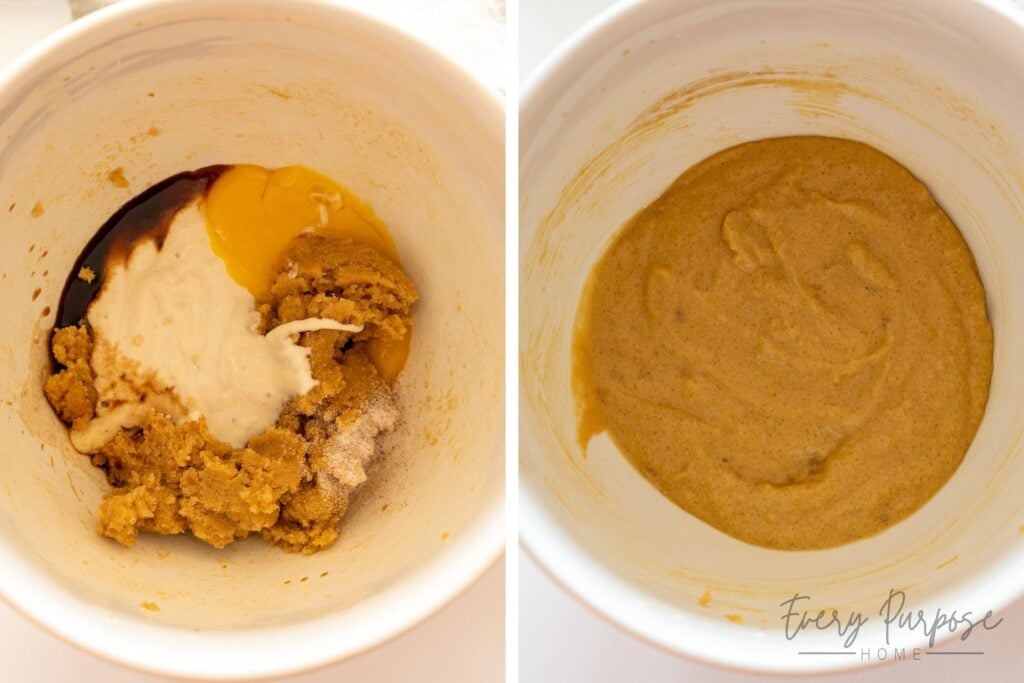
Add the Wet Ingredients: Add your sourdough starter, egg yolks, vanilla extract, and salt. Beat until it becomes smooth and slightly frothy. Make sure to scrape down the sides and very bottom of the bowl with a spatula to ensure the starter is fully incorporated! You should not see any chunks floating around by this point.
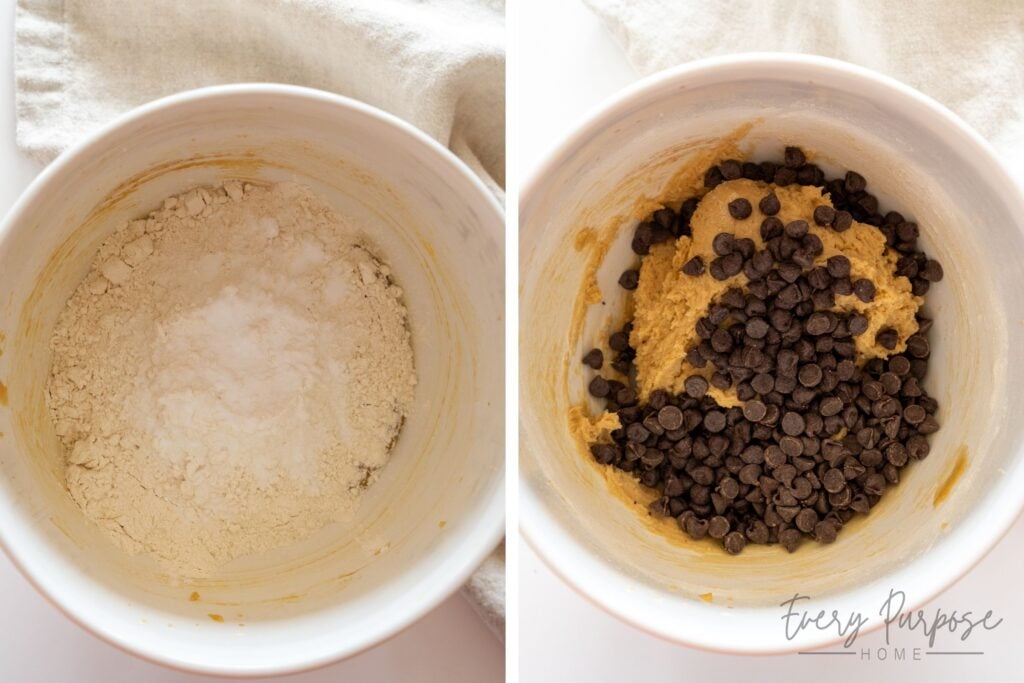
Incorporate the Dry Ingredients: Add your flour and sprinkle the baking soda on top. Turn your mixer to low speed, and stir just until almost all of the dry flour streaks are gone. Critical Step: Stop mixing when you still see a few tiny streaks of flour left. If you over-mix at this stage, you will accidentally over-develop the gluten and your cookies will be tough rather than fudgy and chewy.

Fold in the Chocolate: Use a spatula to scrape down the sides of the bowl. Add the chocolate chips. Then, either use the lowest speed on the mixer for just a couple of rotations, or switch to a spatula to gently fold in the chocolate chips. This ensures that they are evenly distributed without accidentally overworking the dough.
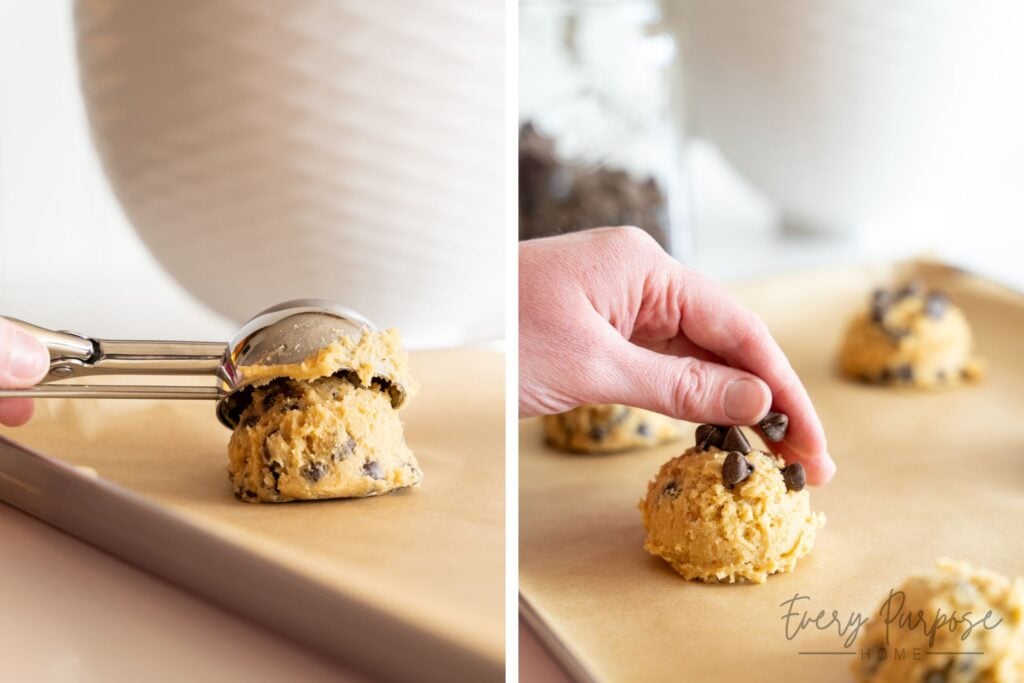
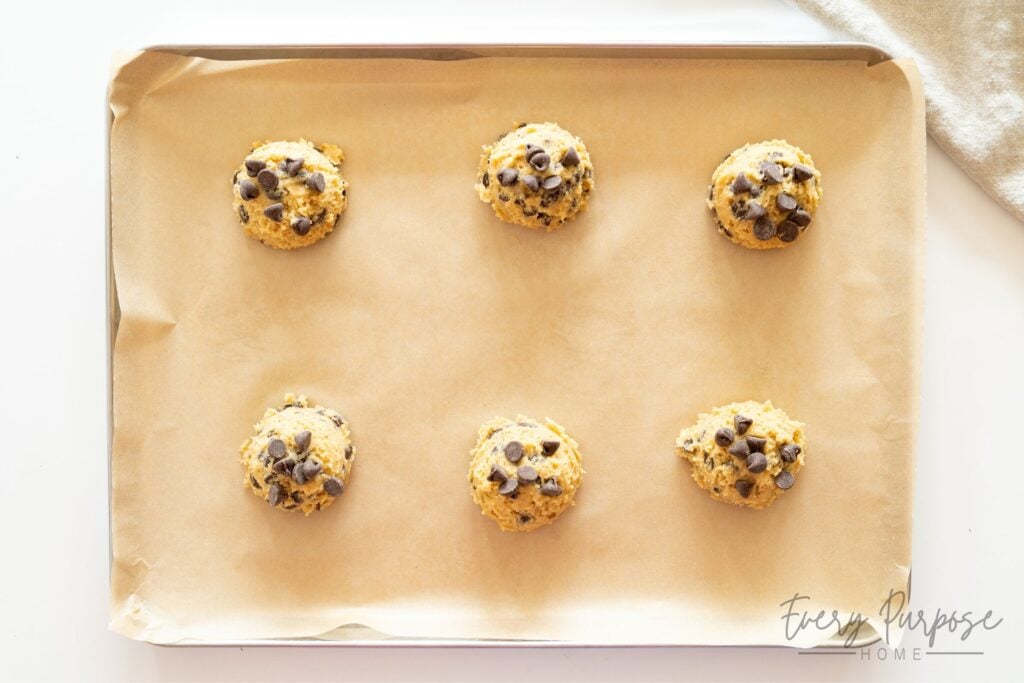
Scoop & Top: Use a large cookie scoop to scoop the dough into large portions (about 3 tbsp or 70g each). Place 6 of the scoops onto the prepared baking sheet, ensuring space between each to allow for spreading. Pro Tip: For that bakery-style look, press a few extra chocolate chips onto the top of each dough ball before baking. This ensures they show up beautifully on top rather than all being hidden inside.
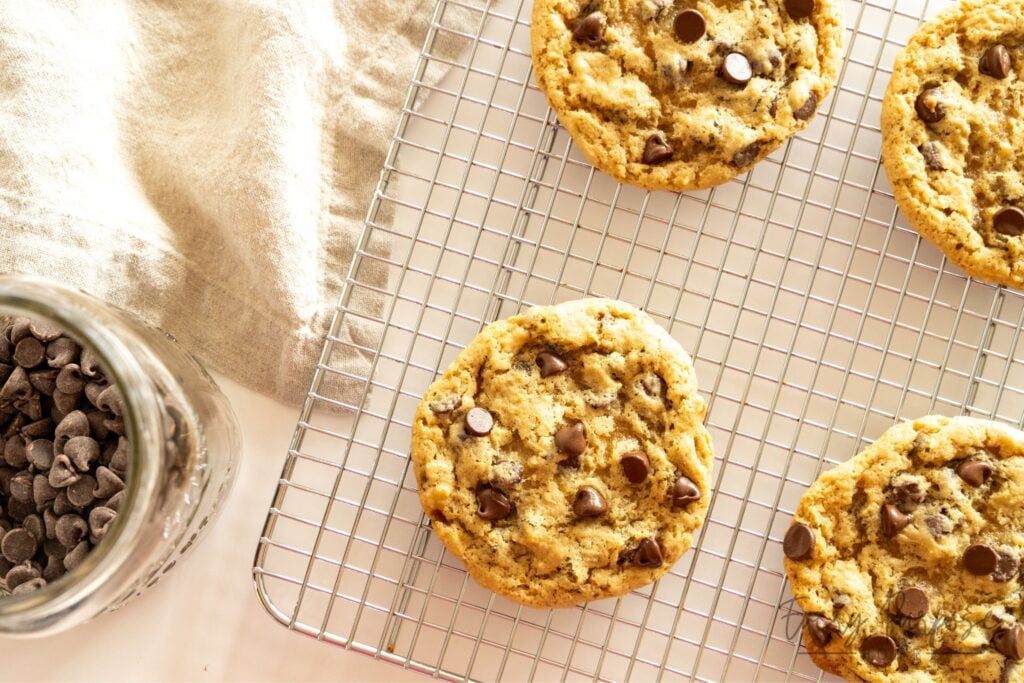
Bake: Bake for 12–15 minutes, rotating the pan halfway through baking. You’ll know they are done when the edges are set and slightly golden, but the centers look soft and slightly under-baked. They’ll continue to set and bake as they cool! Pro Tip: When you remove from the oven, tap the baking sheet against the oven rack a few times to deflate cookies. This will cause them to become denser and therefore more gooey. This recipe makes about 15 cookies total.

Cool On Baking Sheet: Let the cookies sit on the hot baking sheet for right around 7 minutes before transferring them to a cooling rack. This is a crucial step for ensuring that the cookies set up completely (called carry-over cooking!). If you try to move them too soon, they will fall apart.
Storage: Once completely cool, you can store sourdough chocolate chip cookies in an airtight container or bag for up to 5 days at room temperature. Pro Tip: To ensure they stay fresh the longest, place a slice of bread in the container with the cookies. The cookies will absorb moisture from the bread (the bread will become rock hard!), keeping your cookies soft for longer.

Substitutions & Variations
While I designed this recipe specifically to be a fudgy, bakery-style cookie, I know that sometimes you have to work with what’s in your pantry. Here is how to make adjustments with ingredients you already have.
- Brown Sugar: You can swap equal parts dark brown sugar for light brown sugar. Because dark brown sugar contains more molasses, it will result in a deeper toffee flavor and a slightly moister, chewier texture.
- Refined Sugar-Free: If you want to avoid refined sugars, coconut sugar may work well but will result in a slightly crispier, less fudgy cookie due to its lower moisture content.
- Einkorn Flour Swap: Since many in the sourdough community prefer Einkorn flour, you can substitute it here. Use an All-Purpose Einkorn Flour in place of the all purpose flour at a 1:1 ratio by weight (235g). Note that Einkorn absorbs fat differently, so your cookies may spread slightly more. To remedy this, I recommend chilling the dough for 30 minutes if using this ancient grain.
- Using Unsalted Butter: If you only have unsalted butter on hand, simply add an additional ¼ tsp of fine sea salt to the dry ingredients when making the dough.
- Browned Butter Sourdough Cookies: For a gourmet twist, you can make my Brown Butter Sourdough Chocolate Chip Cookies recipe!
- Active vs. Discard Starter: You can use active sourdough starter or discard interchangeably in this recipe. If using active starter, stir it down before measuring by volume to ensure you aren’t measuring air bubbles, though measuring by weight (150g) is always recommended for best results and accuracy.
Creative Mix-In Ideas
For the best bakery-quality cookies, the total volume of mix-ins should stay under 1¾ cups. Going over this limit can cause the cookies to crumble or lose their chewy structure. You may use any combination of the mix-ins below, as long as you stay under that limit!
- Elevated Chocolate Swaps: Instead of semi-sweet chocolate chips, you can swap it for equal amounts of white chocolate or dark chocolate. For those iconic molten pools of chocolate, try hand-chopping high-quality chocolate bars or using large chocolate chunks!
- Adding Nuts: Try adding ½ cup to ¾ cup (approx. 60-85g) chopped nuts of choice. The options include chopped walnuts, hazelnuts, pecans, macadamia nuts, and almonds. Optionally toast the nuts beforehand for a deeper flavor. If adding mix-ins like nuts, decrease the chocolate to about 1 cup of chocolate chips (6oz).
- A Toffee Twist: Try adding about ½ cup (80g) of toffee bits. If adding mix-ins like toffee bits, decrease the chocolate to about 1 cup of chocolate chips (6oz). Consider swapping the semi-sweet chocolate for dark chocolate to complement the sweetness of the toffee.
- Dried Fruit Pairing: Add about ½ cup (approx. 75g) of dried fruit, such as dried cherries or cranberries. You do not necessarily need to decrease the chocolate chips for this amount, as dried fruit is less bulky than nuts. This pairing is excellent for long-fermented dough, as the fruit hydrates slightly during the 1–3 day rest.
- Sweet n’ Salty Crunch: Try adding ½ cup of crushed pretzels to the dough. Be sure to decrease the chocolate to about 1 cup of chocolate chips (6oz), so the dough does not have too many mix-ins.
Troubleshooting FAQ
- Why are my cookies cakey instead of fudgy? This usually happens if the flour was measured incorrectly by volume instead of weight, resulting in the wrong flour-to-fat ratio. This can also happen if the butter and sugar were over-creamed, introducing too much air into the dough. For that thick, chewy profile, stick to the 235g weight for flour and the “dent soft” butter rule.
- Why did my cookies spread into a puddle? The most common culprit is butter that was too warm (oily/melty) or a sourdough starter that was too thin/watery. Always ensure your butter is cool to the touch and offers resistance when pressed. If you accidentally get the butter too warm, simply allow it to firm back up to “dent soft” before making the dough, or chill scooped dough for 30 minutes before baking.
- Can I make the dough ahead of time? Yes! In fact, I recommend a long fermentation of 24–72 hours in the fridge to deepen the flavor and improve digestibility. Just remember to let the dough sit at room temperature for 1 hour before baking so it reaches the proper consistency.

Can I freeze sourdough cookie dough?
Absolutely! For best results, follow this flash-freezing method:
- Scoop: Portion dough into large balls (3 tbsp or 70g each) and place them on a parchment-lined baking sheet. They can be close together but not touching.
- Flash-Freeze: Place the sheet in the freezer for about 1 hour, or until the dough balls are firm to the touch.
- Store: Transfer dough balls into a heavy-duty gallon freezer bag. Pro Tip: Squeeze out as much air as possible before sealing to prevent freezer burn. Label the bag with the date and baking temperature (350°F / 175°C). These will stay fresh for up to 2-3 months!
The Sourdough Cookie Lady Tip: I always double the recipe to intentionally freeze an extra batch! Having ready-to-bake dough means you can have a fresh, bakery-quality cookie whenever the craving hits, without the mess. You can even bake just a few at a time for a quick, no-prep dessert!
Tips to Bake Sourdough Cookies From Frozen:
- The Thaw Method (Recommended): For the chewiest texture, allow the dough to sit at room temperature for 30-60 minutes before baking. This allows the dough to spread properly when baking, resulting in a texture identical to a fresh batch.
- Directly from Freezer: Add 2-4 minutes to the standard 12-15 minute baking time. Watch for the edges to be set while the center remains soft and slightly under-baked, to ensure they stay fudgy.
- Don’t Forget the Tap: Even with frozen dough, remember to tap the pan against the oven rack immediately after baking to achieve the signature chewy center!

How to Make Long-Fermented Sourdough Chocolate Chip Cookies
To long-ferment the dough for more flavor, gut health, and nutritional benefits, follow these simple directions:
- Prepare: Follow the recipe directions to make the dough.
- Ferment: Cover the bowl with plastic wrap, or transfer to an airtight container. Refrigerate for 24-72 hours. Note: While the health benefits increase after day one, the lactic acid bacteria will continue to develop, intensifying the sourdough tang.
- Bake: The temperature of the dough when it hits the oven is the single biggest factor in your final cookie texture.
- For My Signature Chewy Gooey Cookies (Recommended): Remove the dough from the fridge about 1 hour before baking to let it reach room temperature. This ensures the cookies spread properly, yielding a fudgy, dense interior identical to a fresh batch.
- For Puffy, Cake-Like Cookies: If you’re in a pinch, you may bake the dough straight from the fridge. If you skip the room temperature step, the cold fats will resist spreading, resulting in a thicker, cakey consistency.

Love this recipe? Pin it to your sourdough board and follow The Sourdough Cookie Lady on Pinterest for more!
More From The Sourdough Cookie Lady


Sourdough Chocolate Chip Cookie Recipe:
Sourdough Chocolate Chip Cookies (No Chill!)
15
jumbo cookies10
minutes15
minutes285
kcalThese are genuinely the chewiest, gooiest, fudgiest sourdough chocolate chip cookies you will ever make! Developed by The Sourdough Cookie Lady (a former micro-bakery owner), this recipe is specifically crafted for a dense, bakery-quality result without the need for chilling the dough. Even those who don’t care about sourdough call these “the best chocolate chip cookies I’ve ever had”! Thick, decadent, and foolproof. Make them once and you’ll be hooked!
Keeps your screen on while viewing recipe
Recommended Equipment
- For Best AccuracyDigital Kitchen Scale
- For Easy MixingStand Mixer
- For Uniform CookiesLarge Cookie Scoop
Ingredients
1¼ cups light brown sugar tightly packed (275g)
1 tbsp granulated sugar (13g)
½ cup salted butter softened (113g)
½ cup sourdough starter active or discard, stirred down (150g)
2 large egg yolks (40g)
2 tsp vanilla extract (10g)
½ tsp salt (3g)
1½ cups all-purpose flour scooped directly from bag (not spooned and leveled) (235g)
1 tsp baking soda (6g)
1⅓ cup chocolate chips (226g / 8 oz)
Directions
- Preheat & Prep: Preheat oven to 350°F (175°C). Line baking sheet with parchment paper.
- Cream Butter & Sugar: In a large bowl or stand mixer with paddle attachment, beat brown sugar, granulated sugar, and softened butter. Beat for about 3 full minutes on medium-high speed, until pale, fluffy, and aerated.
- Add Wet: Beat in sourdough starter, egg yolks, vanilla extract, and salt until smooth and slightly frothy. Scrape the sides of the bowl to ensure everything is incorporated.
- Incorporate Dry: Add all-purpose flour and sprinkle baking soda on top. Mix on low speed just until almost no dry flour streaks remain. Do not over-mix.
- Fold in Chocolate: Gently fold in chocolate chips until evenly distributed.
- Scoop & Top: Scoop the dough into large portions using a large cookie scoop (3 tbsp / 70g each). Place 6 scoops onto the prepared baking sheet, ensuring even spacing. Pro Tip: For bakery-style cookies, press a few extra chocolate chips onto the top of each scoop before baking. Recipe makes 15 total cookies.
- Bake: Bake for 12–15 minutes, rotating the pan halfway through baking. The edges should be set and slightly golden, but centers should look soft and slightly under-baked. Cookies will firm up as they cool. Pro Tip: When you remove from the oven, tap the baking sheet against the oven rack a few times to deflate cookies. This will cause them to become denser and therefore more gooey.
- Cool: Allow to cool on the baking sheet for 7 minutes to finish setting up before transferring to a wire rack.
Recipe Notes
- • Measuring Flour: For best results, measure flour by weight. If measuring by volume, I designed this recipe to scoop directly from the bag so that it’s slightly packed, and avoid the tedious spoon-and-level method. The right amount of flour ensures a thick and gooey cookie rather than a thin one.
• Butter: Temperature is key. Use “dent soft” butter. It should indent easily when pressed but still feel cool and offer resistance (not room temp). Allow cold butter to sit out for 30-60 mins. If using unsalted butter, add an extra ¼ tsp salt to the dough. Looking for a brown butter cookie? Try my Brown Butter Sourdough Chocolate Chip Cookie recipe!
• Sourdough Starter: Active starter or discard works. For ease, I usually use cold discard straight from the fridge.
• Long Fermentation (Optional): For enhanced flavor and gut-health benefits, cover and refrigerate dough for 1-3 days. Crucial: Allow dough to come to room temperature (about 1 hour) before baking for the best chewy texture.
• Storage: Cookies will keep at room temp in an airtight container for up to 5 days. Pro Tip: Add a slice of bread to the container to keep cookies soft for longer.
• Freezing: Freeze dough scoops in an airtight freezer bag for up to 3 months. Bake from frozen (add 2-4 mins to bake time), or for chewier cookies, thaw at room temperature for 30-60 minutes before baking.
Approximate Nutrition Facts
- Total number of serves: 15
- Calories: 285kcal
- Fat: 11g
- Saturated Fat: 7g
- Sodium: 185mg
- Carbohydrates: 44g
- Fiber: 1g
- Sugar: 30g
- Protein: 3g
Like this recipe?
Follow @everypurposehome on Pinterest for more!

)
So yummy! I always love a good chocolate chip cookie recipe and the sourdough makes these even better!
Yum!! Sourdough cookies are the best!!
Amazing!!! I love a chewy cookie!