
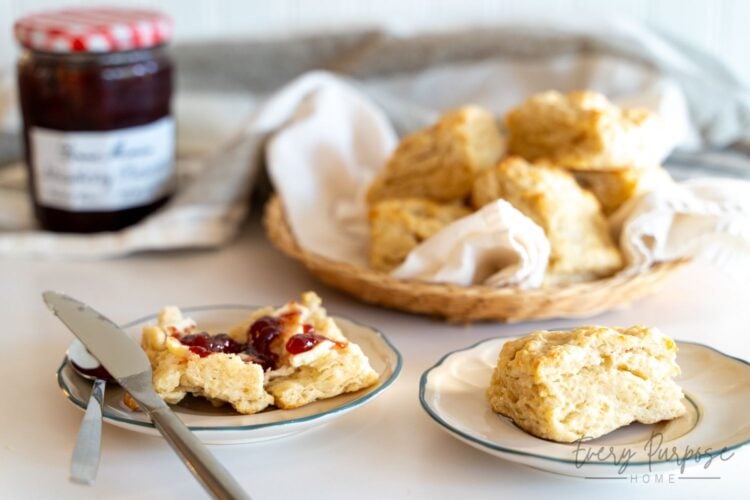
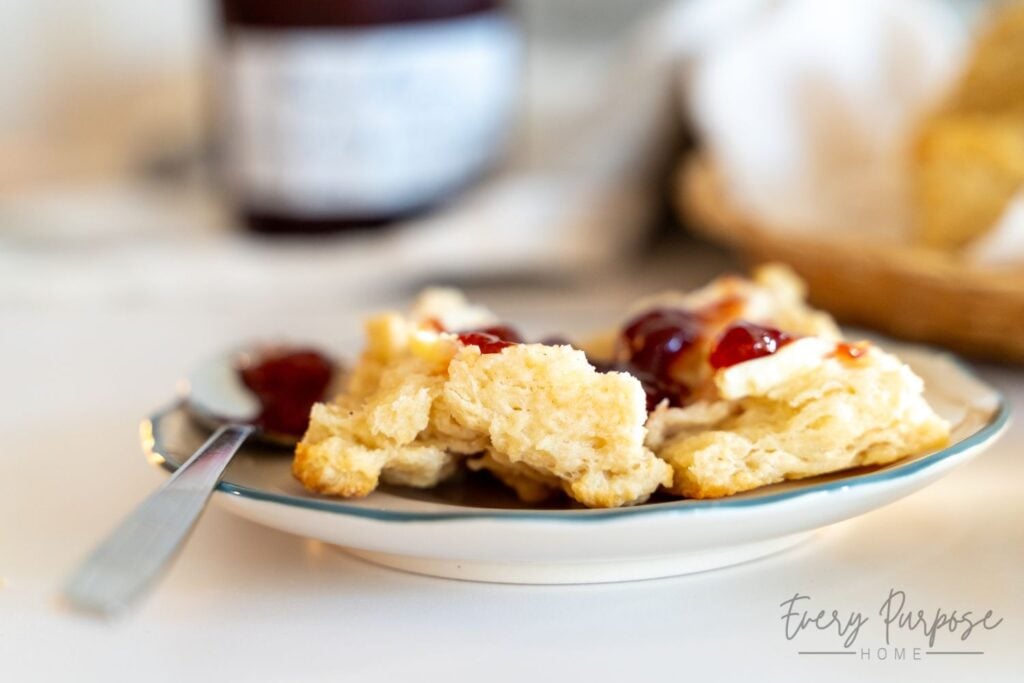
You might be like me and love a classic breakfast, but also have a need to focus on protein intake! I wanted a way to make the healthiest protein biscuits with no protein powder and no artificial ingredients, but it needed to taste just like regular biscuits. This is why I developed the best, secretly healthy, no fuss, twenty minute high protein biscuits recipe! Whether they’re topped with butter and jam, placed on the side with sausage gravy, or simply eaten straight from the oven, these are sure to impress you and your family! You’ll never go back to regular biscuits again.

Supplies Needed
- Measuring cups and spoons
- Medium bowl
- Butter cutter
- Spatula
- Dough cutter/bench scraper
- Baking sheet and parchment paper
- Cooling rack

Ingredients
- 2 cups all-purpose flour (320g)
- 1 tbsp. granulated sugar (12g)
- 1 tbsp. baking powder (14g)
- 1 tsp. salt (6g)
- 6 tbsp. butter, cold (85g)
- 1 cup plain Greek yogurt (your choice of whole milk, reduced fat, or non-fat) (250g)
- 2 tbsp. water (30g)
- 1 tbsp. milk (for brushing tops) (15g)

Directions
- Preheat the oven to 425 degrees.
- In a medium bowl, combine flour, sugar, baking powder, and salt. Add butter, and use a butter cutter or forks to cut the butter in until it becomes crumbly. Add yogurt and water, and combine into a dough (easiest to do by hand). It will be thick, dry, and somewhat crumbly.
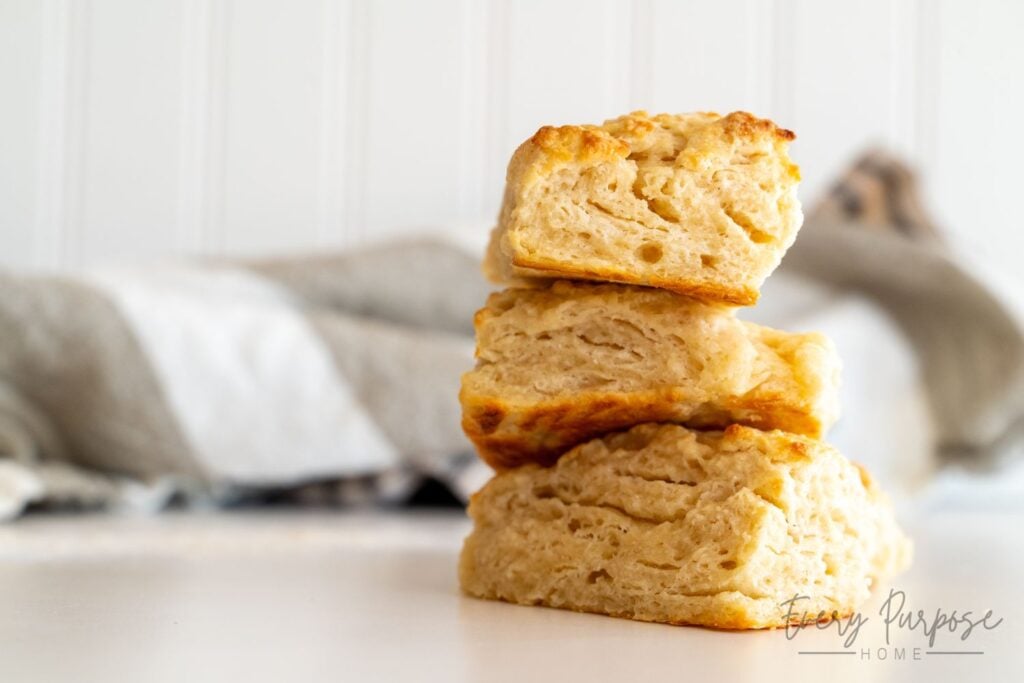
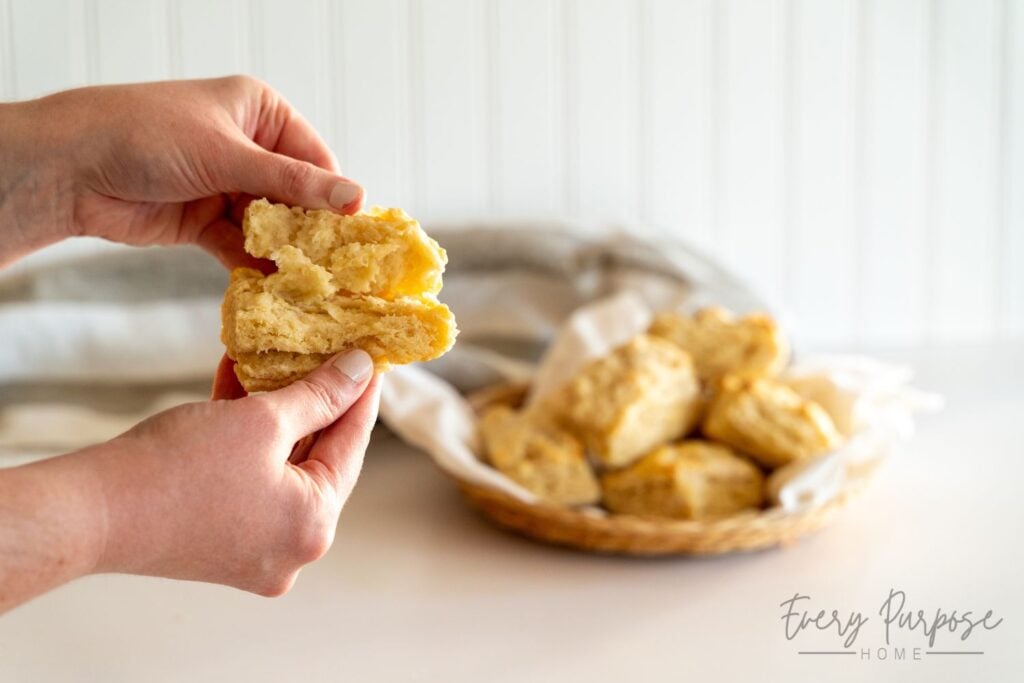
- Turn dough out onto a clean surface, and pat it out flat with your hands (no rolling pin needed). Fold the dough in half and pat out, turn ninety degrees, and fold again, patting it out. Repeat this a few times so that it creates layers in the dough for the fluffiest flakiest layered biscuits.
- Pat dough out into a rectangle shape, and then cut into 8 equal pieces. If you want the tallest biscuits, you may optionally trim the sides of the rectangle off first so that it creates a clean cut on all sides for the layers to open up the most. I prefer the ease of square/rectangle biscuits, but you can use a round biscuit cutter if you’d like to make round biscuits.
- Place all eight protein biscuits onto a parchment-lined baking sheet. Brush the top of each biscuit with milk.
- Bake in preheated oven for 14-18 minutes, or until the edges begin to turn lightly golden brown. Enjoy!
How to Store Protein Biscuits
These protein biscuits can be stored at room temperature for about 4-5 days! Refrigerating them may extend the shelf life by a day or two, but it may affect the texture of the biscuits. For long-term storage, it’s best to freeze biscuit dough and then bake from frozen (directions below).
Can you freeze high protein biscuits?
Absolutely! The best way to freeze protein biscuits is to fully prepare and cut the dough, and then freeze on a lined baking sheet before transferring to a freezer bag for storage. To bake from frozen, brush the tops with milk and bake at 425 degrees F for 16-20 minutes until golden brown!
You may also freeze fully cooked biscuits! Just be sure they cool completely before freezing. Baking from frozen dough is preferable though for texture’s sake.
Substitutions
- You can swap whole wheat flour in for the all-purpose flour in the recipe! If you use whole wheat or freshly-milled flour, you may need to increase the water called for. Simply add additional water, 1 tbsp. at a time, until the consistency reaches the best dough texture.
- You can swap equal parts honey, maple syrup, or brown sugar for the granulated sugar if desired.
- You may brush the tops of the biscuits with melted butter rather than the milk if you prefer!
- You can use any dairy or non-dairy Greek yogurt you have, though plain non-fat Greek yogurt is my yogurt of choice.

Protein Biscuits (No Protein Powder!)
8
servings10
minutes18
minutes230
kcalThese delicious, secretly healthy, no fuss, high protein biscuits can be ready in under 30 minutes, and are made with only real food ingredients (no protein powder needed)! They contain 8g protein per biscuit! You can double the recipe to make 16 biscuits if desired.
Keeps your screen on while viewing recipe
Ingredients
2 cups all-purpose flour (320g)
1 tbsp. granulated sugar (12g)
1 tbsp. baking powder (14g)
1 tsp. salt (6g)
6 tbsp. butter, cold (85g)
1 cup plain Greek yogurt (your choice of whole milk, reduced fat, or non-fat) (250g)
2 tbsp. water (30g)
1 tbsp. milk (for brushing tops) (15g)
Directions
- Preheat the oven to 425 degrees.
- In a medium bowl, combine flour, sugar, baking powder, and salt. Add butter, and use a butter cutter or forks to cut the butter in until it becomes crumbly. Add yogurt and water, and combine into a dough (easiest to do by hand). It will be thick, dry, and somewhat crumbly.
- Turn dough out onto a clean surface, and pat it out flat with your hands (no rolling pin needed). Fold the dough in half and pat out, turn ninety degrees, and fold again, patting it out. Repeat this a few times so that it creates layers in the dough for the fluffiest flakiest layered biscuits.
- Pat dough out into a rectangle shape, and then cut into 8 equal pieces. If you want the tallest biscuits, you may optionally trim the sides of the rectangle off first so that it creates a clean cut on all sides for the layers to open up the most. I prefer the ease of square/rectangle biscuits, but you can use a round biscuit cutter if you’d like to make round biscuits.
- Place all eight protein biscuits onto a parchment-lined baking sheet. Brush the top of each biscuit with milk.
- Bake in preheated oven for 14-18 minutes, or until the edges begin to turn lightly golden brown. Enjoy!
Recipe Notes
- Approximate Nutritional Summary (per biscuit): 230 calories, 8g protein, 9g fats, 32g carbs, 495mg sodium
- Substitutions: See list of substitutions above.
- Storage: These protein biscuits can be stored at room temperature for about 4-5 days
- To freeze: The best way to freeze protein biscuits is to fully prepare and cut the dough, and then freeze on a lined baking sheet before transferring to a freezer bag for storage. To bake from frozen, brush the tops with milk right before baking and add a couple of minutes to the baking time.
- Optional: If you would like to add protein powder, you may add it to the flour before continuing with the recipe.
Like this recipe?
Follow @everypurposehome on Pinterest for more!

)