
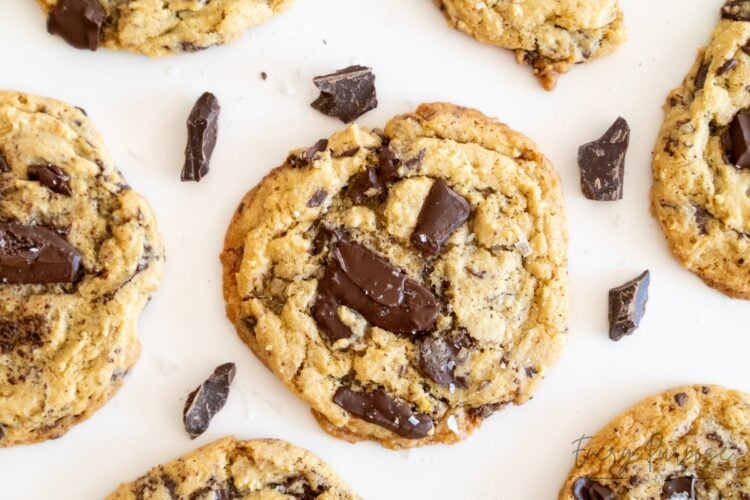
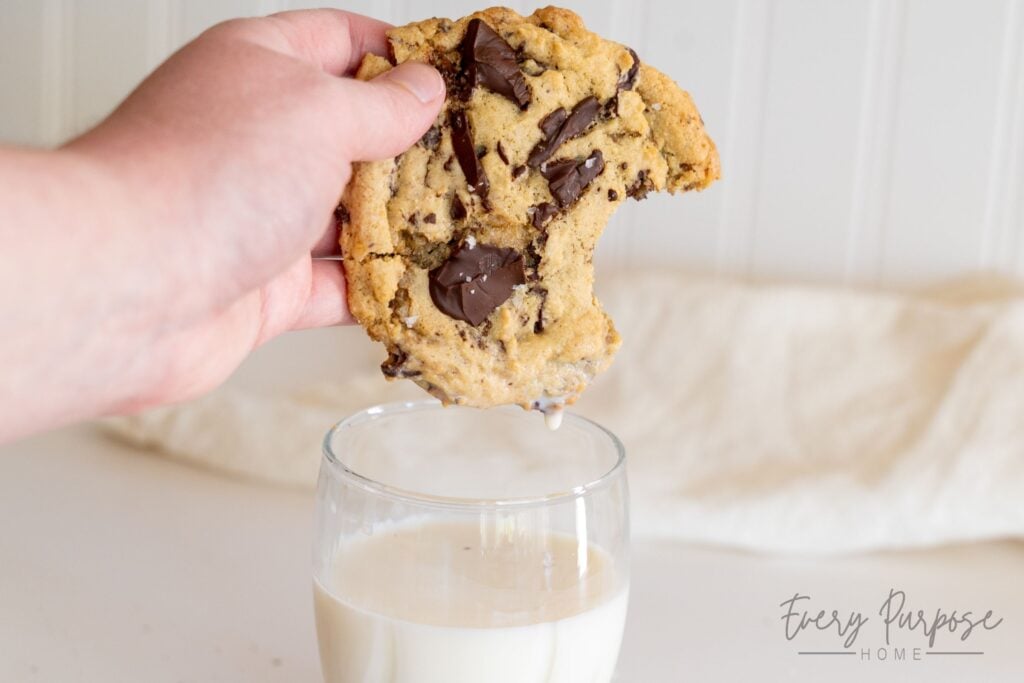
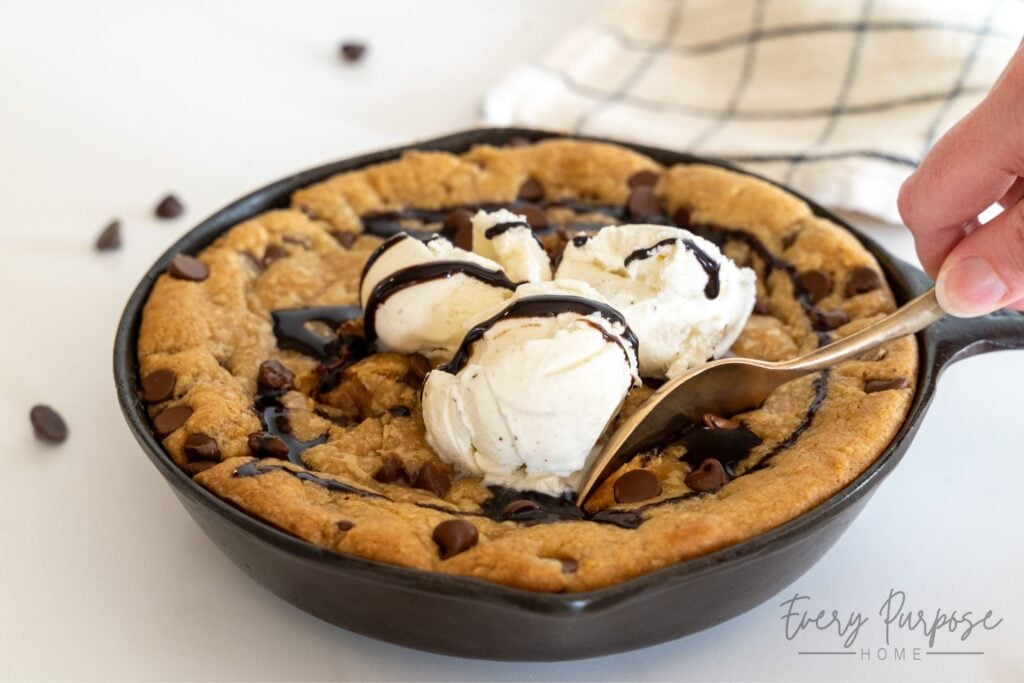
There is something truly transformative about the aroma of brown butter swirling through your kitchen! These Brown Butter Sourdough Chocolate Chip Cookies capture the flavor and aroma of perfectly browned butter, paired with molten pools of chocolate and crunchy sea salt. By utilizing the natural acidity of a sourdough starter, the flavors are heightened far beyond a standard cookie, resulting in a chewy and gooey crumb that feels both nostalgic and professional. It’s the kind of recipe that turns a simple afternoon into a treat, with ingredients already in your own kitchen!
Essentials for the Perfect Sourdough Cookie
- Digital Kitchen Scale: In my kitchen, a digital scale is a non-negotiable! Measuring by weight is the only foolproof way to ensure accuracy, especially for flour and sourdough starter, which can vary wildly by volume and make or break that signature chewy and gooey texture. I have used this exact digital scale for years and it has never failed me!
- Stand Mixer: A quality stand mixer fitted with a paddle attachment is a game changer for sourdough cookies. It helps combine the stiff dough with ease without over-mixing, which is key for a tender, bakery-style crumb!
- Large Cookie Scoop: Most of my sourdough cookie recipes are designed for making jumbo cookies. Using a large cookie scoop (about 3 tablespoons) ensures that you get the bakery-style size with even baking every time!
Ingredients
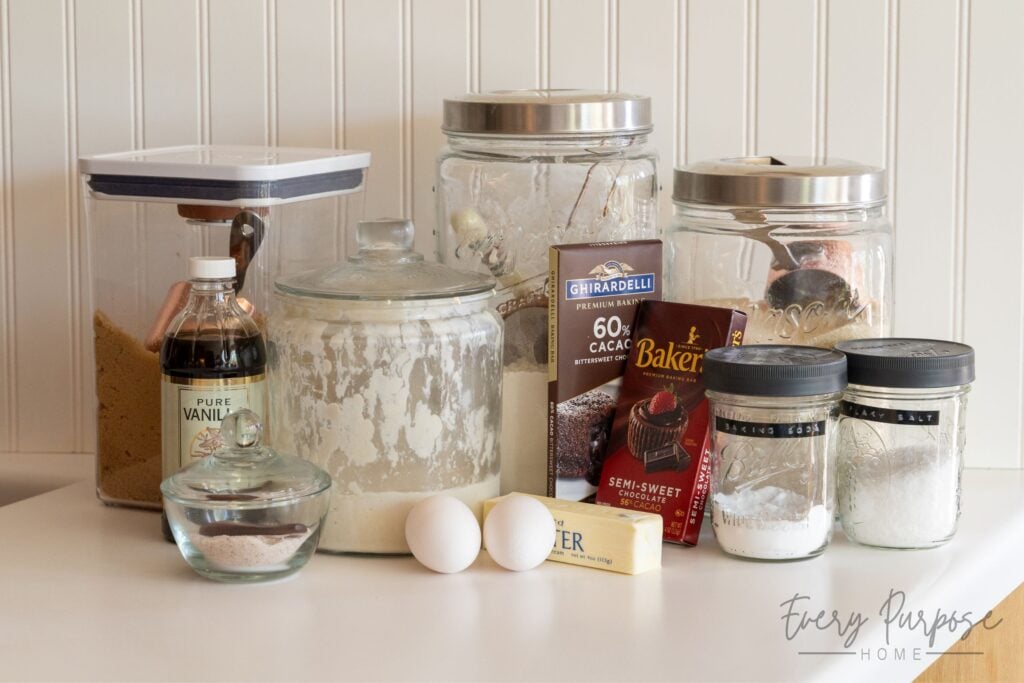
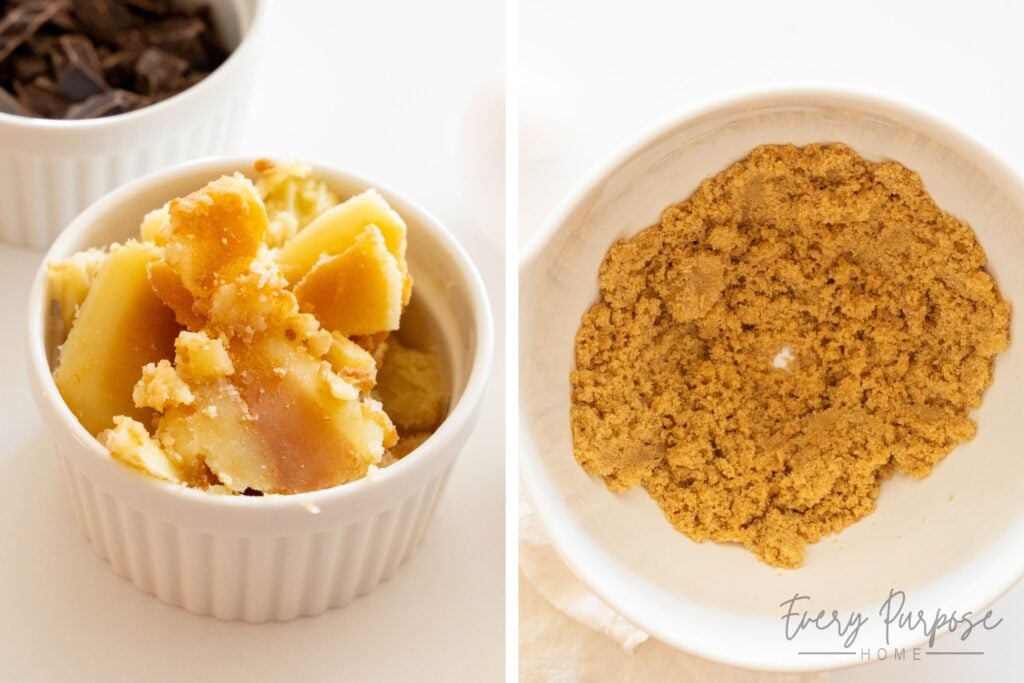
- ½ cup salted butter (113g): We will be browning the butter to give it beautiful nutty caramel notes! After browning the butter, we will chill it back to “dent soft”, meaning it should indent with resistance when pressed, remaining cool to the touch and not shiny or oily. This usually takes 30–60 minutes at room temperature. To use unsalted butter, add ¼ tsp additional salt.
- 1¼ cups light brown sugar, packed (275g): Pack it tight for the best chew and a perfect spread!
- 1 tbsp granulated sugar (13g): Balances moisture for slightly crisp edges while maintaining the chewy center.
- ½ cup sourdough starter, active or discard, stirred down (150g): Active or discard starter works! Stir it down well before measuring by volume. For best accuracy, measure by weight.
- 2 large egg yolks (40g): Yolks only (skipping the egg white) give the cookies a gooey, dense center that is never cakey.
- 2 tsp vanilla extract (10g): Pure vanilla extract provides the cleanest, best flavor.
- ½ tsp salt (3g): Sea salt is preferred over iodized salt for a cleaner flavor profile.
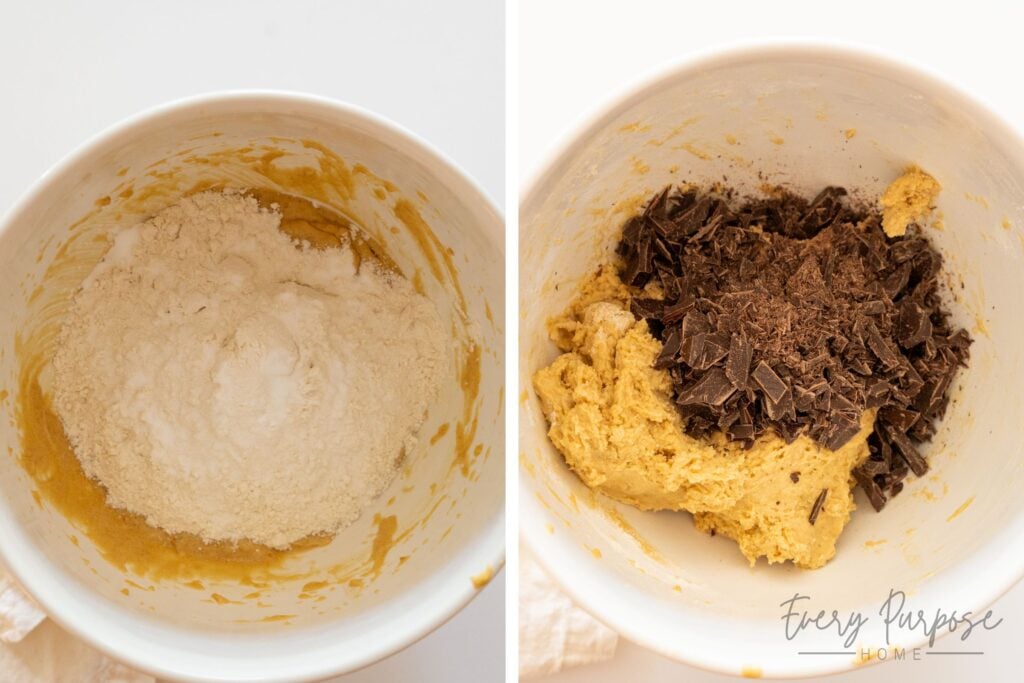
- 1½ cups all-purpose flour, scooped directly from bag (235g): I designed this volume measurement to be scooped directly out of the bag (not sifted or spooned and leveled). Pro Tip: For the best accuracy and overall cookie texture, measure flour by weight.
- 1 tsp baking soda (6g): Ensure you are using baking soda, not baking powder. They’re not interchangeable here.
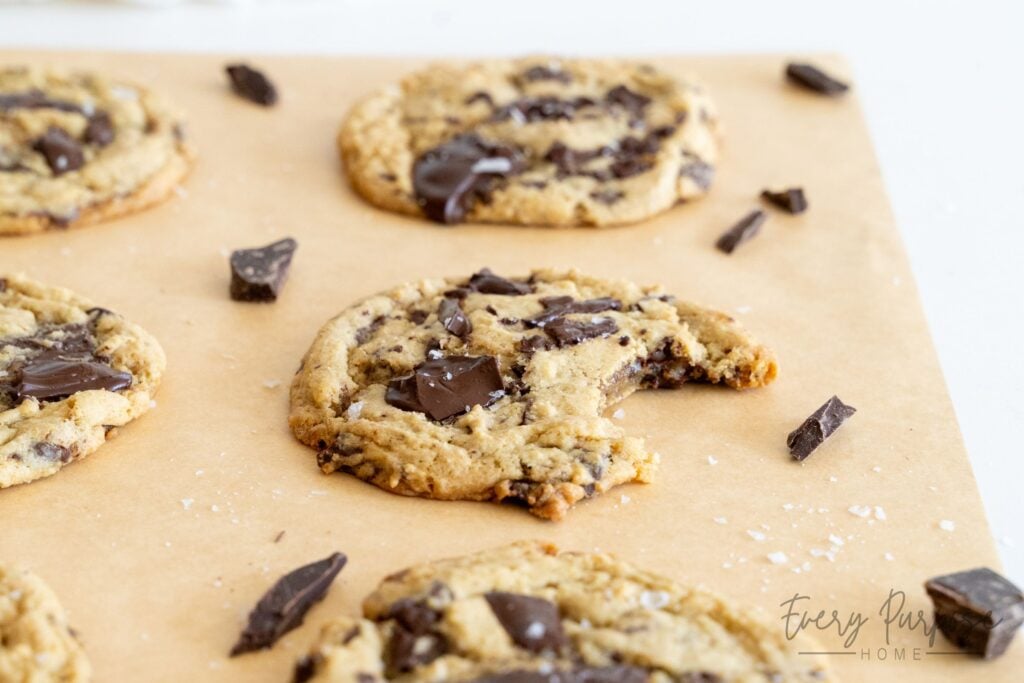
- 8 ounces chocolate baking bars, chopped into varying sized shards (or 1⅓ cup chocolate chips) (226g): For this recipe, I love using one 4 oz semi-sweet chocolate baking bar, and one 4 oz bittersweet chocolate baking bar for the perfect blend of classic sweet and deeper chocolate flavors.
- Flaky sea salt (to taste): Adding a bit of flaky sea salt immediately after baking adds the perfect salty crunch to contrast with the rich chocolate!
How to Make Brown Butter Sourdough Chocolate Chip Cookies
Step 1: Brown the Butter & Chill
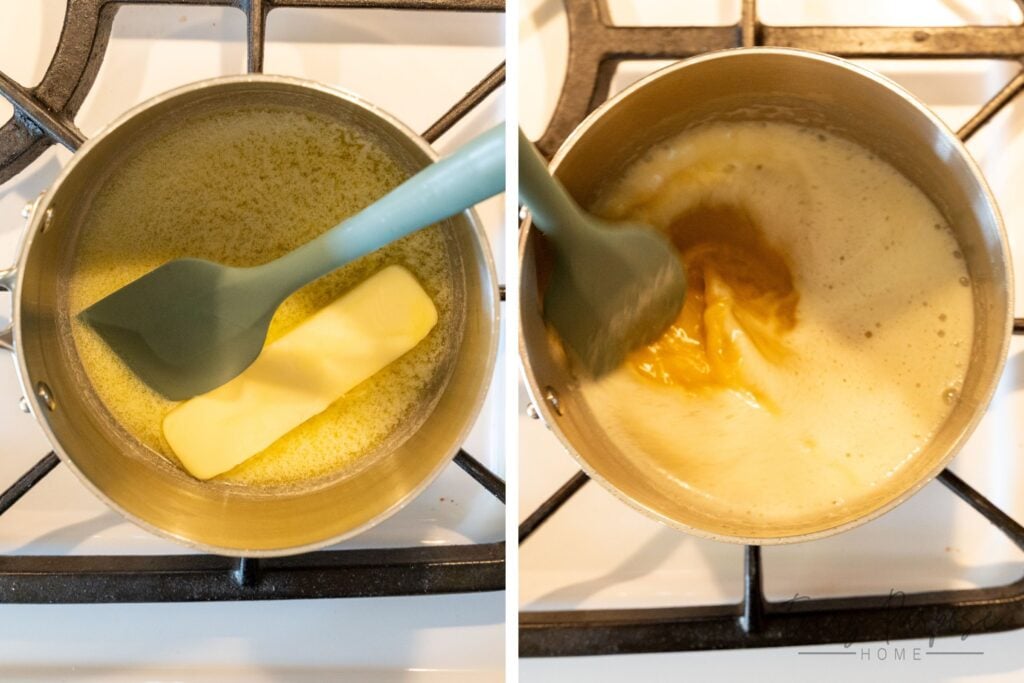
Place butter in a small saucepan over medium-low heat. Allow to simmer for about 5-7 minutes, stirring constantly. It will foam up, then the foam will dissipate and it will quickly turn golden with brown flecks, and will develop a nutty caramel aroma.
Remove the browned butter from heat, transfer to a shallow bowl, and place in the fridge until it solidifies into a “dent soft” consistency (about 1 hour in the fridge). “Dent soft” means it is opaque and solid but still pliable. When pressed with a finger, it should indent with some resistance and feel cool to the touch, not oily or greasy. This state is crucial for proper aeration during the creaming step.
Step 2: Preheat Oven & Prep
Preheat oven to 350°F (175°C). Line baking sheet with parchment paper.
Step 3: Cream the Butter & Sugars
Beat the brown sugar, granulated sugar, and chilled brown butter until the texture is creamy, uniform, and slightly aerated (about 3 minutes on medium-high speed). If you see chunks of butter, keep mixing! This works best with a stand mixer (paddle attachment) or a handheld electric mixer.

Step 4: Add the Wet Ingredients
Add the sourdough starter, egg yolks, vanilla extract, and salt. Beat until smooth and slightly frothy. Pro Tip: Scrape down the sides of the bowl to ensure the starter is fully incorporated with no streaks remaining.
Step 5: Incorporate the Dry Ingredients
Add the flour and sprinkle the baking soda evenly over the top. Turn the mixer to low speed and stir until just combined. Critical Step: Stop mixing when you still see a few tiny streaks of flour remaining. Over-mixing here develops too much gluten, making cookies tough rather than chewy.
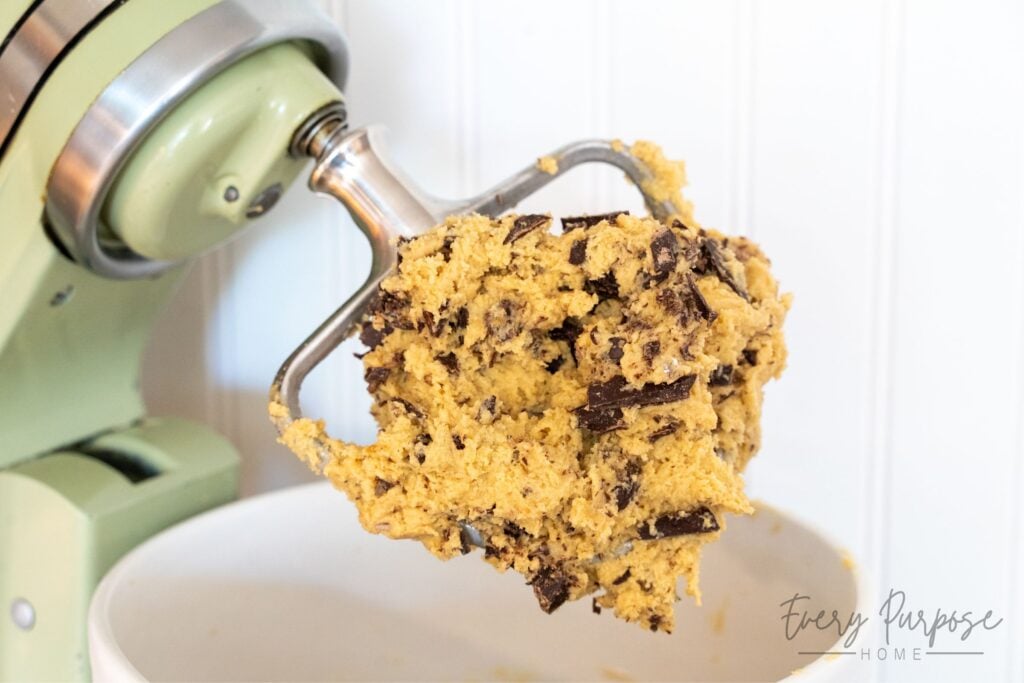
Step 6: Fold in the Chopped Chocolate
Gently fold in the chopped chocolate using a spatula or the lowest speed on your mixer for a couple of rotations. Mix only until evenly distributed to avoid overworking the dough. Pro Tip: Reserve a few of the chocolate pieces to press on top of the dough scoops before baking.
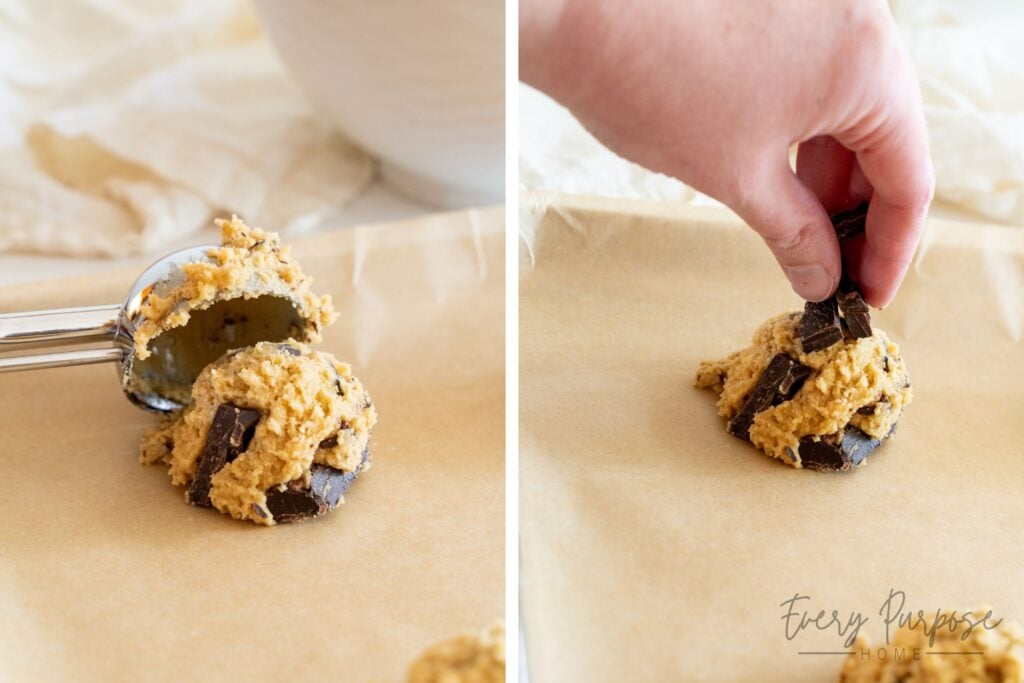
Step 7: Scoop & Top
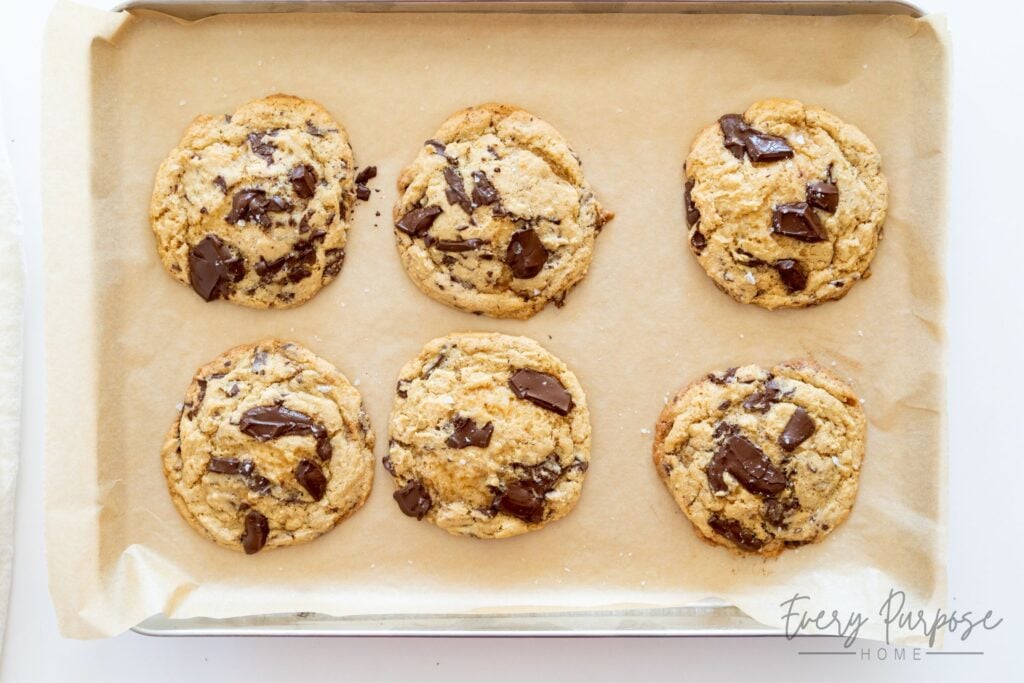
Portion the dough into large scoops using a cookie scoop or spoon (3 tbsp / 70g each). Place 6 scoops per baking sheet to allow space for spreading. Pro Tip: For a bakery-style look, press extra chocolate pieces onto the top of each dough ball before baking to give the top of the cookie pools of chocolate after baking.
Step 8: Bake
Bake for 12–15 minutes, rotating the pan halfway through. Remove when the edges are set and slightly golden but the centers still look soft. Pro Tip: Immediately tap the baking sheet against the oven rack a few times to deflate the cookies. This creates a denser, gooier texture. Bake in batches. Recipe makes about 15 cookies.

Step 9: Salt & Cool On Baking Sheet
Immediately sprinkle the top of each cookie with a bit of flaky sea salt for added crunch and depth of flavor. Allow cookies to set on the hot baking sheet for 7 minutes before transferring to a wire rack. Moving them too early may cause them to fall apart.

Storage Tips
- Store completely cooled cookies in an airtight container for up to 5 days at room temperature.
- Pro Tip: Place a slice of bread in the container to keep cookies soft. The cookies will absorb the moisture from the bread (the bread will turn hard!), preventing the cookies from drying out as the days go on.

Frequently Asked Questions
Can I skip the browning butter step?
If you’re in a time crunch, you may skip the brown butter step. You will lose out on some of the nutty and caramel flavor notes that make these cookies magical though! For a simpler option, try my classic Sourdough Chocolate Chip Cookies. Alternatively, you can prep brown butter in advance, up to 2 weeks in advance if refrigerated, or up to 3 months in the freezer.
Will these cookies taste sour?
The sourdough discard acts as a flavor enhancer, adding a subtle depth that balances the sweetness of the other ingredients. To ensure the cookies do not taste sour, use starter or discard that has been fed within the last two weeks. If you prefer a more complex, tangy profile, the long-fermentation option (1–3 days in the fridge) will allow those distinct sourdough notes to develop further!
Can I use active starter instead of discard?
Absolutely! Both active starter and sourdough discard work perfectly here. Since the baking soda handles most the leavening, the only difference will be a slightly milder flavor when using an active, recently fed starter.
Why did my cookies come out cakey instead of chewy?
Cakey cookies are usually caused by two things: either over-measuring the flour or over-mixing the dough. To ensure that signature dense, gooey texture, weigh your flour in grams and stop mixing the moment the flour streaks disappear. Over-mixing develops gluten, which creates a tough, bread-like crumb rather than a chewy cookie. For the chewiest cookies, be sure to follow the pan tapping tip immediately after baking (in the directions).

Can I freeze brown butter sourdough cookie dough?
Absolutely! For best results, follow this flash-freezing method:
- Scoop: Portion the brown butter sourdough chocolate chunk cookie dough into balls (3 tbsp / 70g each) and place them on a parchment-lined baking sheet. They can be close together, but make sure they are not touching.
- Flash Freeze: Place the sheet in the freezer for about 1 hour, or until the dough balls are firm to the touch. Pro Tip: Optionally top with a few extra chocolate pieces so that they stay visible after baking.
- Store: Transfer the frozen dough balls into a gallon freezer bag. They can be stored in the freezer for up to 3 months!
Pro Tip: Double the recipe to intentionally freeze an extra batch! This provides you with ready-to-bake brown butter sourdough chocolate chip cookies for when that sweet tooth hits.
Tips For Baking Frozen Dough:
Thaw Partially: For best results, allow frozen dough to sit at room temperature for 30–60 minutes before baking. This helps achieve a texture and baking time nearly identical to a fresh batch of dough.
Potentially Increase Bake Time: You may need to add 1–2 minutes to the baking time if the dough is still colder than fresh dough would be.
How to Make Long-Fermented Brown Butter Sourdough Chocolate Chip Cookies
To long-ferment the dough for more flavor, gut health, and nutritional benefits, follow these simple directions:
- Prepare: Follow the recipe directions to make the dough.
- Cold Ferment: Cover the bowl with plastic wrap, or transfer to an airtight container. Refrigerate for 1–3 days. Note: After the first day, longer fermentation increases the health benefits, but it also intensifies the tangy flavor.
- Bring to Room Temp: The dough temperature will significantly affect the final texture of your cookies. For the perfect chewy cookie, remove the dough from the fridge about 1 hour before scooping.
- Scoop & Bake: Once dough has come to almost room temperature, scoop (3 tbsp / 70g each) and bake as listed in the directions! Troubleshooting: If your cookies turn out more “puffy” or cake-like instead of dense and chewy, the dough was likely still too cold when it hit the oven. Cold dough doesn’t spread as easily, so ensuring a full hour at room temperature is the key to that perfect bakery-style spread.

Love this recipe? Pin it to your sourdough board and follow The Sourdough Cookie Lady on Pinterest for more!
More From The Sourdough Cookie Lady

Brown Butter Sourdough Chocolate Chip Cookie Recipe:

Brown Butter Sourdough Chocolate Chip Cookies
15
large cookies15
minutes15
minutes295
kcalDon’t let your sourdough discard go to waste! Transform it into these decadent and gooey Brown Butter Sourdough Chocolate Chip Cookies. Every bite is packed with the caramel aroma of perfectly browned butter, molten pools of chocolate, and a perfectly crunchy sea salt finish.
Keeps your screen on while viewing recipe
Recommended Equipment
- For Best AccuracyDigital Kitchen Scale
- For Easy MixingStand Mixer
- For Uniform CookiesLarge Cookie Scoop
Ingredients
½ cup salted butter (113g)
1¼ cups light brown sugar tightly packed (275g)
1 tbsp granulated sugar (13g)
½ cup sourdough starter active or discard, stirred down (150g)
2 large egg yolks (40g)
2 tsp vanilla extract (10g)
½ tsp salt (3g)
1½ cups all-purpose flour scooped directly from bag (not spooned and leveled) (235g)
1 tsp baking soda (6g)
8 oz chocolate baking bars chopped into varying sized shards (or 1⅓ cup chocolate chips) (226g)
Flaky sea salt (to taste)
Directions
- Brown Butter & Chill: Place butter in a small saucepan over medium-low heat. Allow to simmer for about 5-7 minutes, stirring constantly. It will foam up, then the foam will dissipate and it will quickly turn golden with brown flecks, and will develop a nutty caramel aroma. Remove from heat, transfer to a shallow bowl, and place in the fridge until it solidifies into a “dent soft” consistency (see notes) (about 1 hour in the fridge).
- Preheat & Prep: Preheat oven to 350°F (175°C). Line baking sheet with parchment paper.
- Cream Butter & Sugar: In a large bowl or stand mixer with paddle attachment, beat brown sugar, granulated sugar, and chilled brown butter. Beat for about 3 full minutes on medium-high speed, until pale, fluffy, and aerated.
- Add Wet: Beat in sourdough starter, egg yolks, vanilla extract, and salt until smooth and slightly frothy. Scrape the sides of the bowl to ensure everything is incorporated.
- Incorporate Dry: Add all-purpose flour and sprinkle baking soda on top. Mix on low speed just until almost no dry flour streaks remain. Do not over-mix.
- Fold in Chocolate: Gently fold in chopped chocolate until evenly distributed. Be sure to reserve a few pieces for the topping.
- Scoop & Top: Scoop the dough into large portions using a large cookie scoop (3 tbsp / 70g each). Place 6 scoops onto the prepared baking sheet, ensuring even spacing. Pro Tip: For bakery-style cookies, press a few extra chocolate pieces onto the top of each scoop before baking. Recipe makes 15 total cookies.
- Bake: Bake for 12–15 minutes, rotating the pan halfway through baking. The edges should be set and slightly golden, but centers should look soft and slightly under-baked. Cookies will firm up as they cool. Pro Tip: When you remove from the oven, tap the baking sheet against the oven rack a few times to deflate cookies. This will cause them to become denser and therefore more gooey.
- Salt & Cool: Immediately sprinkle each cookie with a bit of flaky sea salt. Allow to cool on the baking sheet for 7 minutes to finish setting up before transferring to a wire rack.
Recipe Notes
- • “Dent Soft” Butter: After browning, the butter should be chilled until it is opaque and solid but still pliable. When pressed with a finger, it should indent with some resistance and feel cool to the touch, not oily or greasy. If using unsalted butter, add an extra ¼ tsp salt to the dough.
• Chocolate Bars For this recipe, I use one semi-sweet bar and one bittersweet bar to get the perfect balance of sweet and deep chocolate.
• Measuring Flour: For best results, measure flour by weight (235g). If measuring by volume, I designed this recipe to scoop directly from the bag so that it’s slightly packed, avoiding the spoon-and-level method. The right amount of flour ensures a chewy and gooey cookie rather than one that spreads too thin.
• Sourdough Starter: Active starter or discard works. For ease, I usually use cold discard straight from the fridge.
• Long Fermentation (Optional): For enhanced flavor and gut-health benefits, cover and refrigerate dough for 1-3 days. Crucial: Allow dough to come to room temperature (about 1 hour) before baking for the best chewy texture.
• Storage: Cookies will keep at room temp in an airtight container for up to 5 days. Pro Tip: Add a slice of bread to the container to keep cookies soft for longer.
• Freezing: Freeze dough scoops in an airtight freezer bag for up to 3 months. Bake from frozen (add 2-4 mins to bake time), or for chewier cookies, thaw at room temperature for 30-60 minutes before baking.
Approximate Nutrition Facts
- Total number of serves: 15
- Calories: 295kcal
- Fat: 14g
- Saturated Fat: 9g
- Cholesterol: 45mg
- Sodium: 185mg
- Carbohydrates: 42g
- Fiber: 2g
- Sugar: 26g
- Protein: 4g
Like this recipe?
Follow @everypurposehome on Pinterest for more!
