Having a nice and organized pantry is so valuable to everyday life! Especially for those who cook from scratch, having a pantry that is highly functional is key in preventing food waste, and inspirational to try new recipes. Here, we completed a less than $100 pantry renovation that only took a few hours from start to finish! The difference it has made is invaluable. Keep reading to see how we completed this easy and budget friendly pantry renovation!
Supplies We Used
- Measuring tape: To find out how long the shelves need to be. My husband loves this measuring tape, and it’s budget-friendly too!
- A circular saw: You can use a circular saw for cutting the wood to length. If you are inexperienced with power tools like this, your local hardware store may be able to cut the wood for you.
- A handheld drill: We used a handheld drill for screwing the shelving brackets into the wall.
- A stud finder: Using a stud finder is important to make sure the brackets are screwed into the studs for maximum support.
- A sanding block: I used a sanding block for smoothing out the spackling once it dried.
- A level: We used a level for making sure that the shelves were hung straight.
- A pencil: We used pencils for marking the wall.
Materials Used
- Pine boards: These 16” unfinished pine boards are what we used for the shelves. My husband used his router tool to put a curve on the edges, but that’s completely optional. We used 2 of these boards for our project.
- 1” by 3” wood slats: These are called furring strip boards, and we used them as the shelving support brackets. We needed 5 of these boards for for our project, and my husband used the router tool to make the edges of the wood less sharp on these as well.
- Drywall spackling: This was used to patch the holes left behind from the previous shelving. I have used the Dap DryDex Spackling for years!
- Screws and anchors: For attaching the shelving brackets securely to the walls. We have been using metal screws and anchors for years. They’re extremely easy to use because the anchors don’t need a hole in the wall, and they can simply be drilled in as if they were a screw.
- Paint: I just used our touchup paint from when we painted our house. For reference, we chose Behr Ultra paint with an eggshell finish, in the color Chic Gray. We purchased it at Home Depot.
Step-By-Step Process
First, we measured the length and depth of our shelves with a measuring tape. We then purchased all of our supplies based on our measurements.
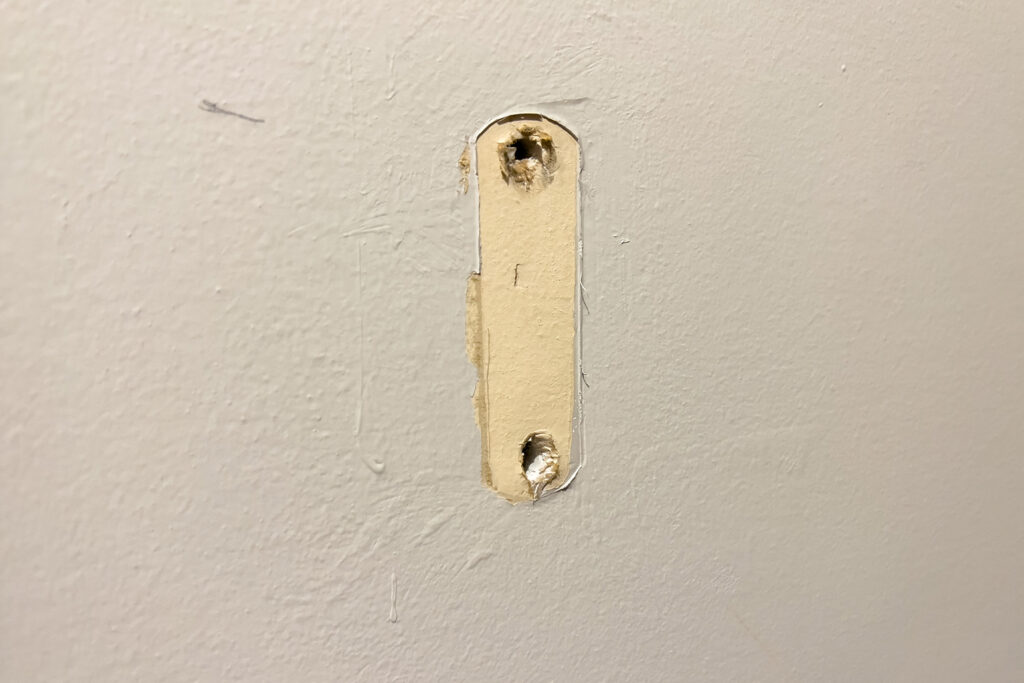
Next, we removed the existing shelving.
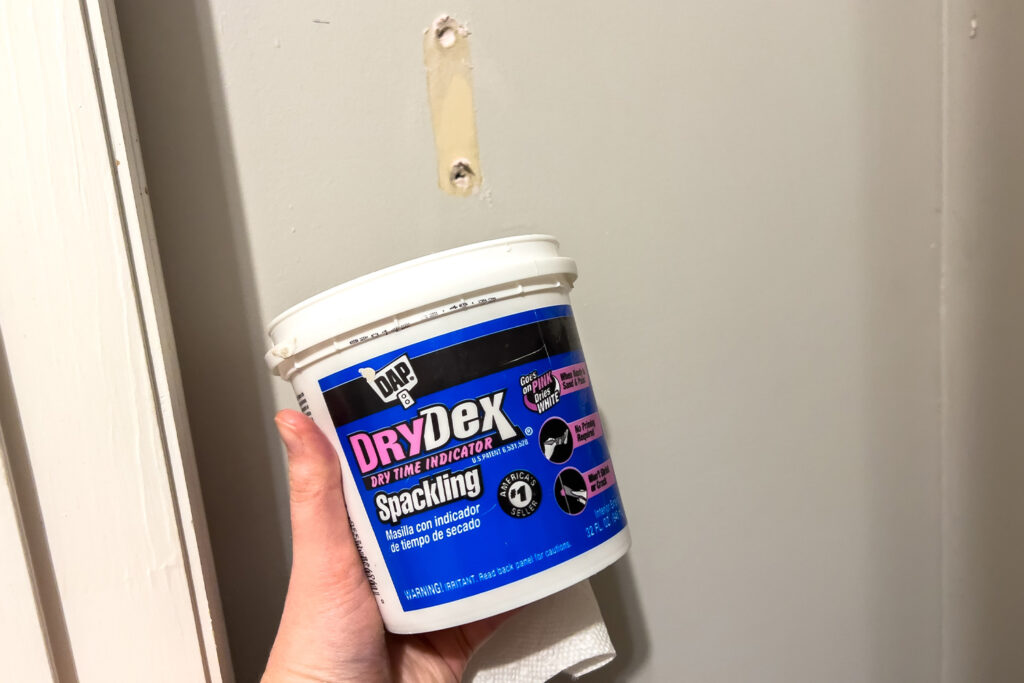
We used drywall spackling to fill the holes from the previous shelves.
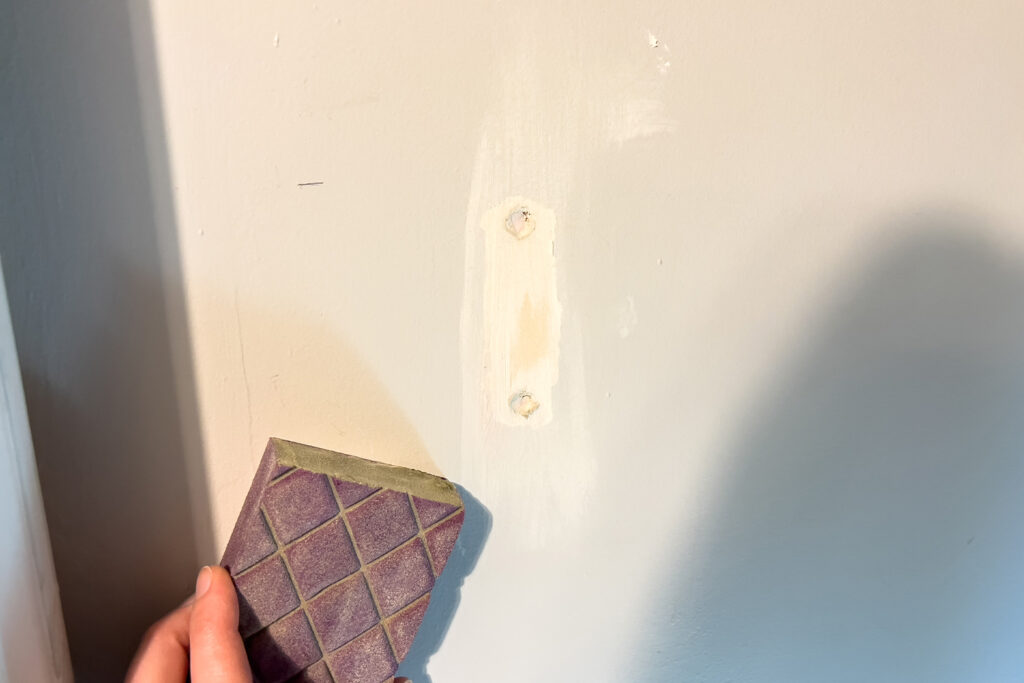
Once dry, we sanded the spackling flat, so that it wouldn’t look lumpy once it was painted.
Then, we touched up the paint so that we were starting with a clean surface.
Next, we used the stud finder to mark all of our studs, and also measure out where we wanted each shelf. We were able to go from 4 shelves to 6 just by being smart with how we spaced it out!
We used the level to draw a line where each shelf would be.
My husband then used his power tools (such as a circular saw) to cut all of the shelves and brackets to length. He also used his router tool to round the edges over. If you are inexperienced with power tools like this, your local hardware store may be able to cut the wood for you.

We used the drill to screw the anchors into the wall, and then screwed each shelving bracket into place, again making sure that it was level.
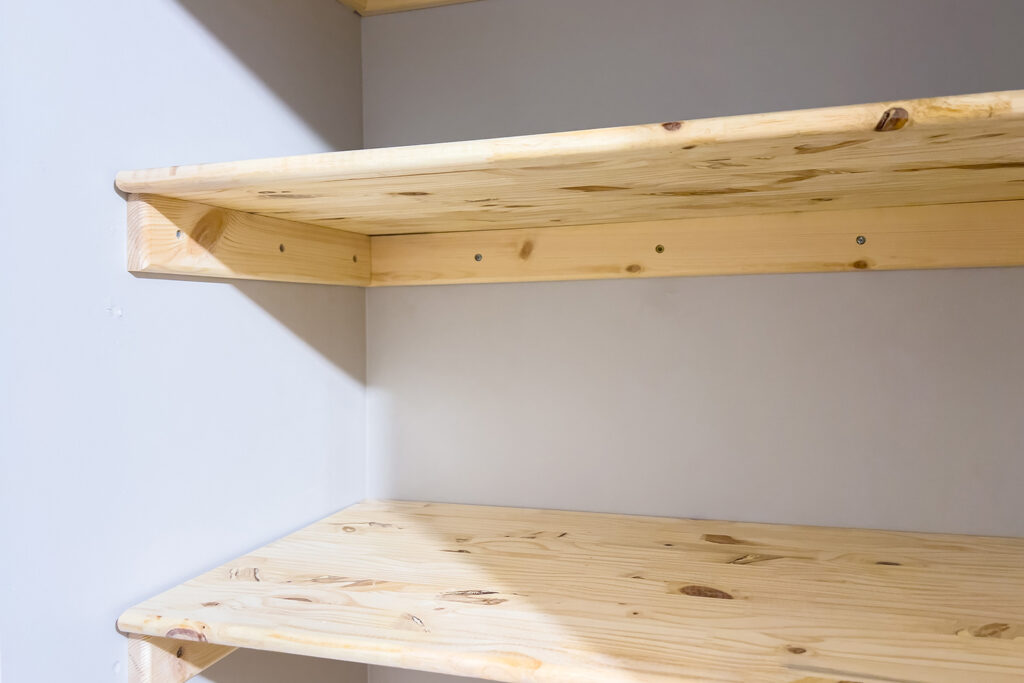
Once all of the brackets were in place, we simply slid each shelf onto its own bracket!
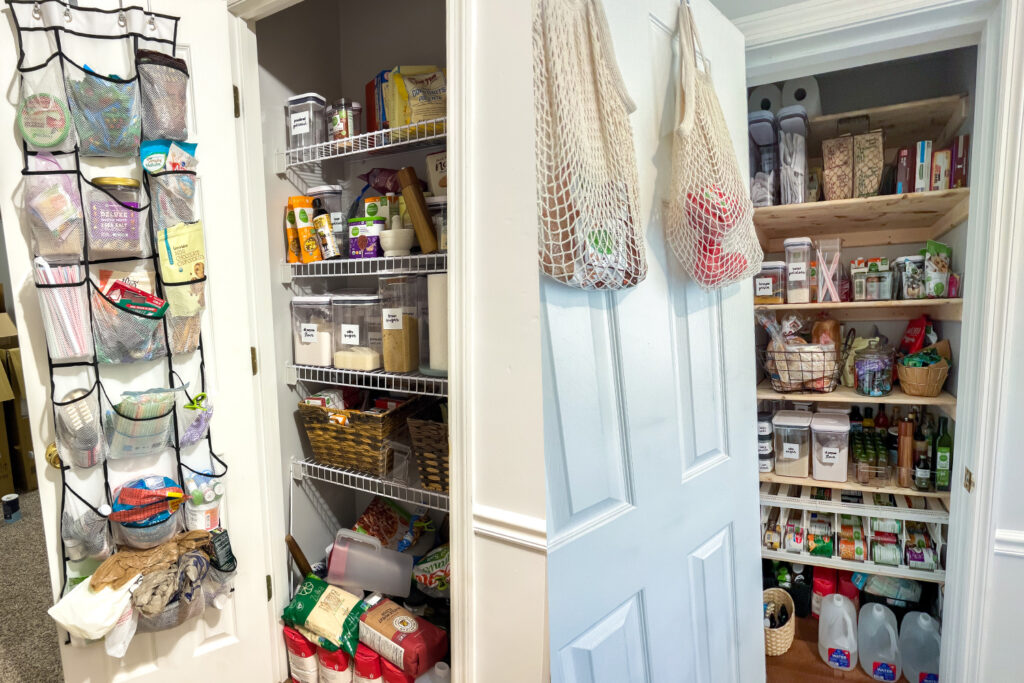
We finally placed all of our pantry staples neatly onto the new shelves. I was even able to get rid of the hanging pockets on the door because everything fit so much nicer on the extra shelves!
Before and after:
The Final Cost of this Budget Friendly Pantry Renovation
Here are the final numbers, and we came in under budget! Note that wood prices fluctuate frequently, so the prices listed below may not be the current pricing.
- $64 – Pine boards used as the wood shelves. They were about $32 each and we used two of them.
- $15 – Wood slats used as shelving brackets. They were about $3 each, and we used five of them.
- $7 – Drywall spackling used for patching holes in the wall from the previous shelves. One container of this far more than covered the entire closet of holes.
- $10 – Metal screws and anchors used for attaching the shelving brackets to the walls.
- $0 – Touchup paint that we already owned. This was our Behr paint purchased at Home Depot.
TOTAL: $96
Organizational Add-Ons
Here are some of my favorite pantry organization products! The price of these items are not included in the final cost breakdown of this budget friendly pantry renovation, because you can use what you already have instead of purchasing anything new.
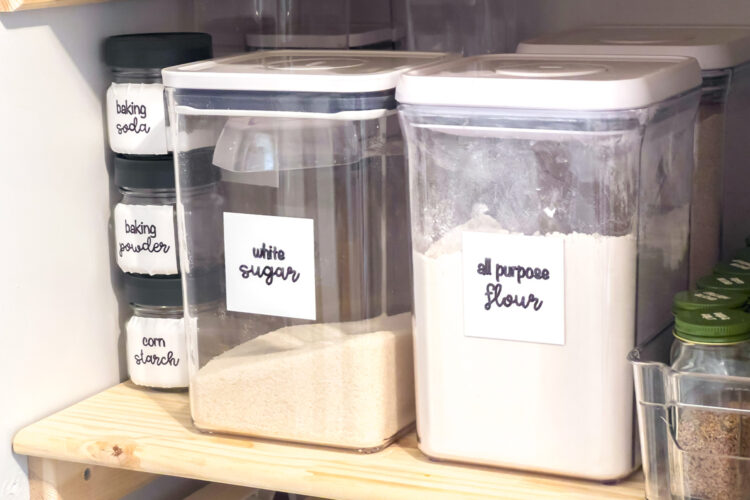
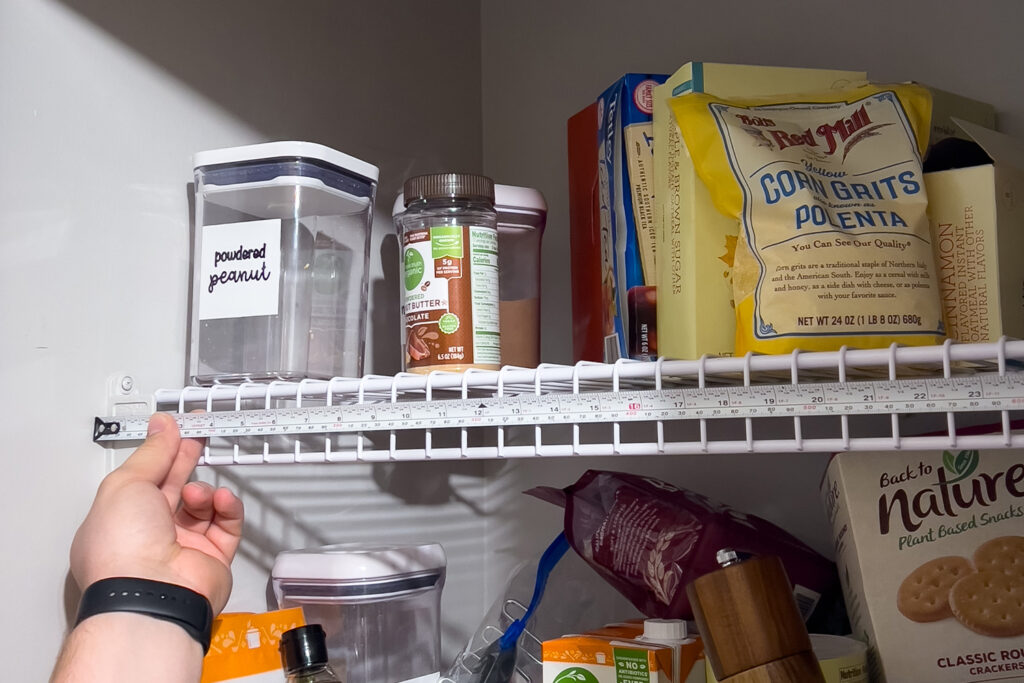
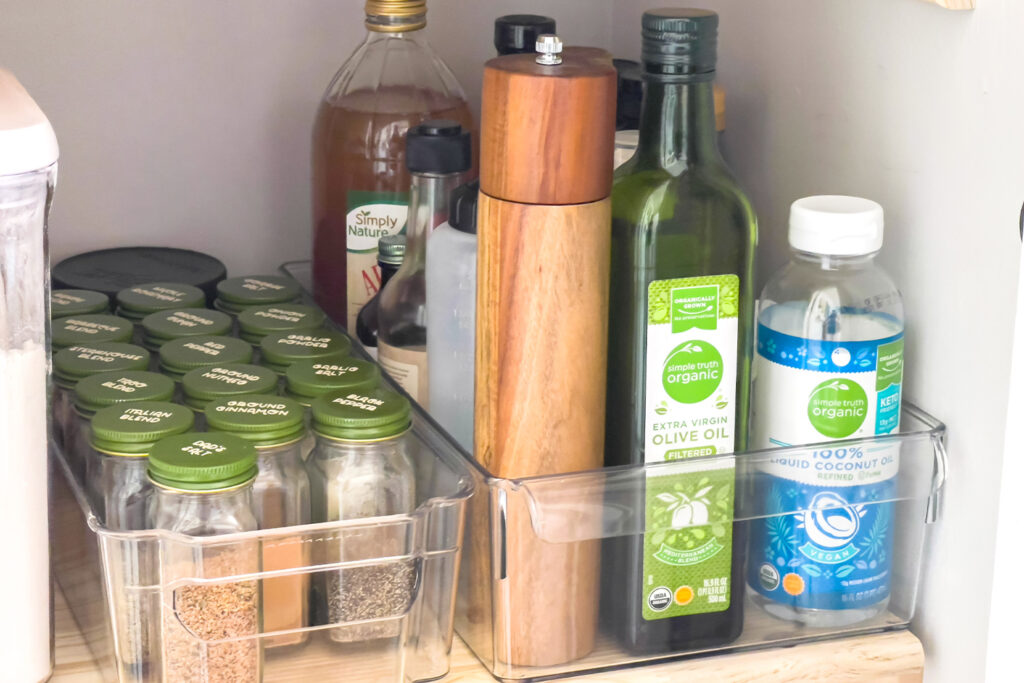
- OXO Good Grips POP containers: I use the large 4.4 qt. containers for flour and sugar, and I have the multiple container set for smaller ingredients such as chocolate chips.
- Glass storage jars: I love using the Anchor Hocking glass storage jars with lids for small items like candy.
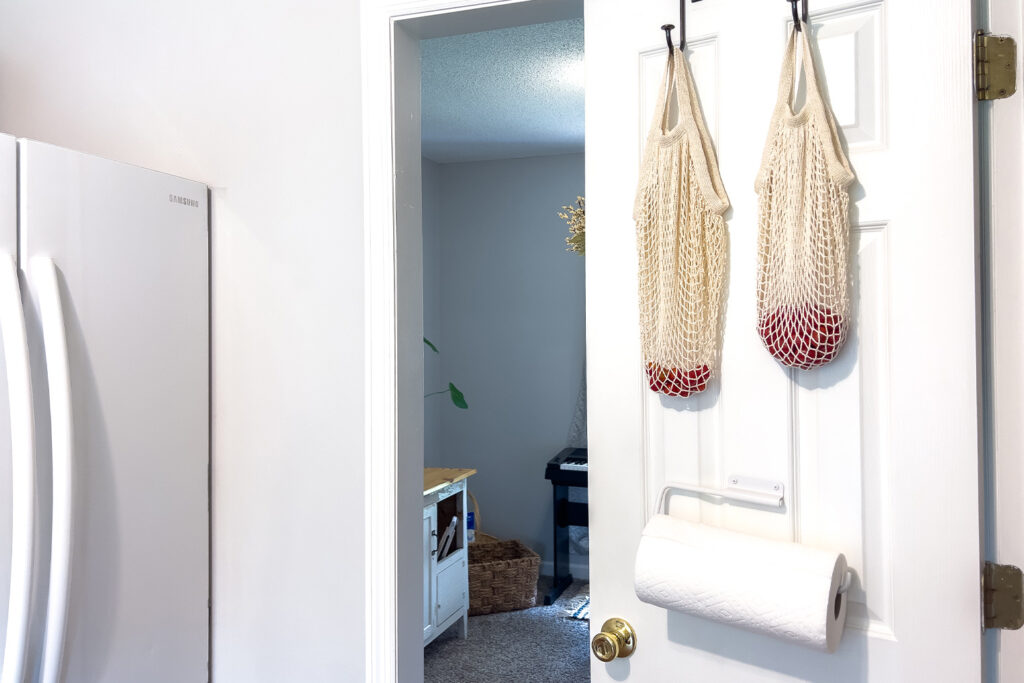
- Paper towel holder: We used this hanging paper towel holder on the pantry door, and we have loved having it there!
- Cotton mesh bags: I use these cotton mesh grocery bags on over the door hooks to hold our tomatoes, potatoes, and other produce.
- Clear bins: I like to use clear pantry bins because I like to be able to see what I have when I’m meal planning. The pantries where everything is tucked away in wicker baskets might look prettier in photos, but that’s not functional for my personality type. I prefer clear bins that are organized!
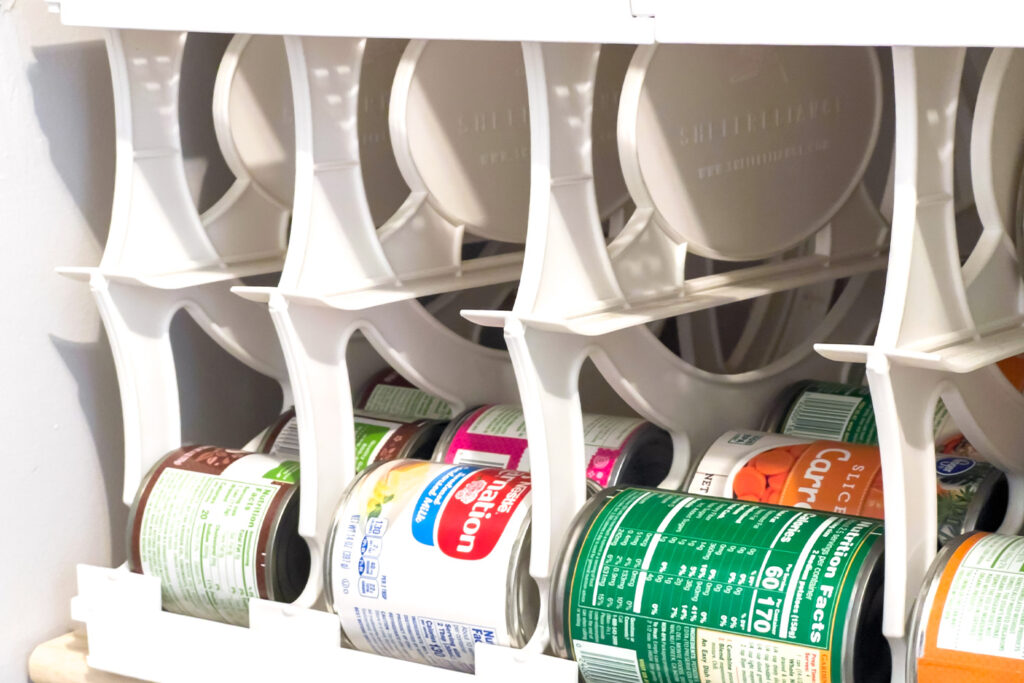
- Canned goods storage: I was also able to move my canned goods into the pantry instead of having them under my kitchen sink. This can organizer system fits perfectly into my space!
- Finally, maximize your space: In between my before and after, I only decluttered one grocery bag full of items. That’s the power of organization!