
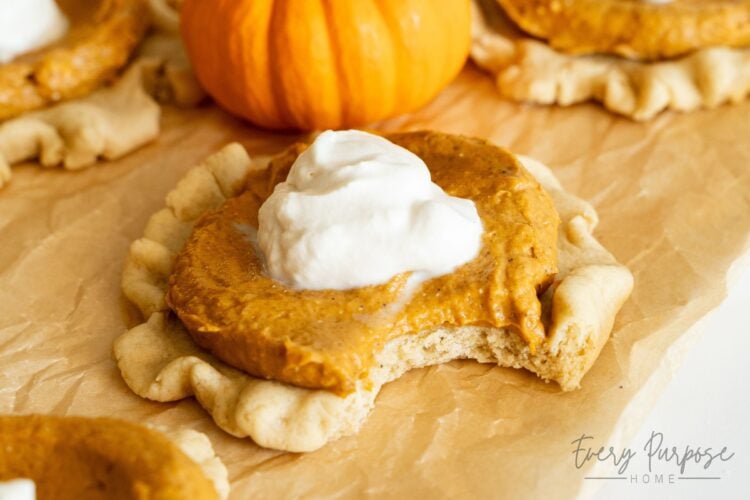
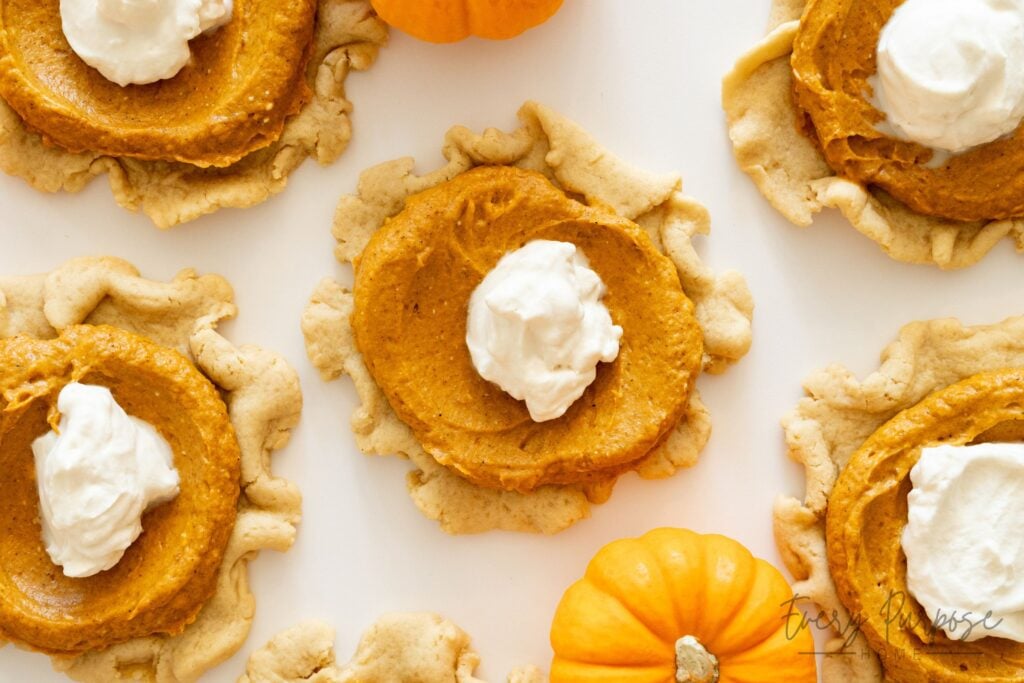
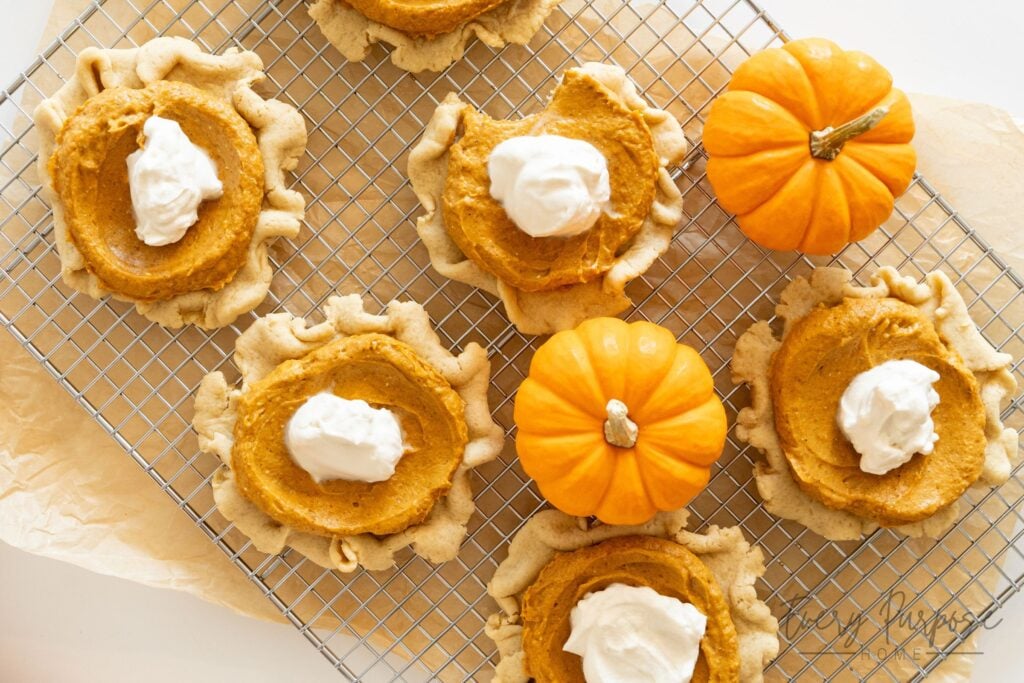
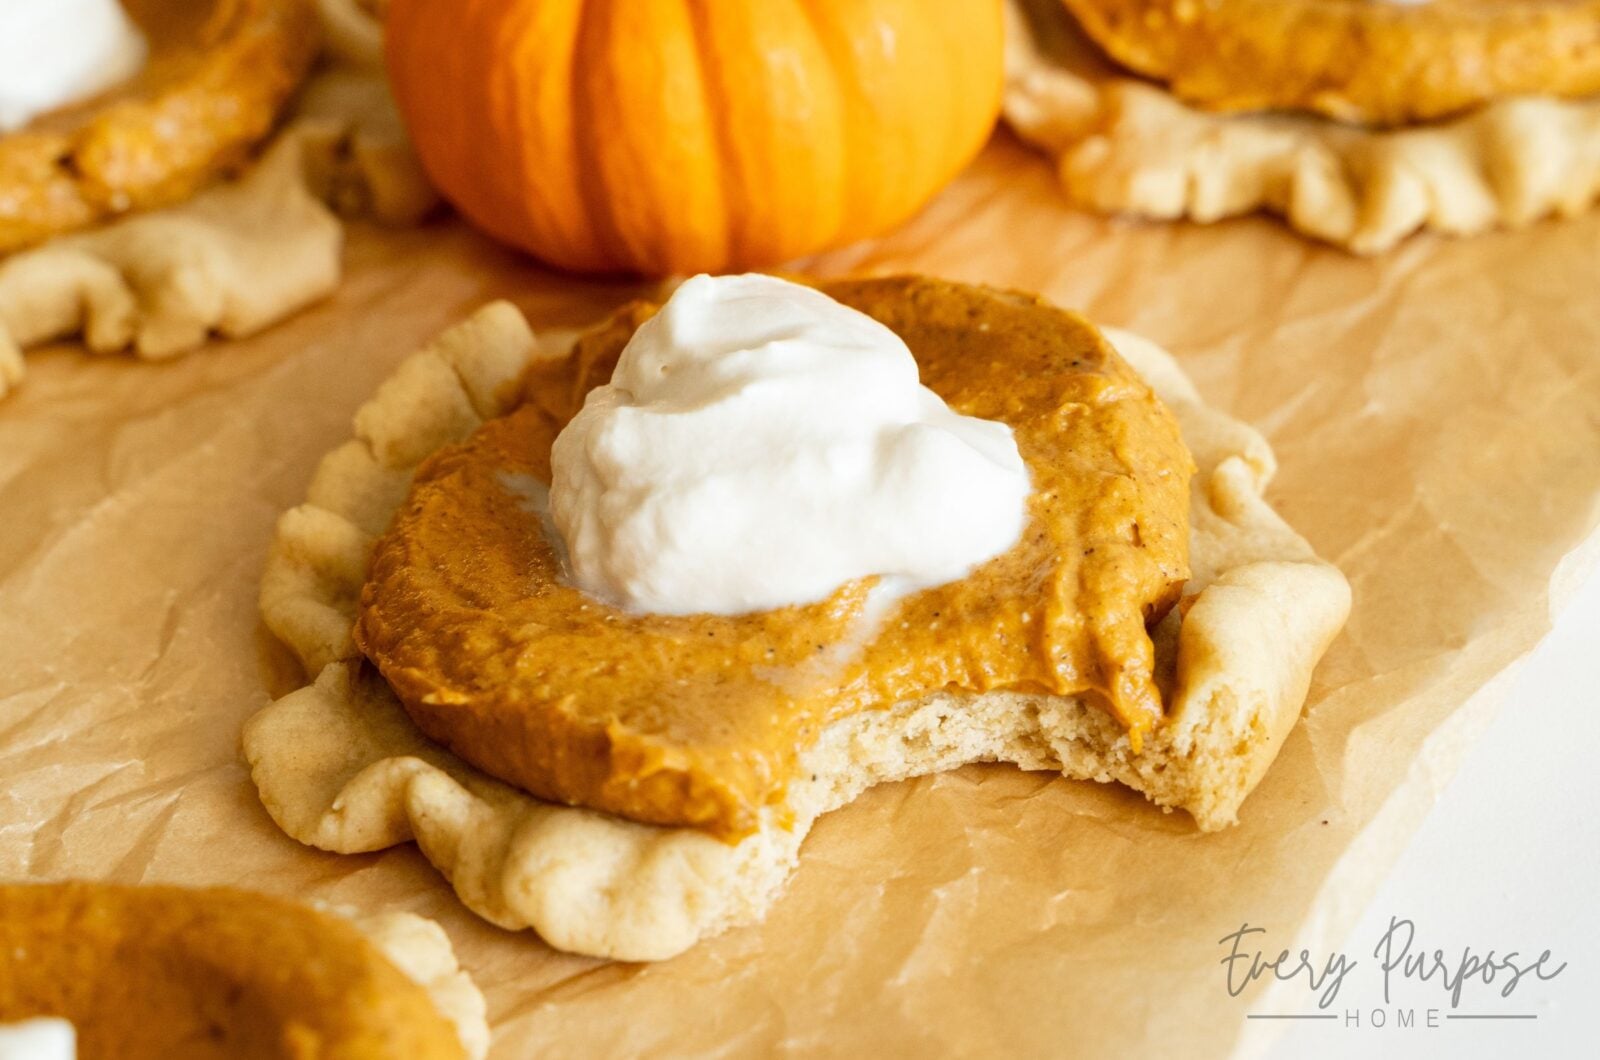
These Sourdough Pumpkin Pie Cookies turn everything you love about classic pumpkin pie into the cutest handheld fall dessert! Each one starts with a buttery sourdough “pie crust” cookie, filled generously with creamy, warmly spiced pumpkin filling and finished with a dollop of maple whipped cream. Serve them whole or cut them into tiny “pie slices” for a fun Thanksgiving dessert that tastes every bit as special as it looks!
Essentials for the Perfect Sourdough Cookie
- Digital Kitchen Scale: Thick, chewy cookies depend on the right balance of flour, starter, and moisture. A digital kitchen scale removes the guesswork so your cookies spread properly while keeping those soft, gooey centers. I have used this exact scale in my kitchen for years, and it has never failed me!
- Stand Mixer: Properly mixing the butter and sugars creates the foundation for that dense, bakery-style texture. A quality stand mixer fitted with the paddle attachment makes quick work of this thick dough, but a handheld electric mixer works too. Just be careful not to overmix once the flour is added!
- Heavy Rolling Pin: Having a heavy marble rolling pin helps to get a nice, even cookie thickness for the perfect sourdough pie crust cookie base for these pumpkin pie cookies. This helps them bake evenly and gives them a consistent appearance!
Ingredients
Pumpkin Pie Inspired Filling Ingredients
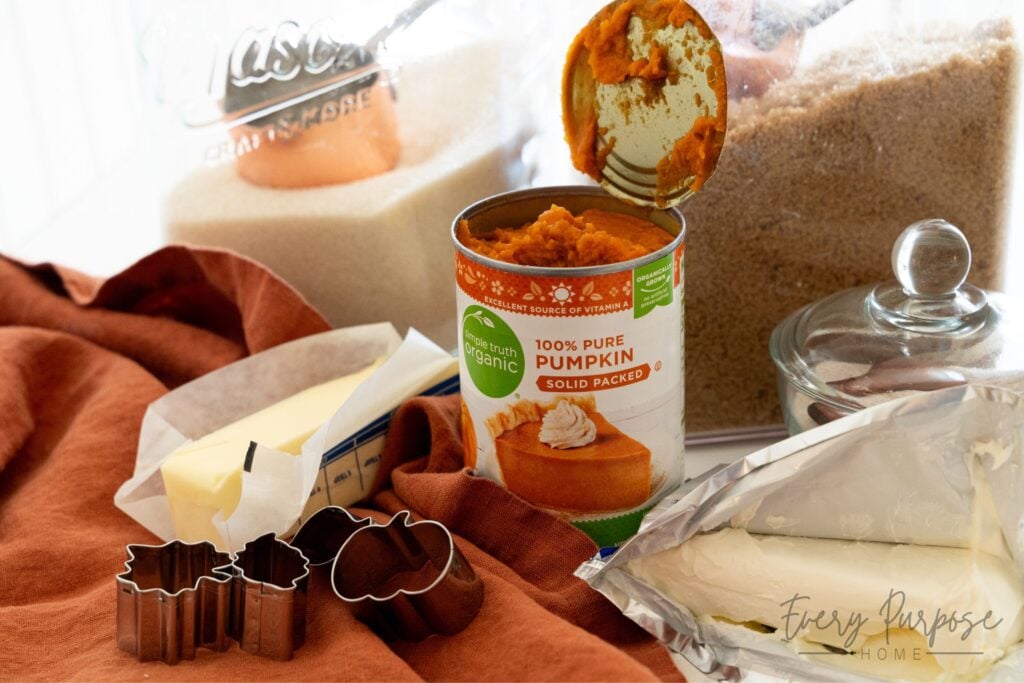
- 1 (15oz) can pumpkin (425g): Using canned pumpkin helps make this an easy recipe! Cooking the pumpkin down concentrates the flavor and helps remove moisture for the best pumpkin pie-style filling.
- ⅓ cup light brown sugar, packed (74g): Brown sugar helps to create the richest pumpkin pie filling with caramel notes.
- 2½ tsp pumpkin pie spice (5g): You can use store-bought pumpkin spice, or I prefer to make my own by stirring together 2 tsp cinnamon, ¼ tsp ground nutmeg, ¼ tsp ground ginger, and a dash of cloves.
- ½ tsp salt (3g): I prefer to use sea salt for the cleanest flavor profile.
- 6 oz cream cheese, softened (170g): Note that cream cheese should not be left out at room temperature for more than two hours. Leaving it at room temperature for about one hour to soften is fine before making the filling and putting it back in the fridge!
- 1 tsp vanilla extract (5g): Pure vanilla extract is best! Imitation vanilla often contains unnecessary additives.
- ⅓ cup powdered sugar (42g): Just a third cup of powdered sugar thickens and sweetens the filling without making it too sweet, allowing the pumpkin flavor to shine!
Sourdough “Pie Crust” Cookie Ingredients
- ¼ cup light brown sugar, packed (55g): Pack it tightly to help create that soft, tender texture!
- ½ cup granulated sugar (100g): Helps create that classic sugar cookie flavor.
- ½ cup salted butter, softened (113g): Use “dent soft” butter, meaning it should indent with resistance when pressed, remaining cool to the touch and not shiny or oily. This usually takes 30–60 minutes at room temperature. To use unsalted butter, add ¼ tsp additional salt.
- ¼ cup sourdough starter, active or discard, stirred down (75g): Active or discard starter works! Stir it down well before measuring by volume. For best accuracy, measure by weight.
- 2 large egg yolks (40g): Yolks only (skipping the egg whites) give the cookies a beautifully tender texture.
- 1 tbsp vanilla extract (15g): Pure vanilla extract is best! Imitation vanilla often contains unnecessary additives. You can sub for vanilla bean paste for an even richer vanilla flavor if desired.
- ½ tsp salt (3g): Sea salt is preferred over iodized salt for a cleaner flavor profile.
- 2 cups all-purpose flour, scooped (not spooned or sifted) (316g): I designed this volume measurement to be scooped directly out of the bag (not sifted or spooned and leveled). Pro Tip: For the best accuracy and overall cookie texture, measure flour by weight.
- ¼ tsp baking soda (1g): Ensure you are using baking soda, not baking powder. They’re not interchangeable here.
Maple Whipped Cream Ingredients
- ⅓ cup heavy cream (80g): Store-bought or raw heavy cream will work. Be careful not to overbeat it, or you’ll turn it into butter!
- 2 tbsp maple syrup (40g): Pure maple syrup is best for the perfect maple flavor that pairs beautifully with the pumpkin filling!
- ¼ tsp vanilla extract (1g): Pure vanilla extract is best! Imitation vanilla often contains unnecessary additives. You can sub for vanilla bean paste for a maple vanilla bean whipped cream if desired.
- (Optional) Dash of cream of tartar: This helps the whipped cream hold its shape.
(Optional) Decorations Ingredients
- Egg Wash: Mix 1 large egg with 1 teaspoon water to help the cinnamon sugar bind to the decorations. You will not need all of this mixture for this recipe.
- Cinnamon Sugar: Stir together 1 tsp sugar and ¼ tsp cinnamon to top the decorations.
How to Make Sourdough Pumpkin Pie Cookies
Part One: Make the Pumpkin Pie Inspired Filling
Step 1: Reduce the Pumpkin
Place the canned pumpkin in a small saucepan over medium-low heat. Cook, stirring frequently, until the excess moisture has evaporated and the pumpkin becomes a thick paste. Once reduced, the pumpkin will weigh about 305g (10¾ ounces).
Removing this excess moisture concentrates the pumpkin flavor and keeps the finished filling thick enough to sit on top of the cookies.
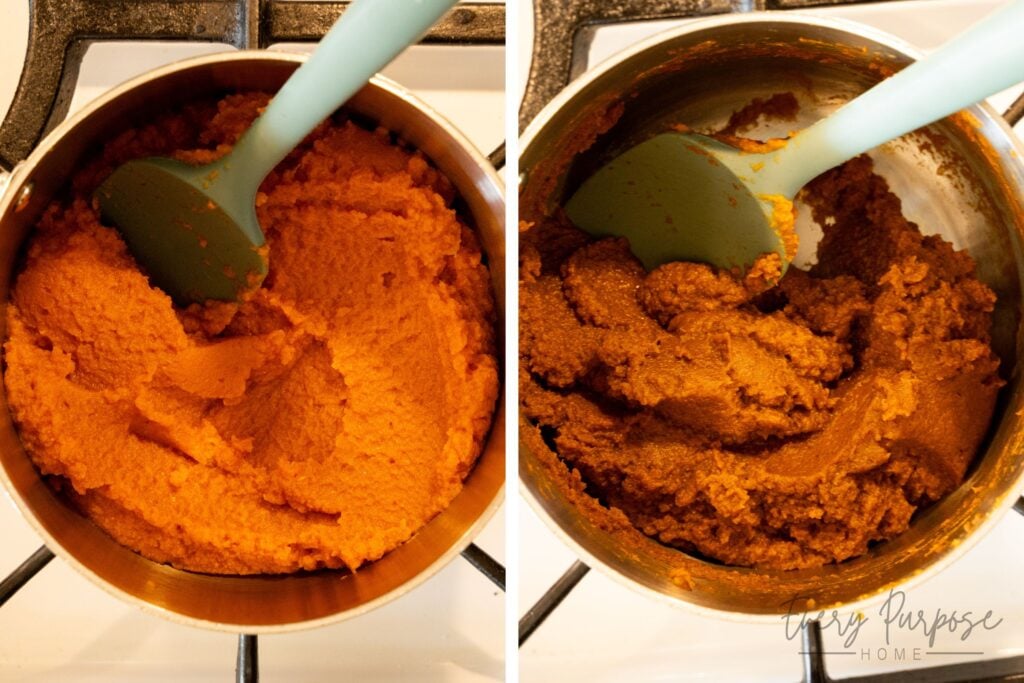
Step 2: Finish the Pumpkin Filling
Stir the brown sugar, pumpkin pie spice, and salt into the reduced pumpkin. Cook for 1 minute more, stirring constantly, then transfer the mixture to a small dish. Refrigerate until completely cool, about 1–1½ hours.
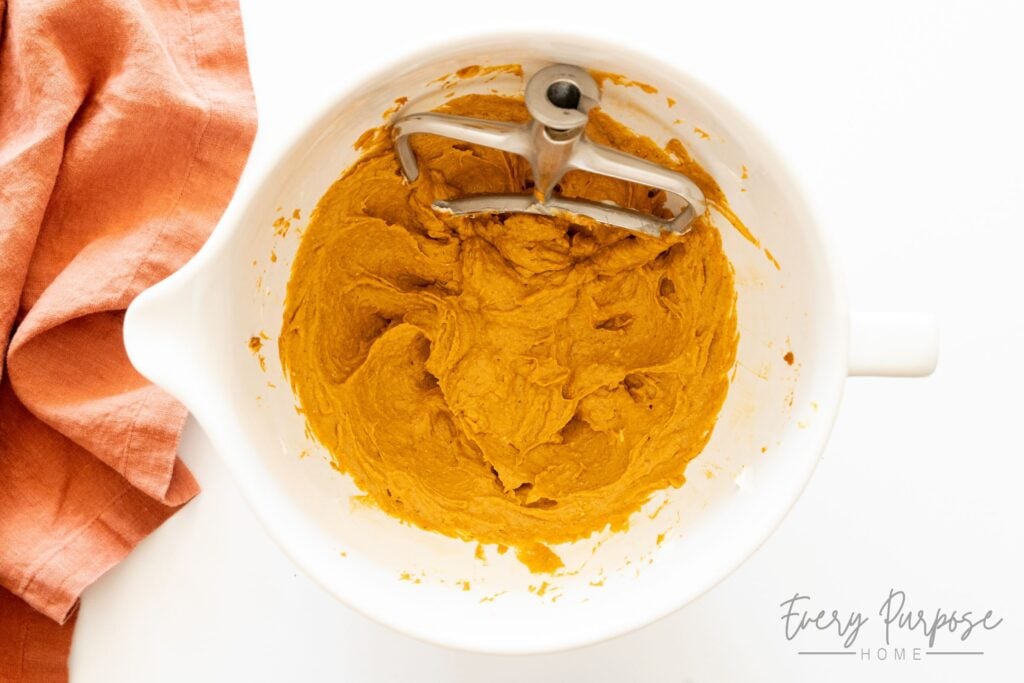
Beat the softened cream cheese until smooth. Add the powdered sugar and vanilla extract, scraping the bowl as needed. Add the chilled pumpkin mixture and beat on low just until smooth. Refrigerate the filling until you are ready to assemble the cookies.
The reduced pumpkin mixture can be prepared the day before if desired. You can also prepare the cookie shells while it cools.
Part Two: Make the Sourdough “Pie Crust” Cookies
Step 1: Preheat Oven & Prep
Preheat oven to 350°F (175°C). Line two baking sheets with parchment paper.
Step 2: Cream the Butter & Sugars
Beat the brown sugar, granulated sugar, and softened butter until completely combined and no visible butter chunks remain.
Do not beat the mixture until light and fluffy. Incorporating too much air can cause the cookies to puff and lose more of their pie-crust shape in the oven.
Step 3: Add the Wet Ingredients
Add the sourdough starter, egg yolks, vanilla extract, and salt. Beat until smooth, scraping the sides and bottom of the bowl as needed.
Either active sourdough starter or discard will work. I prefer cold discard straight from the fridge because it helps keep the dough easy to handle.
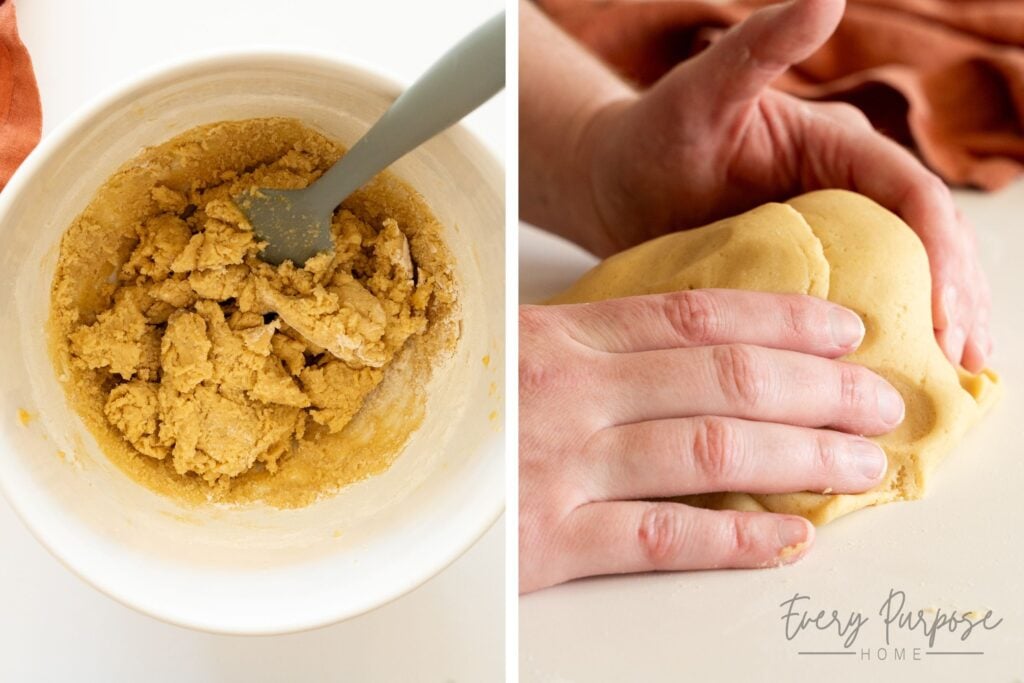
Step 4: Incorporate the Dry Ingredients
Add the all-purpose flour, then sprinkle the baking soda evenly over the top. Mix on low speed until the dough begins forming large clumps.
Turn the mixture onto a clean, flat surface and knead it briefly with your hands until it comes together. The finished dough should have a smooth, play-dough-like consistency. If it sticks to your fingers, knead in additional flour ½ tablespoon at a time.
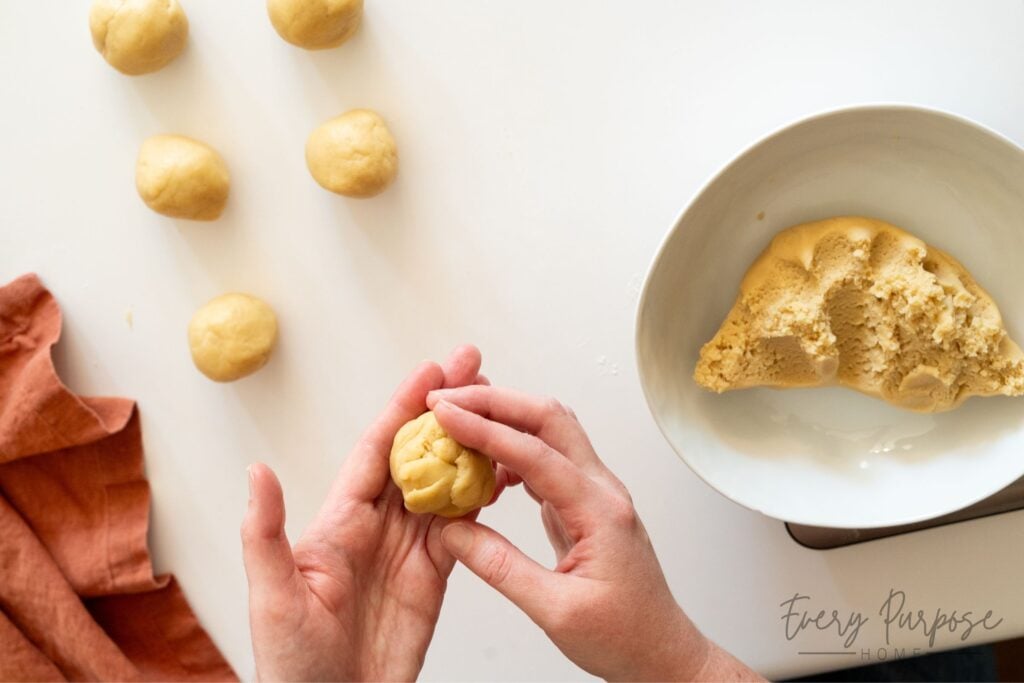
Step 5: Divide & Shape the Cookies
If you are making the optional decorations, divide the dough into 13 equal portions, about 53–54g each, and reserve one portion (wrap and place in the fridge until you’re ready to bake the decorations). If you are skipping the decorations, divide all the dough into 12 equal portions, about 58g each.
Roll the 12 cookie portions into balls. Use a rolling pin to flatten each ball into a thin circle approximately 4–4¼ inches across. Arrange 6 circles on each prepared baking sheet.
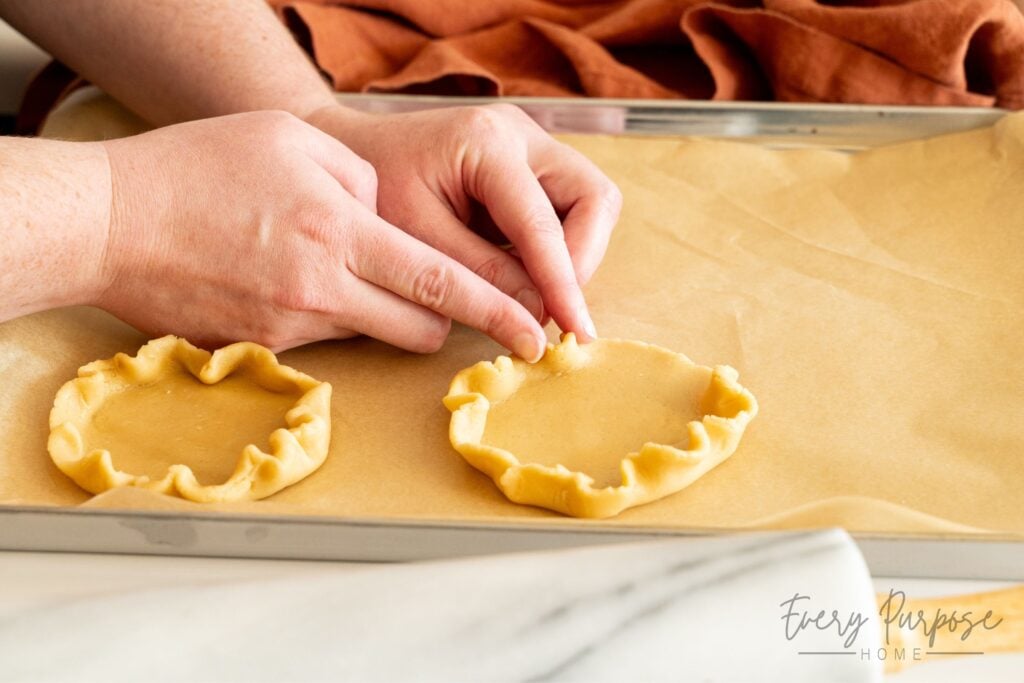
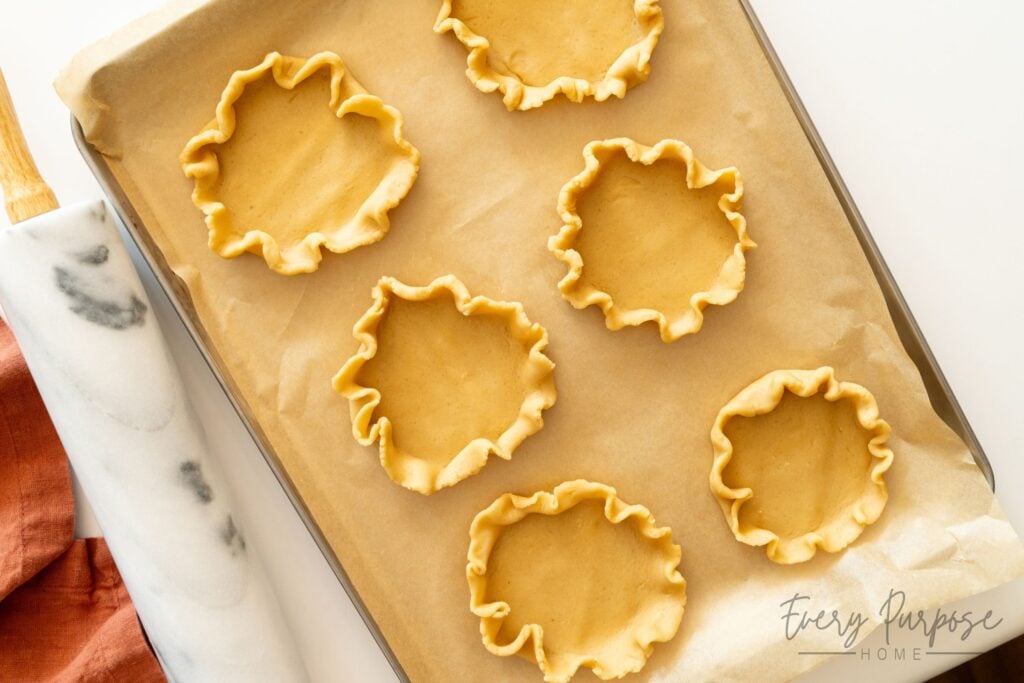
Use your fingers to lift and pinch the outside edge of each circle so it resembles a miniature pie crust. These do not need to look perfectly identical. The rippled edges will relax into a rustic pie-crust shape as the cookies bake.
Step 6: Chill the Shaped Dough
Refrigerate the prepared baking sheets for at least 30 minutes. Although the base cookie dough normally requires no chilling, this short chill firms the butter after shaping and helps the decorative edges hold as well as possible.
Step 7: Bake
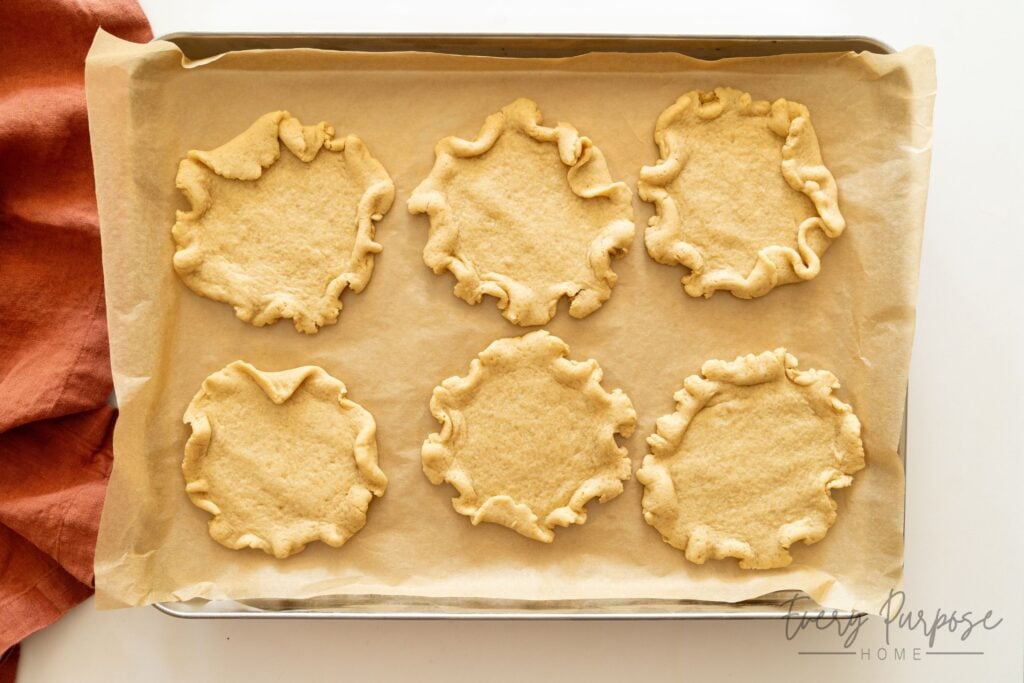
Bake one sheet at a time for 12–14 minutes, rotating the pan halfway through. The cookies are ready when the edges are barely golden and the centers look soft but no longer shiny.
Step 8: Cool on Baking Sheet
Cool on the baking sheet for 7 minutes, then carefully transfer the cookies to a wire rack. Allow them to cool completely before adding the pumpkin filling.
Step 9: Make the Optional Decorations
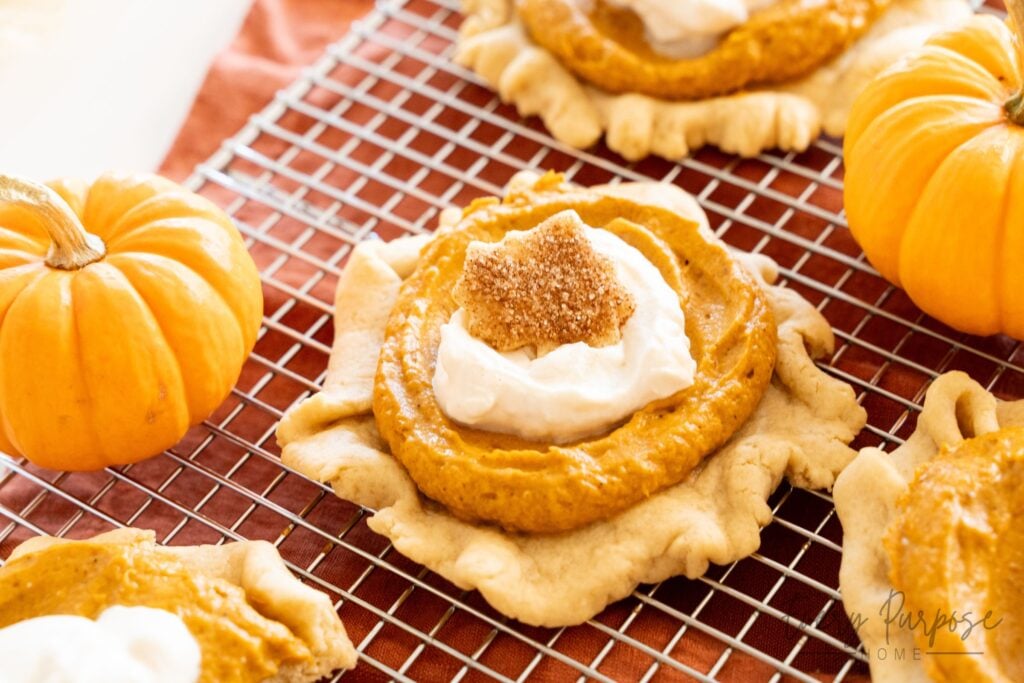
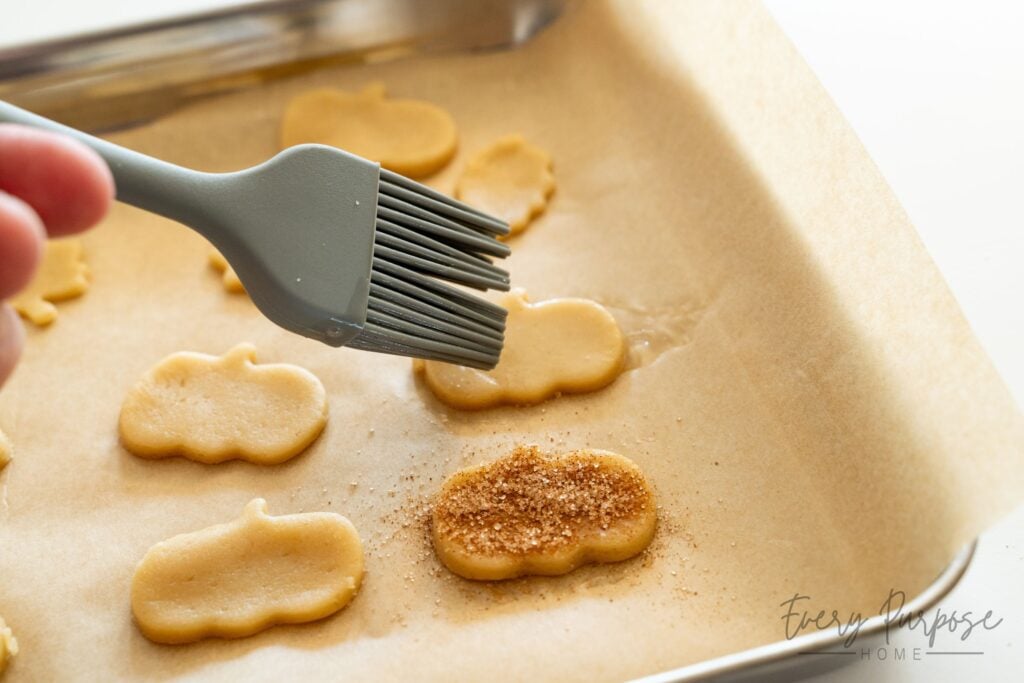
Roll the reserved dough into a thin layer and use approximately 1-inch cookie cutters to cut the desired shapes. Arrange them on a small parchment-lined baking pan.
Lightly brush the shapes with egg wash and then sprinkle with cinnamon sugar. Bake at 350°F for 7–8 minutes, then cool completely.
Part Three: Make the Maple Whipped Cream
Whip the heavy cream, maple syrup, and vanilla extract until soft peaks form. Add a dash of cream of tartar, if using, and scrape the bowl. Continue whipping until stiff peaks form, being careful not to over-whip.
The optional cream of tartar helps the maple whipped cream hold its shape.
Part Four: Assemble the Pumpkin Pie Sourdough Cookies
Step 1: Add Filling
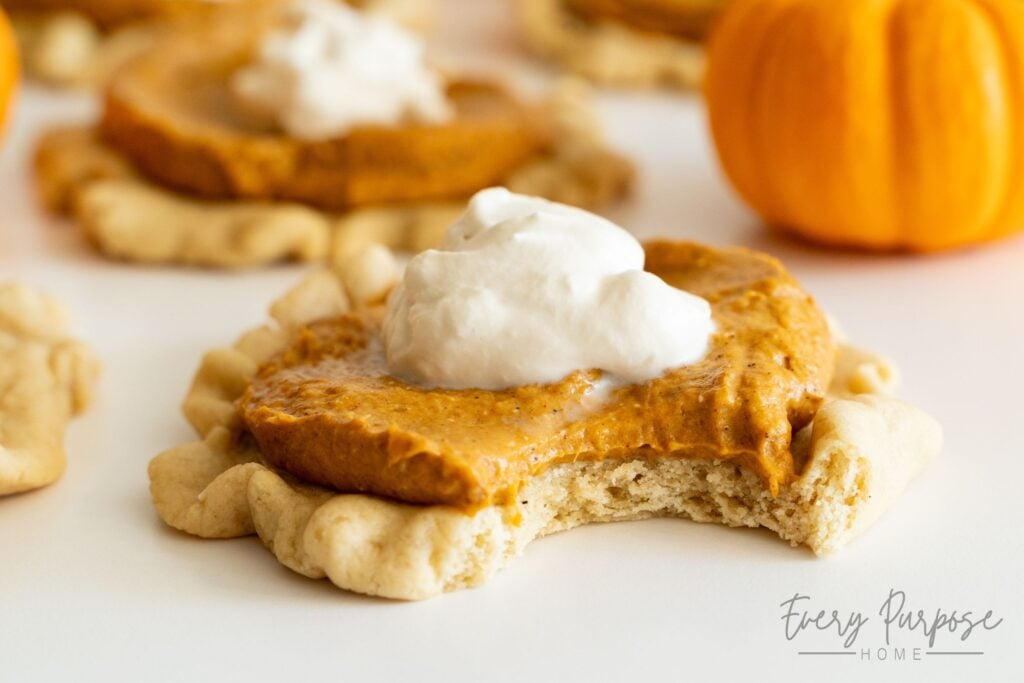
Spoon approximately 3 tablespoons (50g) of pumpkin filling onto each completely cooled cookie. Spread it toward the edges while leaving the rippled pie-crust border visible.
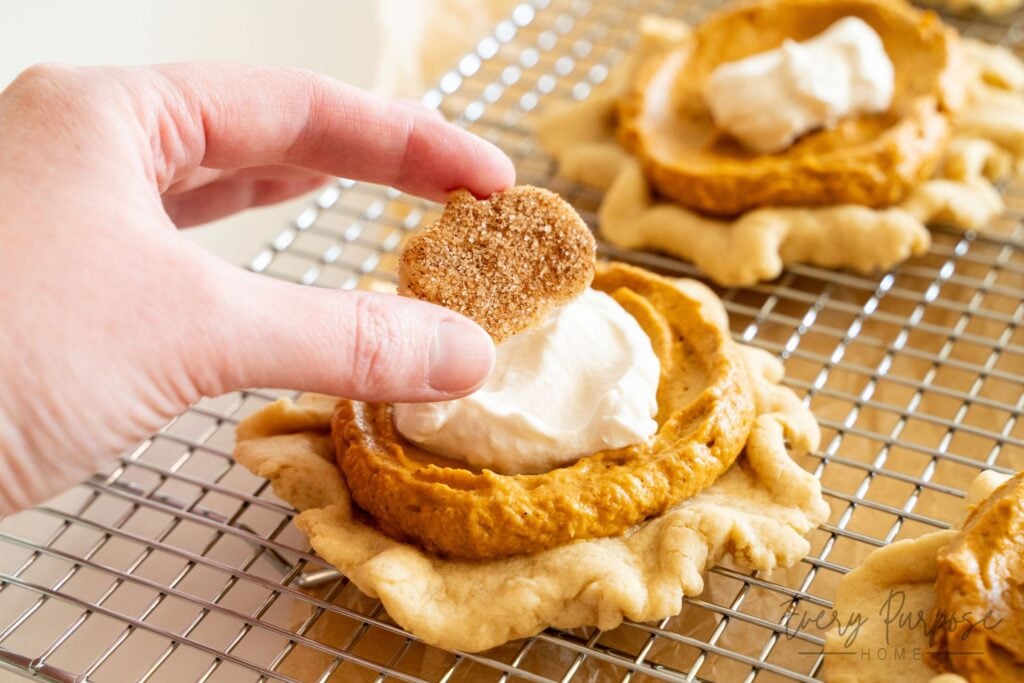
Option A: Whole Cookies
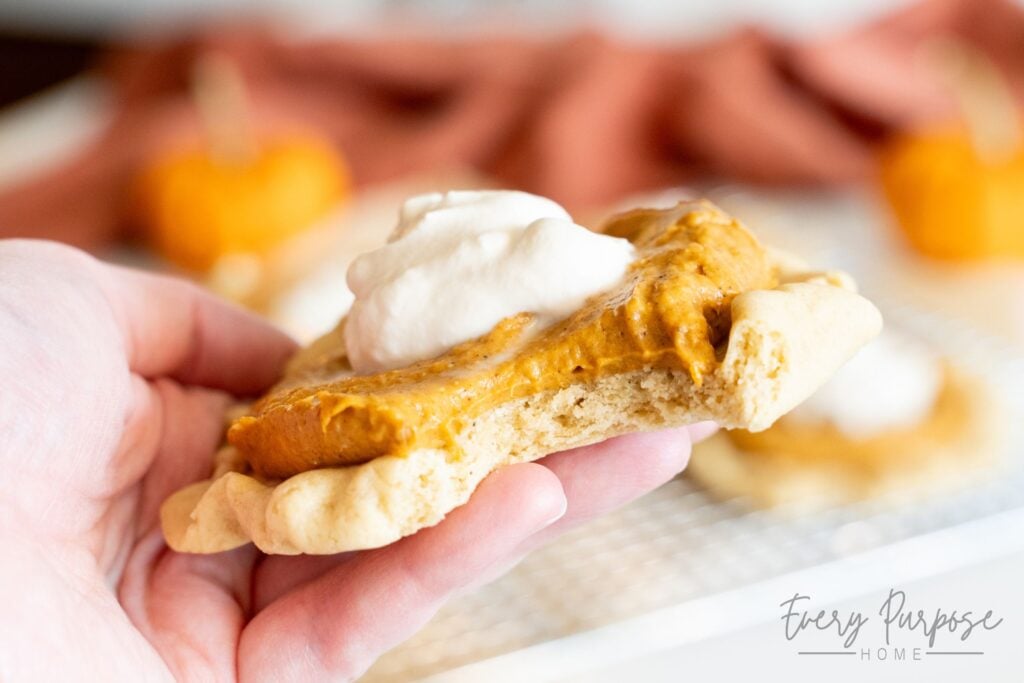
For whole pumpkin pie cookies, finish each one with a dollop of maple whipped cream and an optional cinnamon-sugar decoration.
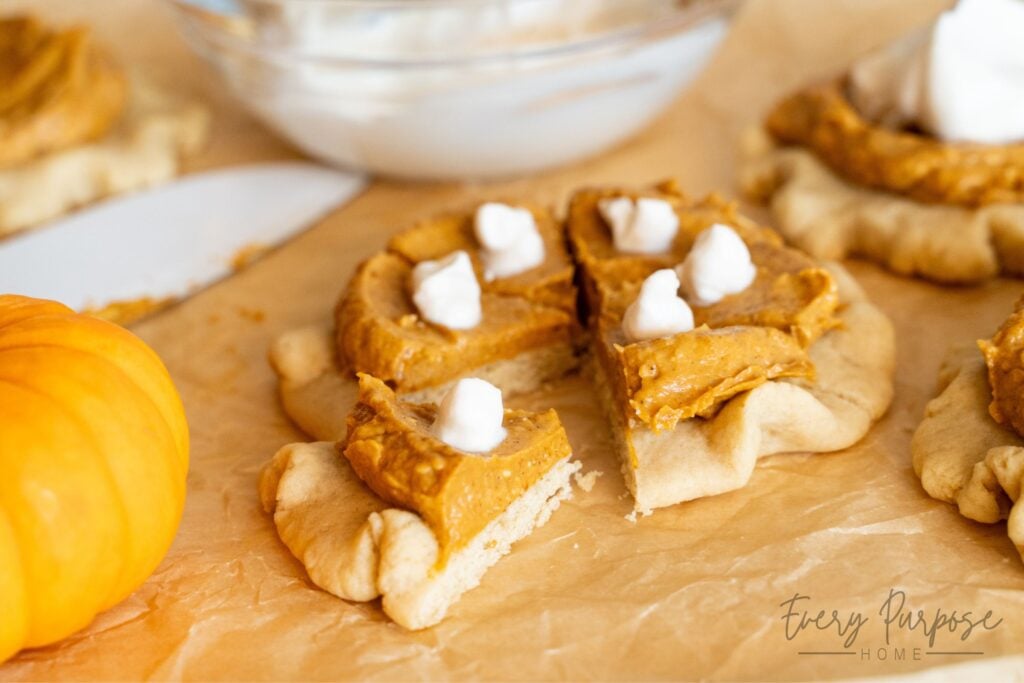
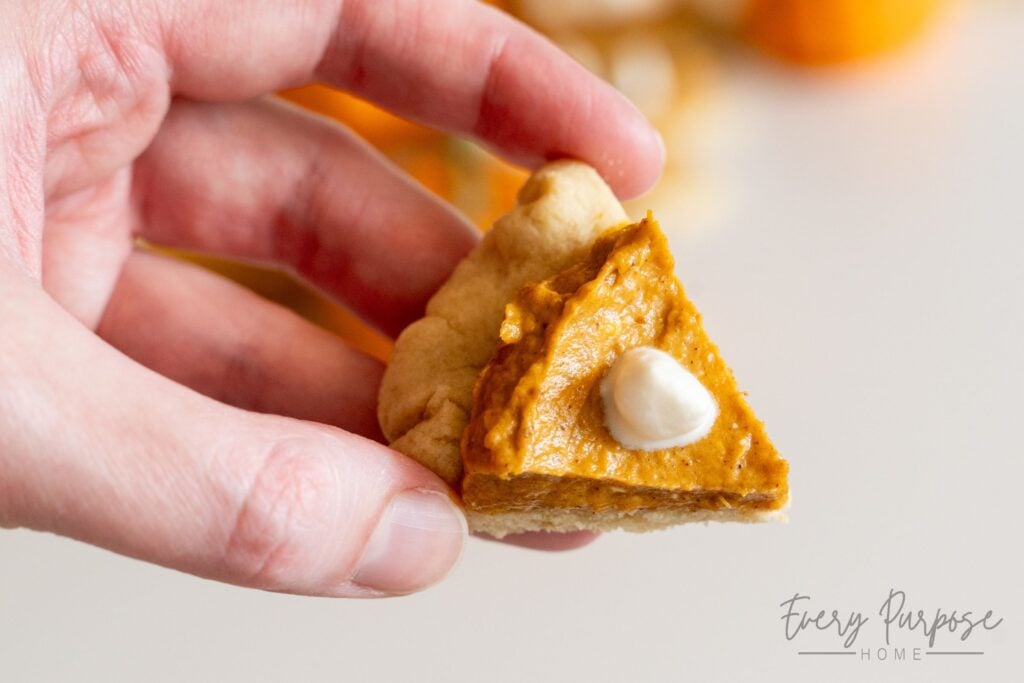
Option B: Mini “Pie Slices”
To create mini “pie slices,” cut each assembled cookie into 6 triangles, wiping the knife clean between cuts. Add a small dollop of maple whipped cream to each slice.
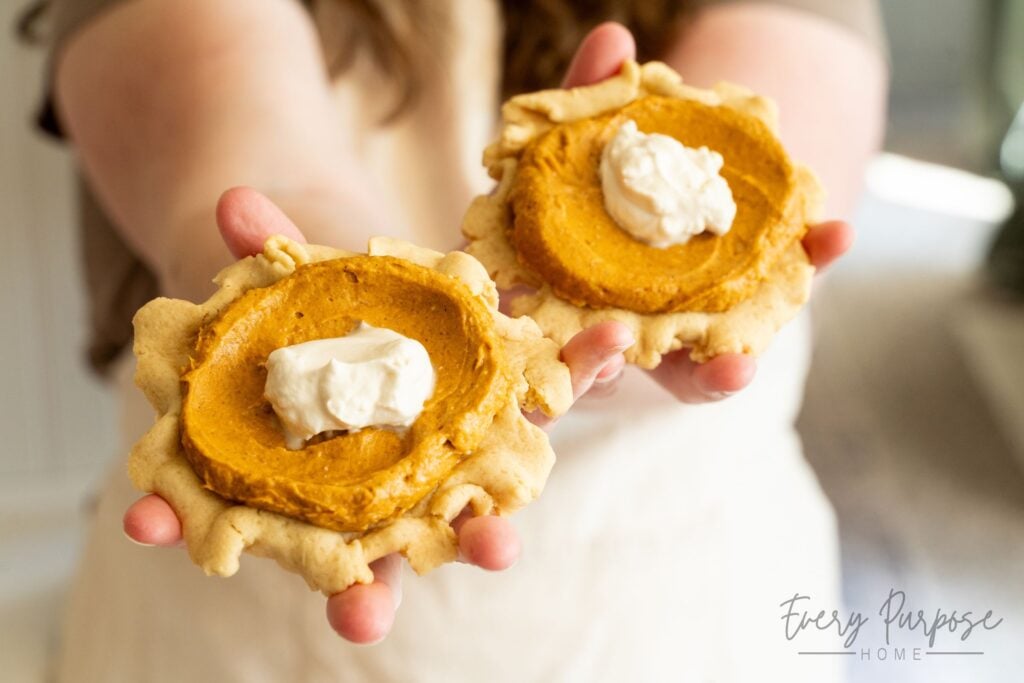
Storage Tips
- Because these pumpkin pie cookies contain cream cheese and whipped cream, they must be stored in the refrigerator. Arrange the assembled cookies in a single layer inside an airtight container and refrigerate for up to 3 days. Avoid stacking them, which can smear the filling and decorations.
- For the best appearance, store the cooled cookie shells, pumpkin filling, and maple whipped cream separately, then assemble the cookies closer to serving. Add the whipped cream and cinnamon-sugar decorations last so they remain neat and beautiful.
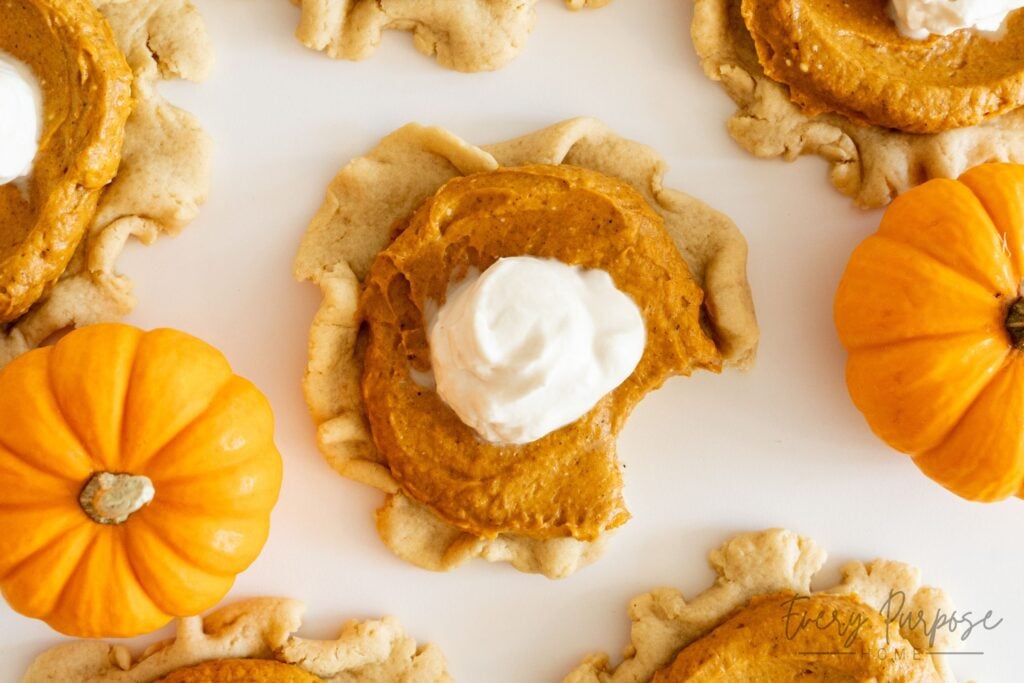
Why This Recipe Works
These sourdough pumpkin pie cookies are designed to taste like real pumpkin pie, but with a fun cookie twist! Reducing an entire can of pumpkin concentrates its flavor while removing enough moisture to create a thick, creamy filling. Just 6 ounces of cream cheese gives the filling structure without overpowering the pumpkin, brown sugar, and warm pie spices. A dollop of maple whipped cream completes that classic pumpkin-pie flavor profile and really pulls the cookies together.
The buttery sourdough cookie base is sturdy enough to hold the generous filling while staying tender and delicious. It’s like making real miniature pies, but better! This cookie dough is even more tender than pie crust. It can be made with active starter or discard, and shaping the edges gives every cookie its own rustic pie-crust look. Serve them whole, cut them into adorable miniature “pie slices”, or finish them with cinnamon-sugar cookie decorations for an extra-special fall dessert!
The Sourdough Cookie Lady’s Tips
- Do not skip reducing the pumpkin. This is the most important step for a thick, flavorful filling! Cooking the pumpkin until it forms a thick paste removes excess moisture and deepens its beautiful pumpkin flavor, just as baking a real pumpkin pie does. Leaving behind too much moisture will create a loose filling that may run over the cookies.
- Look for a play-dough-like dough. The dough should be soft and easy to shape without sticking to your fingers. If it remains sticky, knead in additional flour ½ tablespoon at a time, stopping as soon as the consistency is right.
- Embrace the rustic edges. Each cookie will look a little different, just like a homemade pie crust! The raised edges will relax in the oven, but the filling will bring the complete pumpkin-pie look together.
- Use “dent soft” butter. The butter should indent easily while remaining cool and offering resistance. Warm, greasy butter will create sticky dough and make the shaped edges relax more during baking.
- Cool before assembling. Both the cookie shells and pumpkin filling should be completely cool before assembly. Warm cookies can soften the filling and cause it to slide toward the edges.
Frequently Asked Questions
Can I use pumpkin pie filling instead of canned pumpkin?
No. Use plain canned pumpkin purée, not prepared pumpkin pie filling. Pumpkin pie filling already contains added sugar and spices, which would change the sweetness, flavor, and consistency of this recipe. Plain pumpkin also allows you to reduce the moisture and spice up the filling yourself for that perfectly balanced pumpkin-pie flavor.
Can I prepare these pumpkin pie cookies ahead of time?
Yes! The reduced pumpkin mixture can be prepared the day before and refrigerated until you are ready to finish the filling. For the best presentation, prepare the cookie shells, pumpkin filling, and maple whipped cream separately, then assemble the cookies closer to serving. Add the whipped cream and cinnamon-sugar decorations last so everything looks fresh and beautiful.
Will these cookies taste sour?
The sourdough discard acts as a flavor enhancer, adding a subtle depth that balances the sweetness of the other ingredients. To ensure the cookies do not taste sour, use starter or discard that has been fed within the last two weeks. Older discard and the long-fermented option (1–3 days in the fridge) may create a more noticeable sourdough tang!
Can I use active starter instead of discard?
Absolutely! Both active starter and sourdough discard work well here. Because the dough is mixed and baked immediately, the starter does not need to be active for leavening. Active starter will generally provide a slightly milder flavor.
Can I Freeze Sourdough Pumpkin Pie Cookie Dough?
Absolutely! For the best results, freeze the unbaked dough after shaping it into the miniature pie-crust shells. Do not add the pumpkin filling or maple whipped cream before freezing.
- Shape: Divide, roll, and shape the sourdough cookie dough as directed. Arrange the shaped shells on a parchment-lined baking sheet. They can be close together, but they should not touch.
- Flash Freeze: Freeze for approximately 1 hour, or until the shaped dough feels completely firm.
- Store: Transfer the frozen shells to a rigid airtight container, placing parchment paper between the layers to protect their delicate edges. Freeze for up to 3 months.
Pro Tip: Freezing the shells after shaping completes the most hands-on part of the recipe ahead of time. You can bake only what you need, then add the pumpkin filling and maple whipped cream once the cookies have cooled.
Tips for Baking Frozen Dough
Bake From Frozen: Arrange the frozen shells on a cool, parchment-lined baking sheet while the oven preheats. There is no need to fully thaw them before baking.
Increase the Baking Time: Bake as directed, adding a few extra minutes as needed. The cookies are ready when the edges are barely golden and the centers look soft but not shiny.
Cool Before Filling: Let the baked shells cool completely before adding the chilled pumpkin filling, maple whipped cream, and optional decorations.
How to Make Long-Fermented Sourdough Pumpkin Pie Cookies
For a convenient make-ahead option and more developed sourdough flavor, the cookie dough can be refrigerated for up to 3 days before shaping.
- Prepare the Dough: Follow the recipe directions to prepare the dough.
- Cold Ferment: Cover the bowl tightly or transfer the dough to an airtight container. Refrigerate for 1–3 days. The longer it ferments, the more noticeable the sourdough tang may become.
- Soften the Dough: Remove the dough from the refrigerator about 1 hour before shaping. Let it rest until pliable enough to roll without cracking, but not so warm that it becomes sticky or greasy.
- Divide & Shape: Divide and shape the dough according to the recipe directions, reserving a portion for the optional decorations if desired.
- Chill & Bake: Refrigerate the shaped cookie shells for approximately 30 minutes, then bake as directed. This final chill firms the butter again after the dough has been warmed and handled.
Troubleshooting: If the dough cracks while rolling, it is probably still too cold. Let it rest for a few more minutes. If it becomes sticky or greasy, refrigerate it briefly before continuing.

Love this recipe? Pin it to your sourdough board and follow The Sourdough Cookie Lady on Pinterest for more!
More From The Sourdough Cookie Lady
Sourdough Pumpkin Pie Cookie Recipe:
Sourdough Pumpkin Pie Cookies
Like mini pumpkin pies, but better! These sourdough pumpkin pie cookies are buttery sourdough “pie crust” cookies filled with creamy, warmly spiced pumpkin filling and finished with maple whipped cream. Serve them whole or as tiny “pie slices” for a fun fall dessert that tastes every bit as special as it looks!
12
large cookies45
minutes40
minutes370
kcal1
hour30
minutesKeeps your screen on while viewing recipe
Recommended Equipment
- For Best Accuracy:Digital Kitchen Scale
- For Easy Mixing:Stand Mixer
- For Uniform Cookies:Rolling Pin
Ingredients
- Pumpkin Pie-Inspired Filling
1 (15oz) can pumpkin (425g) (not pumpkin pie filling)
⅓ cup light brown sugar packed (74g)
2½ tsp pumpkin pie spice (or 2 tsp cinnamon, ¼ tsp ground nutmeg, ¼ tsp ground ginger, and a dash of cloves)
½ tsp salt (3g)
6 oz cream cheese softened (170g)
1 tsp vanilla extract (5g)
⅓ cup powdered sugar (42g)
- Sourdough “Pie Crust” Cookies
¼ cup light brown sugar packed (55g)
½ cup granulated sugar (100g)
½ cup salted butter softened, see softness notes (113g)
¼ cup sourdough starter active or discard, stirred down (75g)
2 large egg yolks (40g)
1 tbsp vanilla extract (15g)
½ tsp salt (3g)
2 cups all-purpose flour scooped directly from the bag and leveled off (not spooned and leveled) (316g)
¼ tsp baking soda (1g)
(Optional) For Decorations: Egg Wash: 1 large egg beaten with 1 teaspoon water (you will not need it all)
(Optional) For Decorations: Cinnamon Sugar: 1 tsp sugar mixed with ¼ tsp cinnamon
- Maple Whipped Cream
⅓ cup heavy cream (80g)
2 tbsp maple syrup (40g)
¼ tsp vanilla extract (1g)
(Optional) Dash of cream of tartar (helps whipped cream hold its shape)
Directions
- Make the Pumpkin Pie-Inspired Filling
- Reduce Pumpkin: Place the canned pumpkin in a small saucepan over medium-low heat, stirring frequently until excess liquid has evaporated and it has thickened into a paste and reduced to about 10¾ ounces (305g). Add the brown sugar, pumpkin pie spice, and salt, and cook for 1 more minute, stirring constantly. Transfer to a small dish and refrigerate until cool, about 1-1½ hours. This can be prepared the day before if desired.
- Finish Filling: With the paddle attachment, beat the softened cream cheese until smooth. Add the powdered sugar and vanilla, beating until combined and scraping the bowl as needed. Add the chilled pumpkin mixture and beat on low until smooth. Refrigerate until ready to assemble.
- Make the Sourdough “Pie Crust” Cookies
- Preheat & Prep: Preheat oven to 350°F (175°C). Line two baking sheets with parchment paper.
- Beat Butter & Sugars: In a large bowl or stand mixer fitted with a paddle attachment, beat brown sugar, granulated sugar, and softened butter until combined and uniform. Do not beat until light and fluffy, just until no butter chunks remain.
- Add Wet: Beat in sourdough starter, egg yolks, vanilla extract, and salt until smooth and combined, scraping the sides of the bowl as needed.
- Incorporate Dry: Add the all-purpose flour, then sprinkle the baking soda evenly over the top. Mix on low speed until large clumps form. Turn onto a clean surface and knead briefly until the dough reaches a play-dough-like consistency. If sticky, knead in additional flour ½ tablespoon at a time.
- Divide & Shape: If making the optional decorations, divide dough into 13 equal portions, about 53–54g each, and reserve one portion (wrap and place it in the fridge until ready to make the decorations). If skipping the decorations, divide dough into 12 equal portions, about 58g each. Roll the 12 cookie portions into balls, then flatten each into a thin 4–4¼-inch circle. Arrange 6 per prepared baking sheet, then lift and pinch the edges into a pie-crust shape. Refrigerate for at least 30 minutes.
- Bake: Bake one sheet at a time for 12–14 minutes, rotating halfway through. Cookies are ready when the edges are barely golden and the centers look soft but not shiny. The edges will relax into a rustic pie-crust shape as they bake.
- Cool on Baking Sheet: Cool cookies on the baking sheet for 7 minutes, then transfer to a wire rack and cool completely before filling.
- (Optional) To Create Decorations: Roll the reserved dough into a thin layer and cut with approximately 1-inch cookie cutters. Arrange on a small parchment-lined pan, lightly brush with egg wash, and sprinkle with cinnamon sugar. Bake for 7–8 minutes, then cool completely.
- Make the Maple Whipped Cream
- Whip Cream: Whip the heavy cream, maple syrup, and vanilla until soft peaks form. Add the optional cream of tartar, scrape the bowl, then whip to stiff peaks. Do not over-whip.
- Assemble the Cookies
- Fill Cookies: Add about 3 tablespoons (50g) of pumpkin filling to each cooled cookie. Spread toward the edges, leaving the rippled border visible.
- Decorate: For whole cookies, top each with maple whipped cream and an optional decoration. For mini “pie slices”, cut each cookie into 6 triangles, wiping the knife between cuts, and top each slice with a small dollop of whipped cream.
Recipe Notes
- • To Store: Cookies will keep in an airtight container in the fridge for up to 3 days. The cookies require refrigeration because they contain cream cheese filling and maple whipped cream.
• To Freeze Cookie “Pie Crusts”: Freeze the shaped “pie crust” sourdough cookies on a lined baking sheet for 1 hour. Transfer to an airtight container with parchment between layers and freeze for up to 3 months. To bake, arrange on a cool, lined sheet while the oven preheats, then bake as directed, adding a few minutes if needed.
• ”Dent Soft” Butter: Temperature is key. The butter has reached dent-soft consistency when it indents easily when pressed but is still cool and offers resistance. It should not be room temperature, oily, greasy, or shiny. Allow cold butter to sit out for 30–60 mins, or warm in the microwave at 50% power for 8-15 seconds. If using unsalted butter, add an extra ¼ tsp salt to the dough.
• Flour: For best accuracy, weigh the flour. If measuring by volume, the measurements are designed for you to scoop directly from the bag, avoiding the tedious sifting or spoon-and-level method.
• Sourdough Starter: Active or discard starter works. I use cold discard straight from the fridge because it helps keep the dough easy to handle.
• Long Fermentation: For long fermentation, cover and refrigerate the dough for 1–3 days. Before baking, allow the dough to sit at room temperature until it is soft enough to shape, about 1 hour.
Approximate Nutrition Facts
- Total number of serves: 12
- Calories: 370kcal
- Fat: 16g
- Saturated Fat: 10g
- Cholesterol: 78mg
- Sodium: 334mg
- Carbohydrates: 52g
- Fiber: 2g
- Sugar: 26g
- Protein: 5g
Like this recipe?
Follow @everypurposehome on Pinterest for more!


So cute and delicious!
These cookies are so cute and unique for Thanksgiving! Love the idea!